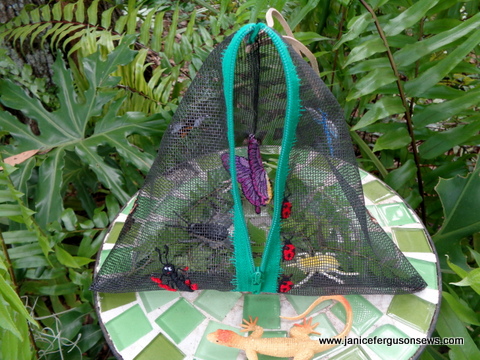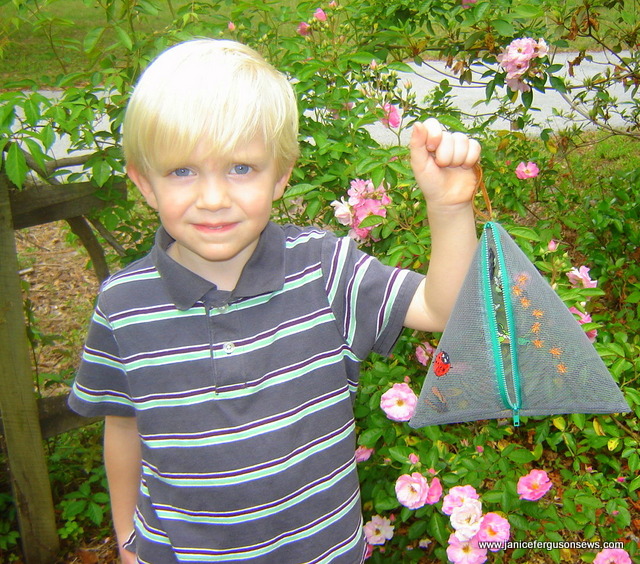
Summer is not yet over, and for some of us, it seems it never will end! As entertaining the children becomes more and more challenging, sometimes just getting them out of the house for a while is a worthy goal.
Whip up this quick and easy bug bag and they will be kept busy prowling the bushes and grass. Make it plain or make it fancy. Honestly, it takes longer to read the instructions than to make the basic bag.Whether the prey be creepy crawlies or fireflies, the adventure is a child’s version of a jungle safari. Work this into a lesson into entomology and identify some of these yard beasties and it becomes an educational adventure.
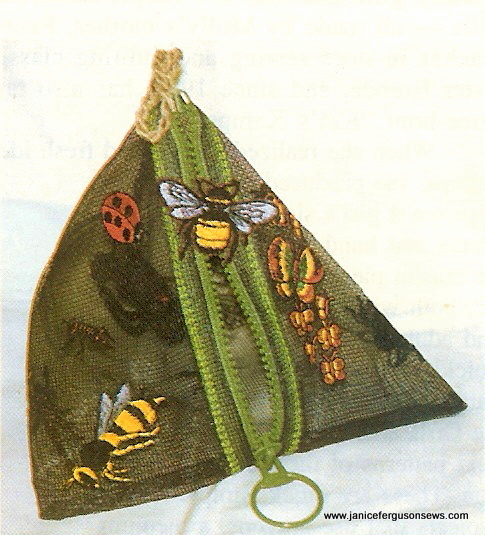
This fiberglass screen wire teepee bag (the name suggested by its shape) is a perfect accessory and holding pen. Use insect designs from design library to embellish the outside. Your Brother embroidery machine and most others will handle the screen wire effortlessly. The stand-alone butterfly swaying inside the bag will intrigue the children and send them racing out the door into nature.
Let’s make a bug bag!
Requirements:
-
- sewing/embroidery machine
- open toe foot, basic sewing foot
- 4—4 or 5—7 frame to embroider more than one design in the same frame
- Fiberglass screen wire: 18 x 26″ for bag embroidery and another large piece for stitch rehearsal of each potential design.
- Utility scissors for cutting screen wire and zipper
- Notions: zipper at least 18″ or with plastic teeth. Longer is fine. It will be cut to size during construction; 8-10″ cord or ribbon; monofilament, sewing and embroidery thread, seam sealant
- Extra heavy water-soluble stabilizer (wss)
- Download both left and right files below and piece together.
layout template left and layout template right (request below in comments and they will be emailed to you) Preparation
1. Print pattern/design templates. It is broken into two parts because my scanner bed is too small for the entire template. Print both the left and right templates and tape them together.
2. Print template of each design you plan to use. If deemed appropriate, resize to be proportional to the bag.
3. Cut 18 x 26″ screen wire. This large size makes hooping easier.
4. Tape completed template to white surface or pin to padded surface.
5. Center screen wire over template and tape or pin corners to hold in place.
6. Trace section placement lines onto screen wire with child’s school chalk. These lines show each section of the finished bag for suitable embroidery placement.
7. Place templates of selected embroidery designs in chosen location within the section.

8. Wind bobbin in each thread color used in the designs.
Embroidery
9. Select one or two designs to embroider on one large side and load into machine.
10. Hoop screen wire and heavy-duty water-soluble stabilizer (wss). Puckering occurred when the screen wire was simply basted to the wss.
NOTE: If you are blessed with a Brother embroidery machine with a camera capability, detailed instructions are posted at Brother’s blog, Stitching Sewcial here. Otherwise, proceed as you will.
13. After embroidery, do not remove wss.14. Continue hooping and embroidering each section. The wss is still in place on the back. Do NOT embroider the ladybugs now.
Construction
Insert the zipper in this unorthodox manner, stitched flat on the top side of the screen wire. This is done so the ladybugs could be embroidered along the zipper edge.
15. Attach open toe foot. The zipper is placed on top of the screen wire.
16. Open the zipper, place the top of the tape at the top of the bag’s marked cutting, right side up with the teeth at the edge of the left marked bag side.
 17. Straight stitch 1/8-1/4″ from zipper teeth, with open toe foot positioned along the edge of the teeth. Needle position is in far right.
18. Open the zipper as far as possible. Repeat on the opposite side. WSS is still in place.
19. Stitch “grass” for ladybug’s home. On my Dream Machine that was stitch #7-12, width 6.5, length 4.0. Or select a similar stitch.
-


-
Return to Embroidery
20. Open ladybugs design. Hoop with zipper near center of frame. Position design. Embroider.

21. Hoop 2 layers of wss in 4X4 frame. Embroider butterfly. This one was resized up to 2.56 x 2.55″. Be sure to use matching thread in the bobbin.

22. Remove as much wss as possible then soak in tepid water until the edges are clean. What remains between the layers will give the free flying butterfly stability. Pat with paper towels to help it dry.
When almost dry, shape it with wings spread as if to fly. The antennae are just loose threads. Applying a bit of seam sealant gives them some body.
Return to Construction
23. Cut screen wire to 8″-16″, along marked chalk lines but do not cut zipper. Best to remeasure for exact sizing. Leave zipper open to its greatest length.
24. Remove as much wss as possible. Trim screen wire and wss from teeth edges to first line of stitching.

25. Immerse bag in tepid water to dissolve wss.
26. Lie flat on a towel and roll the towel around it, like a burrito. Squeeze out excess moisture and hang to dry. If you are in a rush, a blow dryer speeds up the process of drying the zipper tape.

27. Stitch a folded 8-10″ cord or grosgrain ribbon to the top edge within the ¼” seam allowance. The loop should hang down with raw edges extended a little beyond the seam allowance. This creates a loop handle.

28. Close zipper a few inches above the bottom raw edge. Fold the bag inside out with the closed zipper in the center of the seam line. Stitch with ¼” seam allowance right over zipper.

29. Cut excess zipper-finally! Use utility scissors.

30. Fold top in half with zipper at one side. Begin stitching at zipper just above the first tooth. Back stitch for reinforcement. Angle up to ¼” seam line. The open toe foot gives best visibility for those first stitches.

31. Fold top in half with zipper at one side. Begin stitching at zipper just above the first tooth. Back stitch for reinforcement. Angle up to ¼” seam line. The open toe foot gives best visibility for those first stitches.

Does this make you want to hunt bugs or to sew a bug bag?


