God Bless America

pillow made from hemstitched guest towel

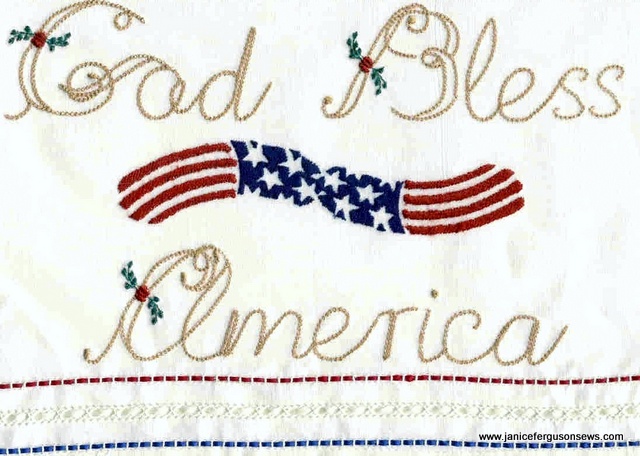
pillow or wallhanging made from hemstitched guest towel.  I wish I had known  then how to rotate the “o” is God so it didn’t look like Gad.


I hope all you Americans are having a fabulous time celebrating our nation’s Independence Day.  We certainly are.

The pictured  pillow or wallhanging (I just can’t recall which) sums up my hopes for our country.  Made years ago for a Sewing at the Beach auction, the pillow features a bean stitch alphabet from a new digitizer in Britain.  I added the waving flag and flowers. Sadly, while moving my designs from one computer to another,  I have lost both the entire alphabet and the name of the designer.   If any of you have any information about this, I would love for you to share.

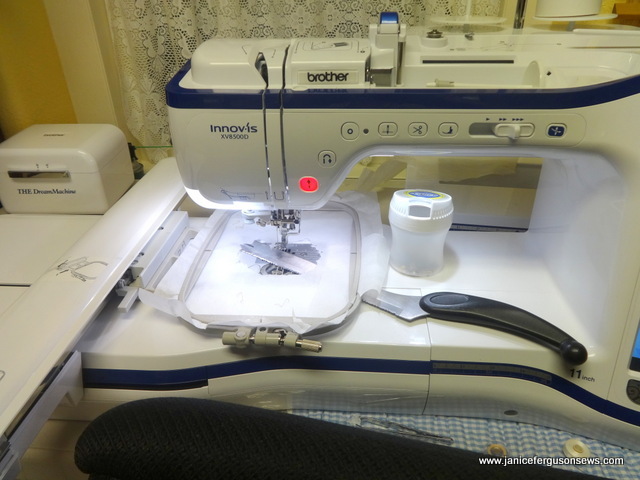
At the time this project was stitched, the largest embroidery frame on my Brother 2001 machine could not accommodate the entire design.  So more than one hooping was required.   I wish I still had the alphabet so I could make an identical pillow or wallhanging for my home.  It would be a breeze with the 9.5 x 14″ hoop on my The Dream Machine.

After driving all night, we arrived home at 6:30 a.m. today after spending a  week in the North Carolina mountains.  With  our two younger grandchildren, 2 yo Vivian Rose and 6 yo Alastair and  their parents it was delightful family time and a cool retreat from Florida’s summer heat.

We did see fireflies!  They certainly were not plentiful but Alastair counted more than 100 each night.  I wonder if he stopped counting them because that’s as high as he can go.

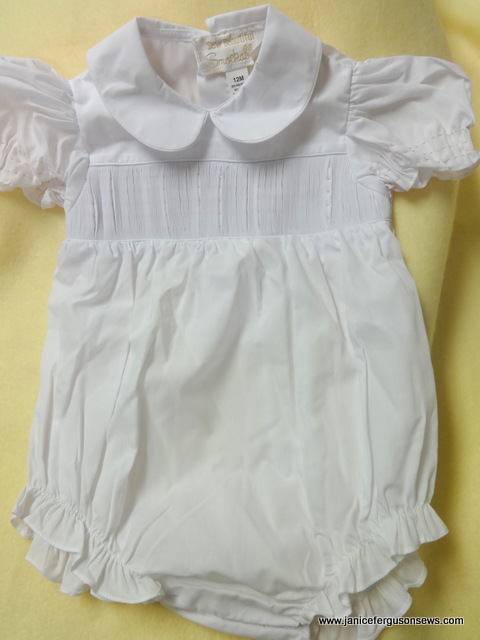
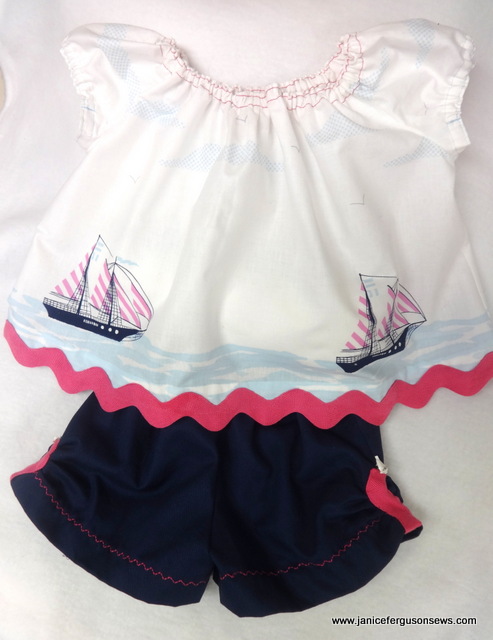
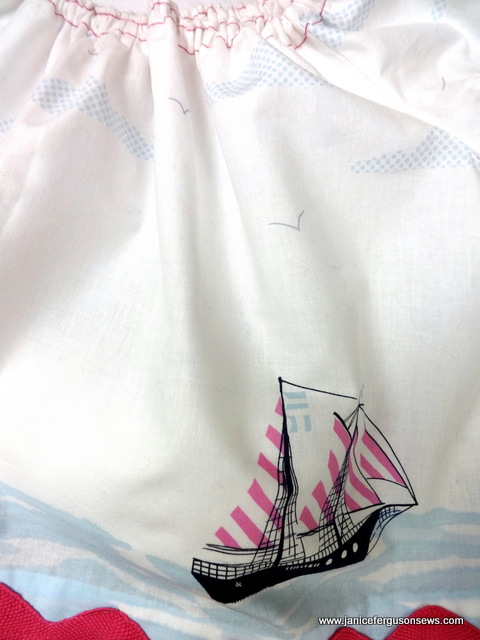
Vivian looked adorable in her firefly outfit with glow-in-the-dark bugs.


1-firefly outfit Continue reading

Quick Tip ~ Thread Nest and Broken Needles

Do you keep a knife in your sewing room?  I do and it’s not for fear of bad guys bursting into my she-cave.  This is why.

Picture it, Glenwood, Florida, and me happily embroidering a sweet tee for Baby Girl.  The machine makes a horrible noise and the needle breaks.  The hoop cannot be moved and the shirt and its design are in jeopardy.  It doesn’t happen often, but when it does….groannnnn.  Though it is generally thought to be the result of operator error, I prefer to think it’s those pesky sewing gremlins.

The situation seems grim.  How can I save the shirt and release the hoop from the gremlins’ malice?


1-kife broken needle container


With that 12″ serrated knife I keep at the ready, that’s how.  The blade must be long enough to reach under the hoop all the way to the thread nest.  It can usually, with care, cut through the threads without damaging the shirt–or whatever is being embroidered.

After cutting through the thread mess, applying a stabilizer patch over the hole, the broken needle has to be dealt with.  It’s not a good idea to throw it into my wastebasket where it can stick me when I take out the trash.  So at each machine I keep a container like this empty sugar-free gum bin into which I discard broken, dull or bent needles.  Before my dear husband kept me supplied with these gum jars, I used empty pill bottles.  Any firm, small canister will do.

These are my tips for thread nests and broken needle storage.  And that’s all I’m going to say about that.

Quick Tip ~ Thread Spools

north end

These are a few of my thread racks. Can you imagine the mess if each spool had a loose tail?

Like most sewists, I love threads–never met a spool or color I didn’t like.  My sewing room is stocked with every thread weight from 12 to 80, some 2 ply and some 3 ply.  There are thread fibers from cotton to silk to rayon, poly, linen and monofilament.  That’s a lot of thread.

And while no one would ever accuse me of being a neat freak, I do like my threads to be in order.  With no loose tails.  So what are we to do with those mini king spools and others without a slot to secure the loose ends?


1-spool nick 2


My solution is an old Olfa art knife and a sharpie pen.  (In a future post, I will share the wonder and uses of my newer, sharp Olfa art knife.) When I get new thread, I carefully make a cut in the spool, noting the direction that it unwinds.  Then, to ease the strain on my “mature” eyes, I mark the slit with a sharpie pen.

It is so quick and easy to snap the thread tail into place and just as quick and easy to locate the cut because of the black mark.

If you have other solutions, please share. Inquiring minds want to know.

Quick Tip~Bobbins

1-reinforcement rings

Do those thread tails hanging off your bobbins annoy you? They drove me crazy.  Of course, there are those very nice plastic bobbin jails–bobbin buddies is one of their names.  But they are bulky and, for me, not convenient as my own solution.


bobbin buddy

The reinforcement rings for notebook paper meet my need perfectly.  In a serendipity moment I spotted the school supply package in my stationary drawer.  Hmmm…right shape, right size, sticky, quick and cheap.  AHA!

I keep a sheet of these at each machine.  As remove a bobbin from the case, I secure the thread with a ring, taking care to apply it to the up side of the bobbin as it sits in the case. Then the bobbins are put in one of several clear  plastic divided bins.

When I pull a bobbin from the box, I remove the ring and stick it on the side of my machine. They usually are reusable 3-5 times before they loose their adhesiveness.  They rarely leave any sticky residue on the bobbin.  Any that remains is easily removed.

These little rings have kept my bobbins in order for many years.  A very long time ago, I was teaching for Mildred Turner at one of her Sewing in the Mountains schools.  Another teacher got a worrisome call from her husband at about 9:30 p.m.  Their daughter had just remembered a useful “invention” was due the next day for science class.  As Jimmy Buffet once said, there was “panic in the green room.”

I suggested the ring reinforcers for the bobbins and slam bam! She had an invention.  And got an A.  Maybe I should feel guilty, but desperate times call for desperate measures.

Give these little rings a try.  You will have no more thread tails hanging out of your bobbin box and a more tidy sewing room.


Fireflies and Summer Nights

1-firefly outfit

Do you all remember catching fireflies on young summer nights?  A glowing mason jar served as a torch in the early darkness at the end of a lazy day of sunshine.

A few summers ago our grandchildren experienced this delight at our cabin in the mountains of North Carolina.  It was especially exciting for them because lightning bugs are rarely seen in Florida, and never before seen by them. Continue reading

Ready-to-Smock ~ Smockables for Sale

More Martha Pullen Smockables turned up when I did my major sewing room clean up.  If you are interested  or have any questions about these, send an e-mail to NCcabin@aol.com or post your request as a comment at the end of this post.


1-pink gingham bishop bubble 12 mo

SOLD $25 + postage, insurance at buyer’s discretion. Size 6 months, ready-to-smock, snaps in crotch.


1-white insert bubble g 12 mon

SOLD (1) available. Girl’s white bubble with insert, snaps in crotch, 18 months for $25.  The price was $30 when they were available from Martha Pullen Company.


$25 + postage, insurance at buyer's discretion.  Pink  12 months button front bishop.

SOLD–$25 + postage, insurance at buyer’s discretion. Pink 12 months button front bishop,  This is a pale pink, but not as washed out as the photo shows.  Ready-to-smock.


$25 + postage, insurance at buyer's discretion.  Size 12 months blue button front bishop, ready to smock.  Two available.

SOLD  $25 + postage, insurance at buyer’s discretion. Size 12 months blue button front bishop, ready to smock. Two available.

$30 + postage, insurance at buyer's discretion.  Available (2) 6 months, one 12 months, one 18 months.  Snaps at crotch.

SOLD ALL THREE $30 + postage, insurance at buyer’s discretion. Available one 6 months, one 12 months, one 18 months. Snaps at crotch.  $40 when they were available from Martha Pullen Company.


$30 + postage, insurance at buyer's discretion. Two Martha Pullen Smockable rompers, one 6 months, one 18 months.  Priced at $40 when they were available.

BOTH SOLD  $30 + postage, insurance at buyer’s discretion. Two Martha Pullen Smockable rompers, one 6 months,((SOLD one 18 months). Priced at $40 when they were available.


SOLD $30 + postage, insurance optional, size 3T. Another Martha Pullen ready-to-smock classic navy romper.

Can you use any of these items?  They need a home away from my sewing room, a home where they will be smocked for a special child.

Sail Away, Baby Girl

beach baby outfit for 2 yo Vivian Rose.

beach baby outfit for 2 yo Vivian Rose.  The jumbo rick rack is really bright pink, almost the same color as the pink on the sails.  Oops–just noticed that unstitched section of the neck casing.  Thank goodness it’s an easy fix.


Summertime is beach time.  Our daughter and her family are 30 minutes from our home, staying at a friend’s oceanfront condo.  This little outfit was made for 2 yo granddaughter Vivian Rose to wear if her mother can ever get her out of her bathing suit and swimmies.

I’m generally happy with the finished product but it is not as I planned it.  Do you carefully plan your projects in great detail?  I just can’t get the hang of doing it like that.

My original plan was to make a quick beachwear set using this sweet Michael Miller fabric, Sail Away.  For the top I chose Children’s Corner Jane.  This is a favorite of mine because it is quick, easy to make, comfortable and cool for summer.

It did not go as planned.   As I changed my mind about one thing and another, but turned out to be not very quick and also offered some challenges.


Can you see the soft grey seagulls in the sky?

Can you see the soft grey seagulls in the sky?  And that rick  rack is NOT red!  It’s bright pink.

Continue reading

Sewing Room tips -Fabric storage


Pfaff corner

After coming clean about the condition of my sewing room, I promised some tips for organization.  So let’s start with our fabric or our stash or resource center or just our yards and yards of raw material for the sewing projects we love to make.

When Terri Click told me about using comic book boards for wrapping fabric, I was intrigued.  Several years ago, my sewing room and the bedrooms above were all but destroyed when a huge oak fell on the house during a hurricane.  While the storm was still raging but before the water seeped down through the plaster ceiling, everything from my sewing room was quickly thrown into storage bins.  And there it remained until Terri clued me in about the comic book boards.

It took me forever sorting through those bins to find a particular piece of fabric.  So I ordered the comic book boards on eBay and I love them. Continue reading

My Sewing Room ~ Coming Clean

AFTER cleanup this is the north end of my sewing room .


Nothing motivates me to clean house like incoming guests.   The first time we were scheduled to host our new Bible study/fellowship gathering I did a good bit of tidying up,  but we had to cancel because I had bronchitis.     This week, it was our turn again.  Okay.  No problem.

And then….the ladies said, “Oh good!  We finally get to see your sewing room!”  Gulp…gulp.  I thought I might be experiencing my first panic attack.

Usually, when we have guests I just close the door to my lady cave.  Company respects a closed door.  But it seems that everyone who has ever stitched wants to see others’ sewing rooms.  I know I surely do.  And these ladies sew.

Now, Dear Readers, by inviting you in I am reaching up to another level of friendship with you.   A few, Judy Day,  Suzanne Sawko, Terri Click, Mildred Turner, Linda McGehee, Rheeta Booth and June Mellinger,  have seen my mess and still call me “friend.”    I hope you will be as understanding.

So here is/was my sewing room before my cleaning tornado.  Actually, I had already begun the cleaning process and took some small comfort in the old saying that things often get worse before they get better.  This was worst not worse.

WARNING!  GRAPHIC IMAGES! Continue reading

Keychain Tutorial Posted ~ New Hints


pack pals for Alastair and his friends

Pack pals/ keychains for Alastair and his friends. I’m pleased to report that my keychain tutorial is posted at Brother’s website.  Any of these links will take you there.


I’m pleased to report that my keychain tutorial is now posted at Brother’s website.  Any of the links at the end of this post will take you there.

Apparently, I was not very clear about the felt.   A reader wrote with some questions,  asking if she needed to buy from a bolt.  My answers/comments are:

 I just buy the felt sheets at WalMart, JoAnn’s or Michaels.  They are 9×12″ or 12 x 18″.  The smaller soft ones run about  $.25 each and the larger stiff ones about $.59.   Of course, you could use some by-the-yard felt, but I don’t think that comes in the stiff weight. 

When I first got on this jag, I used soft for both with a cutaway stabilizer for the first hooping.  But then I could not get rid of the stabilizer beyond the outline and had to color it with a sharpie.  Still, the keychain was too floppy to suit me.  So I went with the stiff stuff. 

You can use stiff for both layers, but with my stiff hands, it is hard to cut through two layers of that. Now I always use stiff for the top but when I can’t find matching colored soft felt, I use stiff for both.

When I first heard about these keychains, I too was puzzled about their attachment to the backpacks.  I discovered that they just loop over the hanger loop  with the embroidered piece slipping through the loop or over the wider shoulder strap.   That is why you need such a long loop.  I’m guessing backpack straps are about 2″ wide, so that uses up 4″ of the ribbon loop.  Then the embroidery has to fit through the remaining opening.


Maddie n Elsa


A second tutorial for other machines was to be posted at this time.   But a wicked case of bronchitis and life in general got in the way.  I expect you know how that happens.  But it will be posted soon.

NANA FUN Continue reading