Category Archives: free patterns and designs

Free Brother MCS Design & Pink Baby Blanket

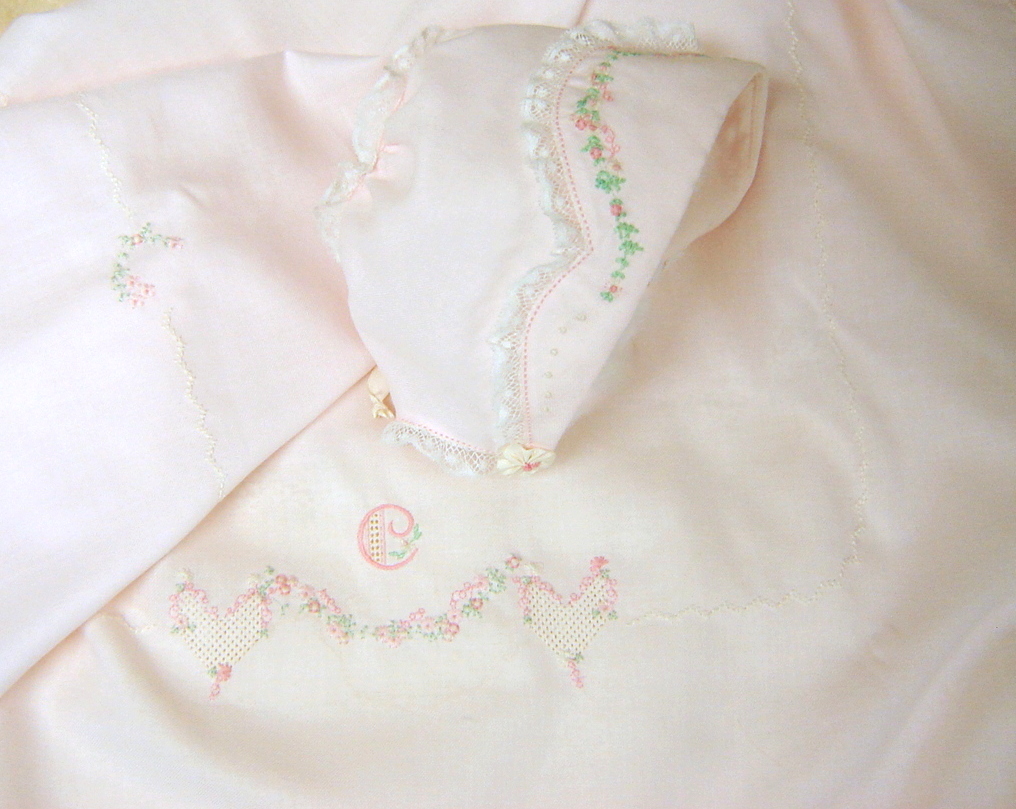
Swiss flannel daygown, bonnet and blanket for baby's homecoming

Swiss flannel daygown, bonnet and blanket for baby’s homecoming

NOTE:  The free design can only be used on Brother machines with the My Custom Stitch feature.  You must download the design and then import it to your machine via memory stick or floppy drive.  It cannot be opened on a computer or accessed any way other than through a Brother model which offers this feature.

It has been busy, busy, busy around here.  I’ve embroidered and framed more scripture verses for church, sewn a denim gored skirt for 9 yo Laurel from a fabulous pattern,  embroidered my son’s hiking back pack, altered his “thunderware” (YIKES!) and done a variety of other “utility” sewing projects.

This photo has been edited/darkened to better show detail.

This photo has been edited/darkened to better show detail.

While  trying to get some blogging done, I came across the forgotten post below in my draft folder.  Since two of my earlier posts on Brother’s  My Custom Stitch  feature,  Heart Swag Baby Shawl  and  T-Bonnet ,  there have been several inquiries asking about the zig zag feather stitch I created.  So once again, I am offering it to readers.  It can be saved to a memory stick or floppy disk or whatever device you use to transfer information to your sewing machine.  It is not a .pes hooped embroidery design.  This is done on the sewing side of the machine.

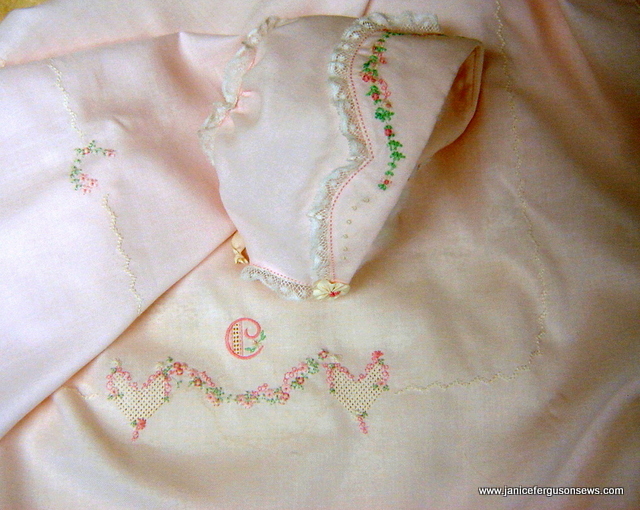
Swiss flannel bonnet, blanket and daygown for baby's homecoming

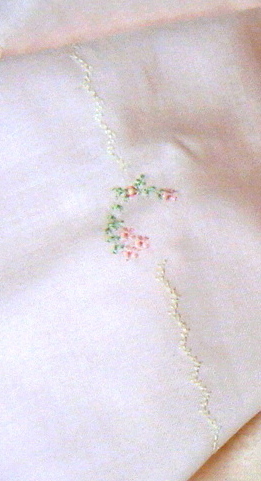
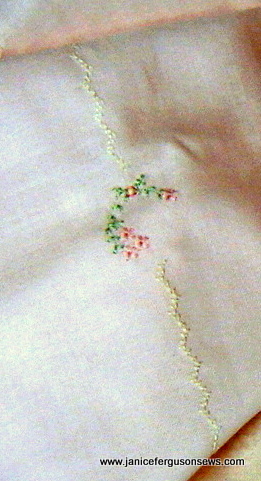
close up of zig zag feather stitch, worked with 30 wt. cotton thread

This  soft pink set was made for granddaughter Vivian Rose’s homecoming in January.  But she was a smaller newborn than our other three grandchildren so the size I chose was too big for her.  Now, 8 months later, the gown has been worn and outgrown.

This shows the feather stitch with greater contrast to better show detail.

This shows the feather stitch with greater contrast to better show detail.

Read on about this useful stitch and post your request for it in a comment.~~~~~~~~~~~~~~~~ Continue reading

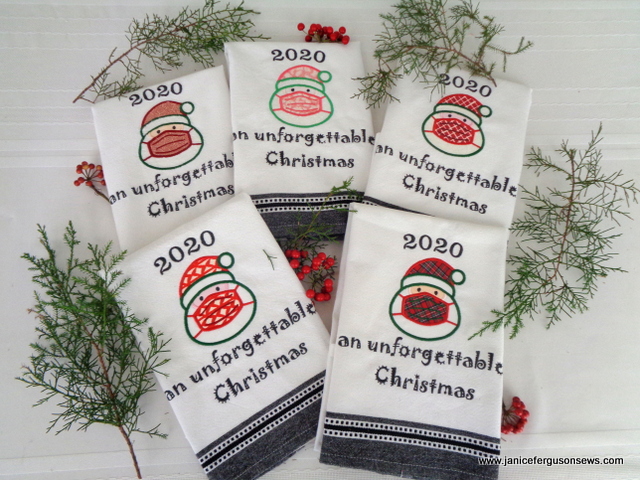
Masked Santa Towel


The season of Christmas 2020 has been like no other.  With all our social limitations, the celebration of the reason for the season remains unchanged.  But that doesn’t mean we can’t acknowledge the uniqueness of this year’s holiday.

Dishtowels have long been a favorite small gift of mine.  It fits everyone, needs no interior decoration coordination, and implies no obligatory reciprocation.  It just conveys the message of caring at this season of love.

After an extensive search, I found just the design I was looking for here at Rivermill Embroidery. It comes in 4 sizes and a variety of formats. With the addition of the text, the applique’d masked Santa on a black bordered towel perfectly reflected my sentiments of the season. I’ve long been a fan and happy customer of AllAboutBlanks.com where I found  these towels.

The addition of the text to the 4×4 applique’ required my 8×8″ Brother Quattro frame.  Another font or text could easily be arranged in a 5 x 7 frame.  Whatever.  I think it’s a perfect design and a lasting remembrance for this season.

If you would like the text “an unforgettable Christmas” sent in .pes format, just leave your request as a comment at the end of this post.

Wishing you all the real joy of this Christmas season.

Required disclaimer: I am a paid Brother Brand Ambassador.  Not required:  I LOVE my Brother machines.


Fun Bug Bag

Summer is not yet over, and for some of us, it seems it never will end! As entertaining the children becomes more and more challenging, sometimes just getting them out of the house for a while is a worthy goal.

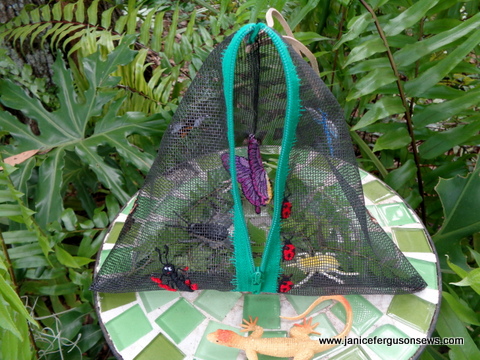
Whip up this quick and easy bug bag and they will be kept busy prowling the bushes and grass. Make it plain or make it fancy. Honestly, it takes longer to read the instructions than to make the basic bag.Whether the prey be creepy crawlies or fireflies, the adventure is a child’s version of a jungle safari. Work this into a lesson into entomology and identify some of these yard beasties and it becomes an educational adventure.

This fiberglass screen wire teepee bag (the name suggested by its shape) is a perfect accessory and holding pen. Use insect designs from design library to embellish the outside. Your Brother embroidery machine and most others will handle the screen wire effortlessly. The stand-alone butterfly swaying inside the bag will intrigue the children and send them racing out the door into nature.

Let’s make a bug bag!

Requirements:

    • sewing/embroidery machine
    • open toe foot, basic sewing foot
    • 4—4 or 5—7 frame to embroider more than one design in the same frame
    • Fiberglass screen wire: 18 x 26″ for bag embroidery and another large piece for stitch rehearsal of each potential design.
    • Utility scissors for cutting screen wire and zipper
    • Notions: zipper at least 18″ or with plastic teeth. Longer is fine. It will be cut to size during construction; 8-10″ cord or ribbon; monofilament, sewing and embroidery thread, seam sealant
    • Extra heavy water-soluble stabilizer (wss)
    • Download both left and right files below and piece together.

layout template left and layout template right (request below in comments and they will be emailed to you)Preparation

1. Print pattern/design templates. It is broken into two parts because my scanner bed is too small for the entire template. Print both the left and right templates and tape them together.
2. Print template of each design you plan to use. If deemed appropriate, resize to be proportional to the bag.
3. Cut 18 x 26″ screen wire. This large size makes hooping easier.
4. Tape completed template to white surface or pin to padded surface.

Note: It may be necessary to trace over the lines with a wide black marking pen for better visibility.

5. Center screen wire over template and tape or pin corners to hold in place.
6. Trace section placement lines onto screen wire with child’s school chalk. These lines show each section of the finished bag for suitable embroidery placement.

Note 1: To make the necessary marks, neither a sliver of soap, chalk marker or washout marker could be seen on the screen wire. Only white chalk, like that used on school black or green boards worked. Hmmm…were you ever in a classroom with a chalkboard? If so, you must be a grandmother like me.
Note 2: The screen wire will slip if not well secured when placed over the template. The red slashes show where it slipped and the line had to be redrawn after pinning it more securely to a padded surface.

7. Place templates of selected embroidery designs in chosen location within the section.

Note: It is helpful to take a picture with your phone so you can refer to it as you embroider.

8. Wind bobbin in each thread color used in the designs.

Embroidery

9. Select one or two designs to embroider on one large side and load into machine.
10. Hoop screen wire and heavy-duty water-soluble stabilizer (wss). Puckering occurred when the screen wire was simply basted to the wss.

NOTE: If you are blessed with a Brother embroidery machine with a camera capability, detailed instructions are posted at Brother’s blog, Stitching Sewcial here. Otherwise, proceed as you will.

13. After embroidery, do not remove wss.14. Continue hooping and embroidering each section. The wss is still in place on the back. Do NOT embroider the ladybugs now.

Note: To create the illusion of the ladybugs trailing up the green zipper they must be embroidered after the zipper insertion.

Construction

Insert the zipper in this unorthodox manner, stitched flat on the top side of the screen wire. This is done so the ladybugs could be embroidered along the zipper edge.

15. Attach open toe foot. The zipper is placed on top of the screen wire.
16. Open the zipper, place the top of the tape at the top of the bag’s marked cutting, right side up with the teeth at the edge of the left marked bag side.

17. Straight stitch 1/8-1/4″ from zipper teeth, with open toe foot positioned along the edge of the teeth. Needle position is in far right.
18. Open the zipper as far as possible. Repeat on the opposite side. WSS is still in place.
19. Stitch “grass” for ladybug’s home. On my Dream Machine that was stitch #7-12, width 6.5, length 4.0. Or select a similar stitch.

    • Return to Embroidery

      20. Open ladybugs design. Hoop with zipper near center of frame. Position design. Embroider.

21. Hoop 2 layers of wss in 4X4 frame. Embroider butterfly. This one was resized up to 2.56 x 2.55″. Be sure to use matching thread in the bobbin.

22. Remove as much wss as possible then soak in tepid water until the edges are clean. What remains between the layers will give the free flying butterfly stability. Pat with paper towels to help it dry.
When almost dry, shape it with wings spread as if to fly. The antennae are just loose threads. Applying a bit of seam sealant gives them some body.

Return to Construction

23. Cut screen wire to 8″-16″, along marked chalk lines but do not cut zipper. Best to remeasure for exact sizing. Leave zipper open to its greatest length.
24. Remove as much wss as possible. Trim screen wire and wss from teeth edges to first line of stitching.

25. Immerse bag in tepid water to dissolve wss.
26. Lie flat on a towel and roll the towel around it, like a burrito. Squeeze out excess moisture and hang to dry. If you are in a rush, a blow dryer speeds up the process of drying the zipper tape.

27. Stitch a folded 8-10″ cord or grosgrain ribbon to the top edge within the ¼” seam allowance. The loop should hang down with raw edges extended a little beyond the seam allowance. This creates a loop handle.

28. Close zipper a few inches above the bottom raw edge. Fold the bag inside out with the closed zipper in the center of the seam line. Stitch with ¼” seam allowance right over zipper.

29. Cut excess zipper-finally! Use utility scissors.

30. Fold top in half with zipper at one side. Begin stitching at zipper just above the first tooth. Back stitch for reinforcement. Angle up to ¼” seam line. The open toe foot gives best visibility for those first stitches.

31. Fold top in half with zipper at one side. Begin stitching at zipper just above the first tooth. Back stitch for reinforcement. Angle up to ¼” seam line. The open toe foot gives best visibility for those first stitches.

Does this make you want to hunt bugs or to sew a bug bag?

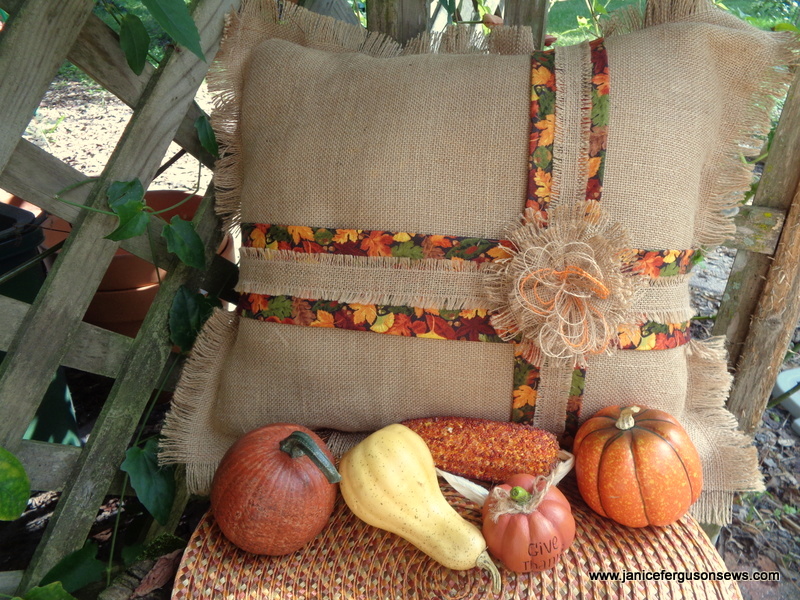
Autumn Burlap Pillow

Get a detailed tutorial for this pillow at http://blog.brothersews.com/home-decor/harvest-time-pillow

This fall pillow gives you all the colors of autumn, even if you live in Florida, as I do. The fabric selection for this season is just remarkable! A trip down the aisles of my favorite sewing store reminds me of our drives down the Blue Ridge Parkway in October. I can almost smell piles of leaves burning.

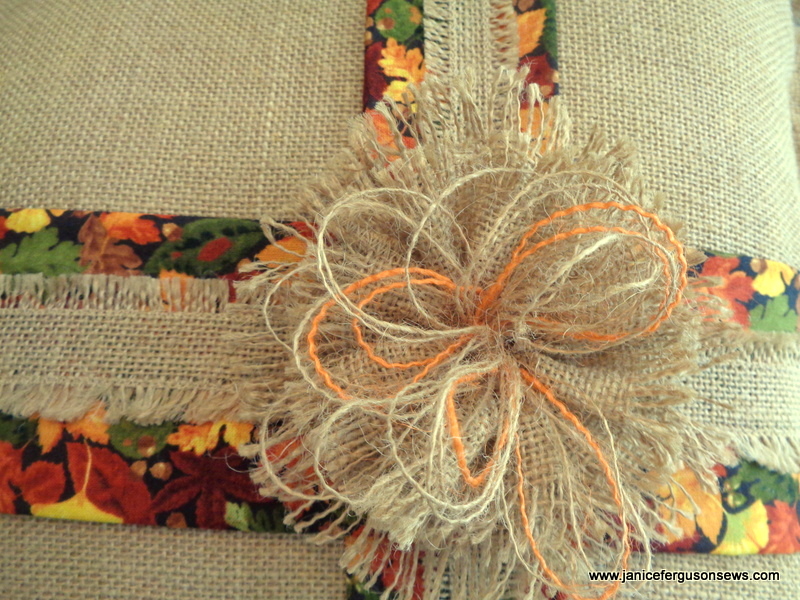
You can make this pillow in a very short time. Working with burlap is a drastic change in gears from heirloom and the burlap rose was fun. Every burlap flower I researched online required hot glue and I did not want that. So this is my version of a no-glue posy. Detailed instructions are in the post at Brother’s Stitching Sewcial blog.

This sturdy pillow can bring fall colors to the outdoors as shown above or it can enrich the colors in your home. By changing the print fabric on the sash, you could make this a Halloween pillow. Then swap the sash to fall fabric after Oct. 31.

It reminds me of Halloweens past with my children’s and grandchildren’s goofy costumes, of huge Thanksgiving dinners with family and friends, of fall festivals at church, of tailgating Gator football games, and fall festivals. So many memories of this season…..

Required disclosure: I am a paid Brother Ambassador/sewing expert. Not required: I love my Brother Dream Machine 2!

Check out the tutorial here and leave a comment if you like it. I would really appreciate it.

http://blog.brothersews.com/home-decor/harvest-time-pillow/

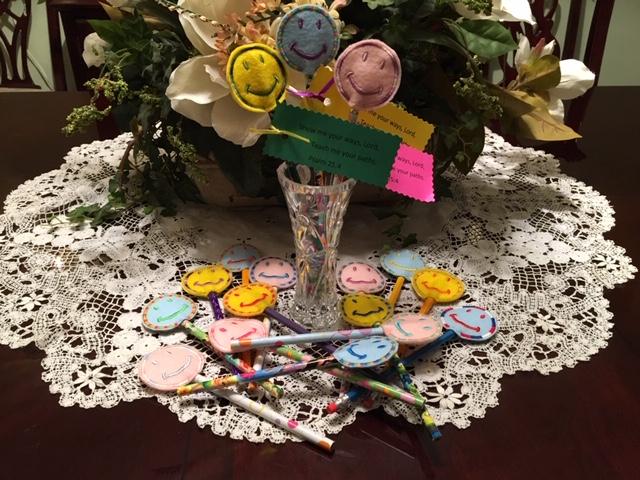
Free Happy Face Pencil Toppers

My turn to present the Children’s Message at church came this week just in time for back-to-school.

The children range in age from 4-10 so the message needed to be catchy to get their attention and brief enough to keep that attention.  Additionally, there must be a meaningful message.

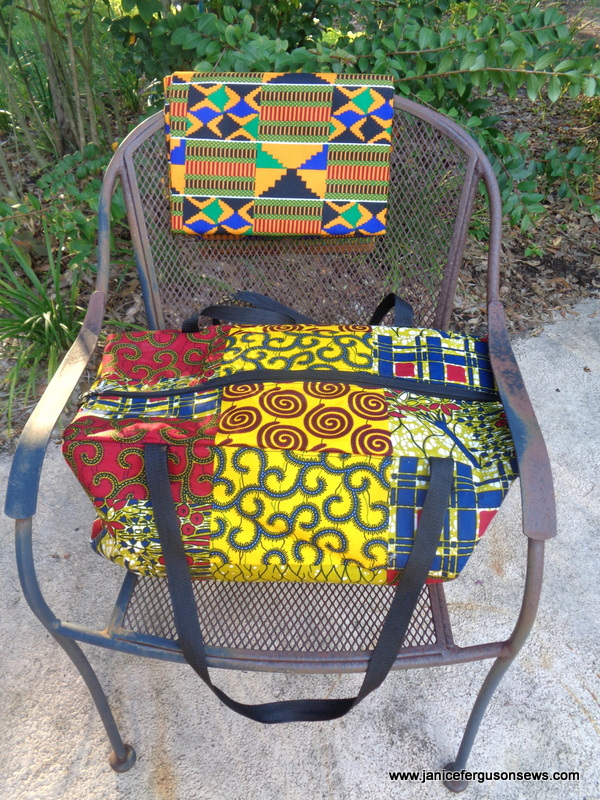
This bag and fabric was a gift to me from the Ghana mission team in thanks for the garments our sewing group made. The bright colors certainly caught the children’s attention.

With a large, colorful  tote bag next to me,  I mentioned that they had all begun a new school year.  Then I asked what they learn at school.  The answers were just as expected–math, reading, manners and to be kind (that was nice to hear).

They were curious about the bag but I said they would see what was in it later.  It was a surprise.  Darling tow-headed Reid, 4 yo,  had snuggled up to me before the service began and sneaked a look in the bag.  He shouted smugly, “I know what the surprise is!!!!” Continue reading

FREE Peekaboo Pumpkin Treat Bag


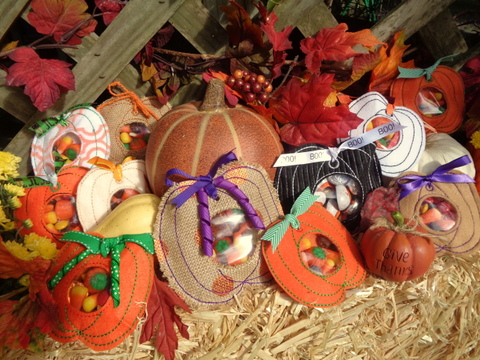
Now here is a quick, easy and fun fall project for you.  Since orange gourd designs are appropriate through Thanksgiving, you can stitch up a whole pumpkin patch of these to share. Even without an embroidery machine, you could trace a pumpkin and stitch the entire project on your sewing machine.

A detailed photo tutorial and the free design in 4×4 a d 5×7 are available at Brother’s blog, Stitching Sewcial. You can be very creative with this little pumpkin, using various colors of felt, burlap or even a sturdy fabric.

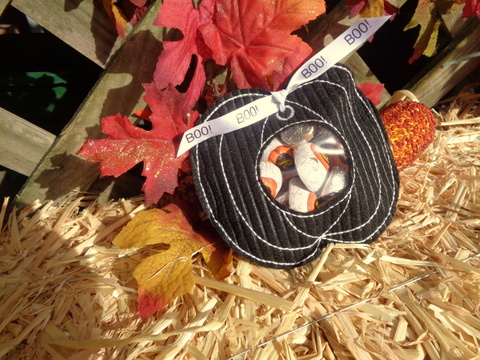
I especially liked using my Brother P-touch Embellish ribbon and tape printer  to print BOO! for the black pumpkin tie.

black love the imprinted ribbon


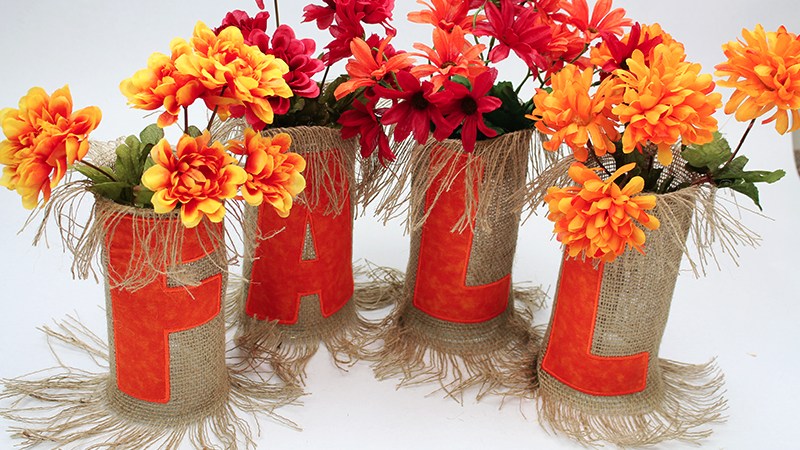
There are so many great projects posted at Stitching Sewcial, like Angela Wolf’s lovely burlap jar covers embellished with Scan ‘n Cut letters FALL.


Having recently purchased a Scan ‘n Cut I was especially interested in this project.  Check out Angela’s post and her tutorial here.  I just love the long fringe at the top and bottom of the jars.

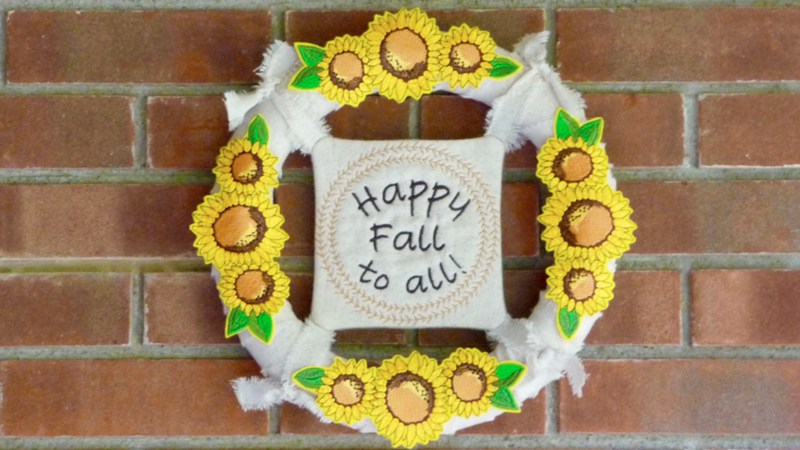
And here is another fall project from Joanne Banko, Fall Wreath–a great post, great project, great tutorial with a great free sunflower swag design.


Happy Fall to you all!  Enjoy stitching for this colorful season.


Wrapped in Love

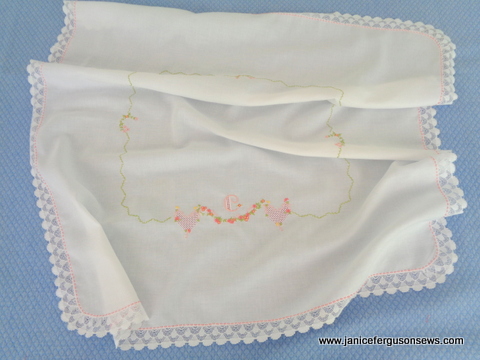
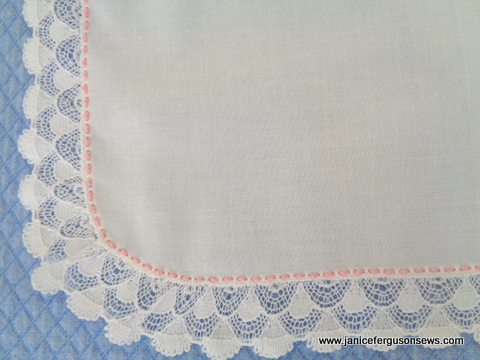
Swiss flannel with pinstitch joining lace to fabric. Pinstitch is woven with pink perle cotton.

I can’t seem to stop thinking about Beatrice. She is the soon-to-be-born, soon-to-be-adopted baby girl whose waiting parents are active members of our church. So I sew. When she is in their arms, she will be wrapped in love, with or without this shawl.

Soft, luxurious Swiss flannel is perfect for any baby. Especially here in Florida where winters are usually moderate, a tiny one dressed in this fabric can go out on the town without being bundled in a parka. The blanket coordinates with a bonnet and smocked daygown featured in earlier posts. I hope to duplicate them for Baby Beatrice.

Pinstitch and Swiss flannel go together like peas and carrots. The holes were perfectly clear and clean, as always, but were woven with perle cotton because I wanted a little more color near the perimeter.

The lace edging is my favorite blanket trim as it can withstand heavy laundering and still flaunts its heirloom ancestry.

Six inches from the lace is a zig zag feather stitch frame, interspersed with embroidery. That stitch is worked in soft green, but I was unable to get a good scan of it. It shows up clearly in this photo from another project. With 30 wt. cotton thread, it works up nicely.

This stitch is one I designed several years ago in Brother’s exclusive My Custom Stitch feature. If you have a Brother machine which includes MCS, I would be happy to share it with you. Just leave your request at the end of this post.

Continue reading

Easter ’18 Week

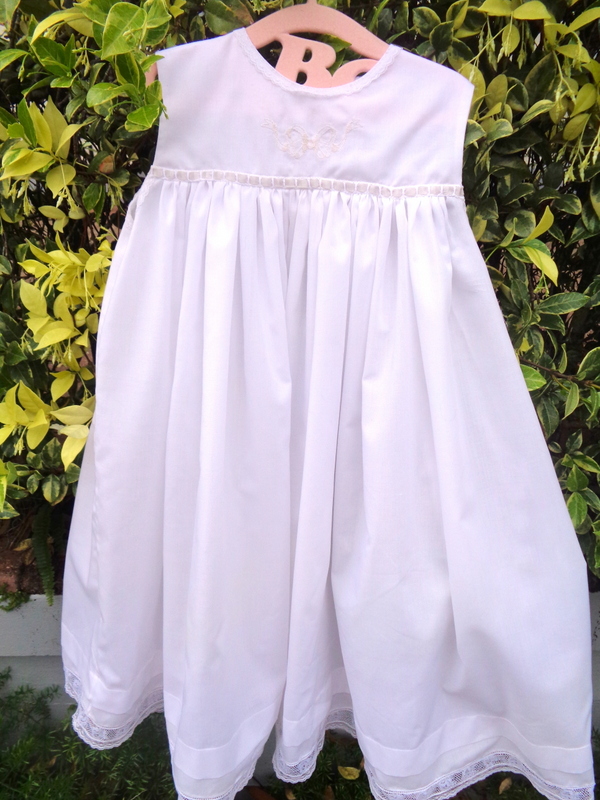
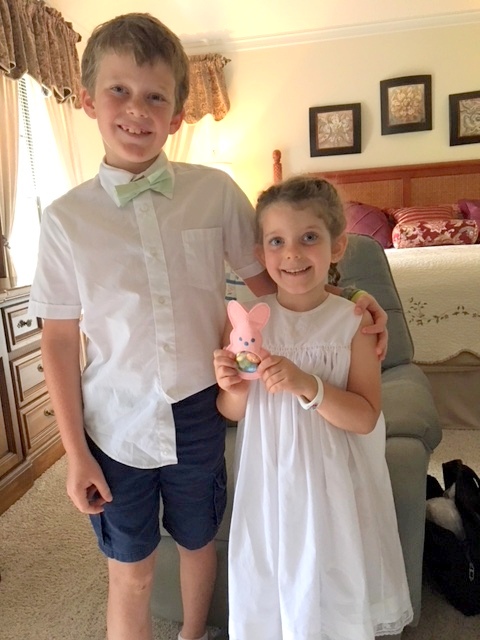
Vivian Rose at Oma’s house, decked out in her mother’s Rebecca’s Bow Dress.

I hope you all had a joyous Easter. The Ferguson family had a fabulous week of Easter celebrations! We saw both of our children with all four of our grandchildren, but not at the same time. A good bit of sewing was done before and after their arrival.

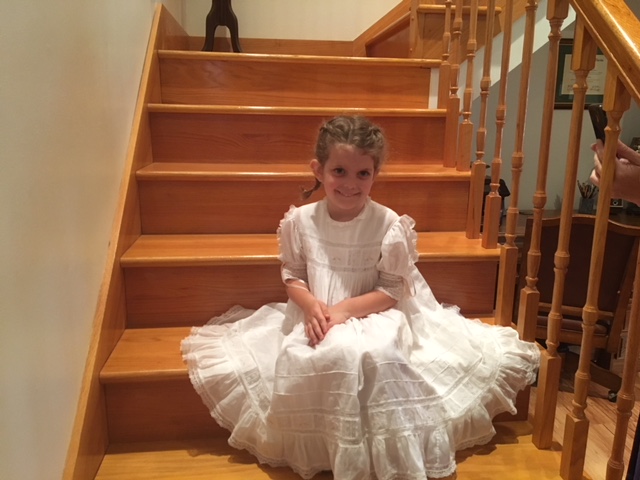
Saturday we joined our son-in-law’s family for Easter dinner.  5 yo Vivian Rose was resplendent in her mother’s 35 yo Rebecca’s Bow Dress, with her curls confined to elaborate, elegant French braids.

The original slip has been lost through the years so this white Imperial batiste slip was made.  Because it really can be worn as a dress, a bow was embroidered on the yoke. To avoid it shadowing through the dress, it was stitched in a very pale pink and white.

The same yoke pattern was used with 1/2″ removed from the top half of the armscye.

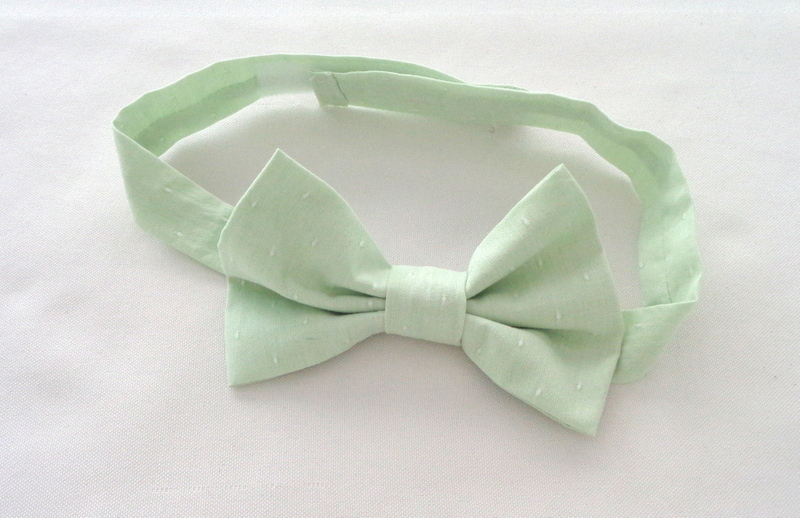
Ever obliging 9 yo Alastair wore his bow tie made from the Little Boy Bowtie:the Quick and Easy Version pattern which I have used so often.

The color matched the green leaves in his sister’s fancyband.

The bows alternated with 3 vertical strips of lace.

I love this picture taken as Vivian was ready to put on her heirloom dress. Alastair was proud that he was already dressed and ready for the egg hunt.

The bunny was tied at the top with a bow, but Vivian HAD to open it.

See the felt candy-filled bunny in Vivi’s hand? That was such a fun little project. I made 20 of these for the children at church, as well as for these two. Vivian had a bunny filled basket and loved handing them out. I so regret that I did not get a photo that or of all the pink, blue, yellow and white bunnies together. They were a big hit with all the children. Continue reading

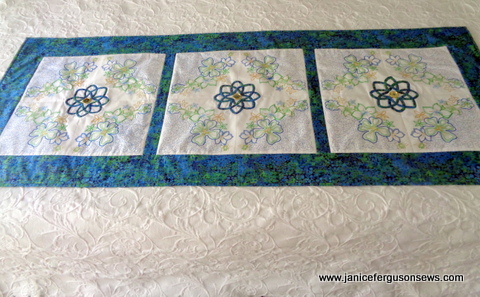
Quilted Bed Foot Warmer and Free Design

No one likes cold feet–not at a wedding nor in bed.

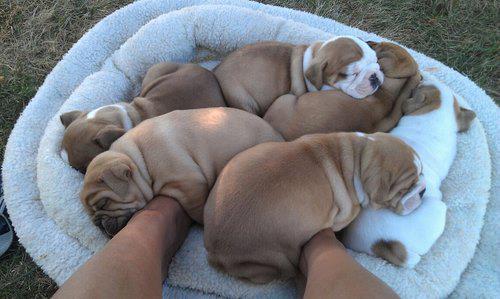
There are many ways to keep your toes warm, like this. Who wouldn’t love that? But you need a lot of puppies.

Or you could do this:

There are risks with this method. Mildred “Mimi” Turner almost burned down our hotel (and her feet) when we were teaching in Australia’s cold Blue Mountains.

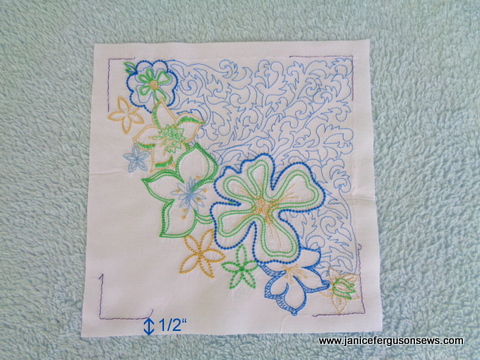
This quilted foot warmer is risk free, readily available, pretty, and fun to make. It is also my latest project for Brother’s blog, Stitching Sewcial, for which I am a paid sewing specialist (this is a required disclosure). The blog post includes a FREE download link for the quilting design used for the spaghetti bias Celtic knot in the center of each square. But more about the special use of that later.

The design measures 7.76 x 7.87″.

Continue reading

Valentine Free Fil Tire’ Heart

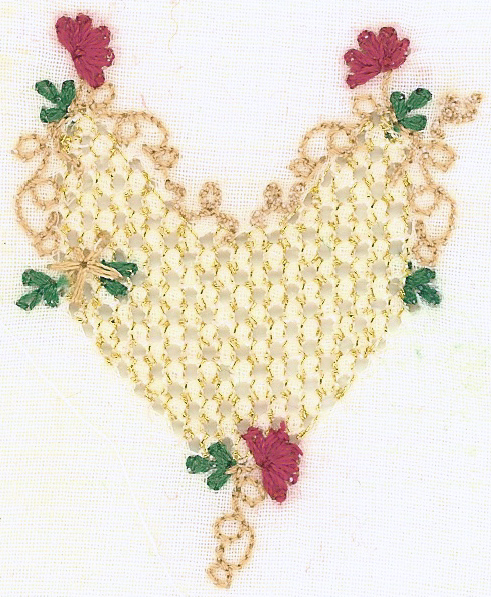
With Valentine’s Day around the corner, I am again offering this free fil tire’ heart design. There are many new readers who might enjoy this and some older readers who might have missed it. The design is so suitable for this holiday celebrating love. And what says love better than a heart?

I so appreciate the support and encouragement you dear readers have given me through the years. For the some time now I have been extraordinarily busy and posts have been few and far between. And yet you still stop by to read my infrequent chats. I thank you for that.

For this day celebrating love, I am offering this free machine embroidered fil tire’ heart, along with wishes for love each day. Just leave your request for the design as a comment at the bottom of this post.
Continue reading