Category Archives: bags

Fun Bug Bag

Summer is not yet over, and for some of us, it seems it never will end! As entertaining the children becomes more and more challenging, sometimes just getting them out of the house for a while is a worthy goal.

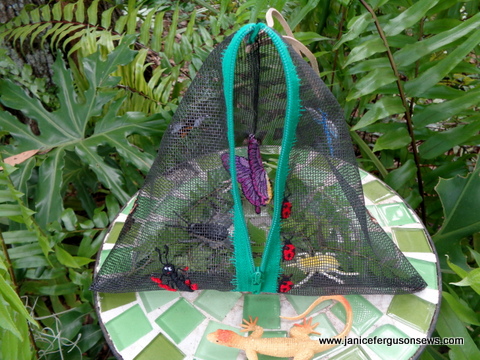
Whip up this quick and easy bug bag and they will be kept busy prowling the bushes and grass. Make it plain or make it fancy. Honestly, it takes longer to read the instructions than to make the basic bag.Whether the prey be creepy crawlies or fireflies, the adventure is a child’s version of a jungle safari. Work this into a lesson into entomology and identify some of these yard beasties and it becomes an educational adventure.

This fiberglass screen wire teepee bag (the name suggested by its shape) is a perfect accessory and holding pen. Use insect designs from design library to embellish the outside. Your Brother embroidery machine and most others will handle the screen wire effortlessly. The stand-alone butterfly swaying inside the bag will intrigue the children and send them racing out the door into nature.

Let’s make a bug bag!

Requirements:

    • sewing/embroidery machine
    • open toe foot, basic sewing foot
    • 4—4 or 5—7 frame to embroider more than one design in the same frame
    • Fiberglass screen wire: 18 x 26″ for bag embroidery and another large piece for stitch rehearsal of each potential design.
    • Utility scissors for cutting screen wire and zipper
    • Notions: zipper at least 18″ or with plastic teeth. Longer is fine. It will be cut to size during construction; 8-10″ cord or ribbon; monofilament, sewing and embroidery thread, seam sealant
    • Extra heavy water-soluble stabilizer (wss)
    • Download both left and right files below and piece together.

layout template left and layout template right (request below in comments and they will be emailed to you)Preparation

1. Print pattern/design templates. It is broken into two parts because my scanner bed is too small for the entire template. Print both the left and right templates and tape them together.
2. Print template of each design you plan to use. If deemed appropriate, resize to be proportional to the bag.
3. Cut 18 x 26″ screen wire. This large size makes hooping easier.
4. Tape completed template to white surface or pin to padded surface.

Note: It may be necessary to trace over the lines with a wide black marking pen for better visibility.

5. Center screen wire over template and tape or pin corners to hold in place.
6. Trace section placement lines onto screen wire with child’s school chalk. These lines show each section of the finished bag for suitable embroidery placement.

Note 1: To make the necessary marks, neither a sliver of soap, chalk marker or washout marker could be seen on the screen wire. Only white chalk, like that used on school black or green boards worked. Hmmm…were you ever in a classroom with a chalkboard? If so, you must be a grandmother like me.
Note 2: The screen wire will slip if not well secured when placed over the template. The red slashes show where it slipped and the line had to be redrawn after pinning it more securely to a padded surface.

7. Place templates of selected embroidery designs in chosen location within the section.

Note: It is helpful to take a picture with your phone so you can refer to it as you embroider.

8. Wind bobbin in each thread color used in the designs.

Embroidery

9. Select one or two designs to embroider on one large side and load into machine.
10. Hoop screen wire and heavy-duty water-soluble stabilizer (wss). Puckering occurred when the screen wire was simply basted to the wss.

NOTE: If you are blessed with a Brother embroidery machine with a camera capability, detailed instructions are posted at Brother’s blog, Stitching Sewcial here. Otherwise, proceed as you will.

13. After embroidery, do not remove wss.14. Continue hooping and embroidering each section. The wss is still in place on the back. Do NOT embroider the ladybugs now.

Note: To create the illusion of the ladybugs trailing up the green zipper they must be embroidered after the zipper insertion.

Construction

Insert the zipper in this unorthodox manner, stitched flat on the top side of the screen wire. This is done so the ladybugs could be embroidered along the zipper edge.

15. Attach open toe foot. The zipper is placed on top of the screen wire.
16. Open the zipper, place the top of the tape at the top of the bag’s marked cutting, right side up with the teeth at the edge of the left marked bag side.

17. Straight stitch 1/8-1/4″ from zipper teeth, with open toe foot positioned along the edge of the teeth. Needle position is in far right.
18. Open the zipper as far as possible. Repeat on the opposite side. WSS is still in place.
19. Stitch “grass” for ladybug’s home. On my Dream Machine that was stitch #7-12, width 6.5, length 4.0. Or select a similar stitch.

    • Return to Embroidery

      20. Open ladybugs design. Hoop with zipper near center of frame. Position design. Embroider.

21. Hoop 2 layers of wss in 4X4 frame. Embroider butterfly. This one was resized up to 2.56 x 2.55″. Be sure to use matching thread in the bobbin.

22. Remove as much wss as possible then soak in tepid water until the edges are clean. What remains between the layers will give the free flying butterfly stability. Pat with paper towels to help it dry.
When almost dry, shape it with wings spread as if to fly. The antennae are just loose threads. Applying a bit of seam sealant gives them some body.

Return to Construction

23. Cut screen wire to 8″-16″, along marked chalk lines but do not cut zipper. Best to remeasure for exact sizing. Leave zipper open to its greatest length.
24. Remove as much wss as possible. Trim screen wire and wss from teeth edges to first line of stitching.

25. Immerse bag in tepid water to dissolve wss.
26. Lie flat on a towel and roll the towel around it, like a burrito. Squeeze out excess moisture and hang to dry. If you are in a rush, a blow dryer speeds up the process of drying the zipper tape.

27. Stitch a folded 8-10″ cord or grosgrain ribbon to the top edge within the ¼” seam allowance. The loop should hang down with raw edges extended a little beyond the seam allowance. This creates a loop handle.

28. Close zipper a few inches above the bottom raw edge. Fold the bag inside out with the closed zipper in the center of the seam line. Stitch with ¼” seam allowance right over zipper.

29. Cut excess zipper-finally! Use utility scissors.

30. Fold top in half with zipper at one side. Begin stitching at zipper just above the first tooth. Back stitch for reinforcement. Angle up to ¼” seam line. The open toe foot gives best visibility for those first stitches.

31. Fold top in half with zipper at one side. Begin stitching at zipper just above the first tooth. Back stitch for reinforcement. Angle up to ¼” seam line. The open toe foot gives best visibility for those first stitches.

Does this make you want to hunt bugs or to sew a bug bag?

How-to: Garments for Ghana

Required disclosure: I am a paid Brother Ambassador. Not required: I absolutely love Brother Machines.

Several readers have written asking if they may participate in the Garments for Ghana project.  Others asked how our project operated so they might do a similar event in their own community. When I mentioned in response to a comment on this topic that I might write this post, at least one promised that she (sweet Sandee) would not find these details boring. I hope she is not the only one because I am going ahead with this.

Before I began, I was given some direction from the mission team leaders. The request was for bright colors, since the landscape there is pretty bleak. We did that. Check.

Second, there must be no buttons or closures that might break or need replacement. Such replacement is not an option for mothers in these areas. Check. Elastic at the neckline was the only closure notion. I know elastic gives out after a couple of years, but I expect these garments will be worn out long before the elastic is.

Third, in many African nations and apparently in Ghana, bare shoulders for girls and perhaps adult females, is taboo. So we needed some sort of sleeve. Check. I did notice early on that many photos of pillowcase dresses for Little Dresses for Africa showed the girls wearing a tee shirt under their dresses. Now I see that the site offers a free pattern that has a sleeve, much like the pattern I used.

Fourth, each garment must be marked with its size. I had a bag of labels for sizes 1-5 and for the others I embroidered sizes on grosgrain ribbon in the hoop. Ladies who worked from home used a sharpie to write on ribbon, which like the others, was tucked into the elastic casing at the back. Continue reading

Bicycle Bag

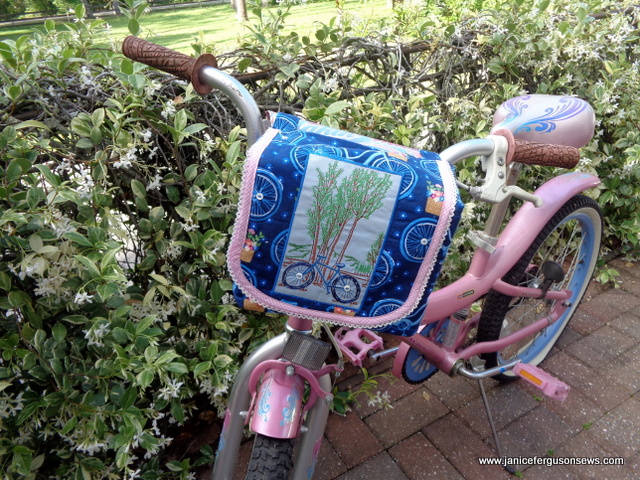
The bike bag is a perfect match to my granddaughter’s bike. What a lucky coincidence! Detailed instructions are available here.

For that special biker (your child, your grand, your mother, yourself?) who has everything, how about a pretty quilted bike bag.

This was a fun project, made for Brother’s blog, Stitching Sewcial, in celebration of National Bike Month. Detailed photo instructions are included in the tutorial post.

I’ve loved this design since it was first included on a Brother card, EDB LG1. Now it is available as a single design at iBroidery.com for 5×7 frames.

Continue reading

Beaded Bag

If you happened to stop by these past  two weeks, you must have thought I have dropped off the face of the earth.  Though very busy, I have managed to stitch a few things that I would like to share with you.

monogrammed for a bridesmaid

Today I’m showing a feminine drawstring bag. This is a bride’s gift to her bridesmaid, stuffed with a few precious momentos, reminders of the young ladies’ time together and a matching monogrammed handkerchief. After the wedding, the bag can hold more handkerchiefs or whatever pretties that need a container.

The fabric is a lovely organza from fabric.com. The fabric was cut 10″ x 16″. With a width of 118″ 7 bags can be cut from 1/3 yd. with plenty of room to straighten the fabric edge.

In order to show off the ribbon, ivory French lace beading was used instead of a casing.

The beaded trim was originally joined to a dark brown twill base. After it was stitched in place, the taupe colored satin ribbon stitched on top of it.

The same ribbon was used for the drawstring ties. Thread for the monogram was chosen to match the ribbon.

I love a quick project every now and again. This same bag could be purposed for so many other uses–bridal showers, birthdays or any gift occasion. It’s nice to have a simple project to make up in a hurry when the need arises. Then try stitching a pretty bag like this.

How good is good enough?

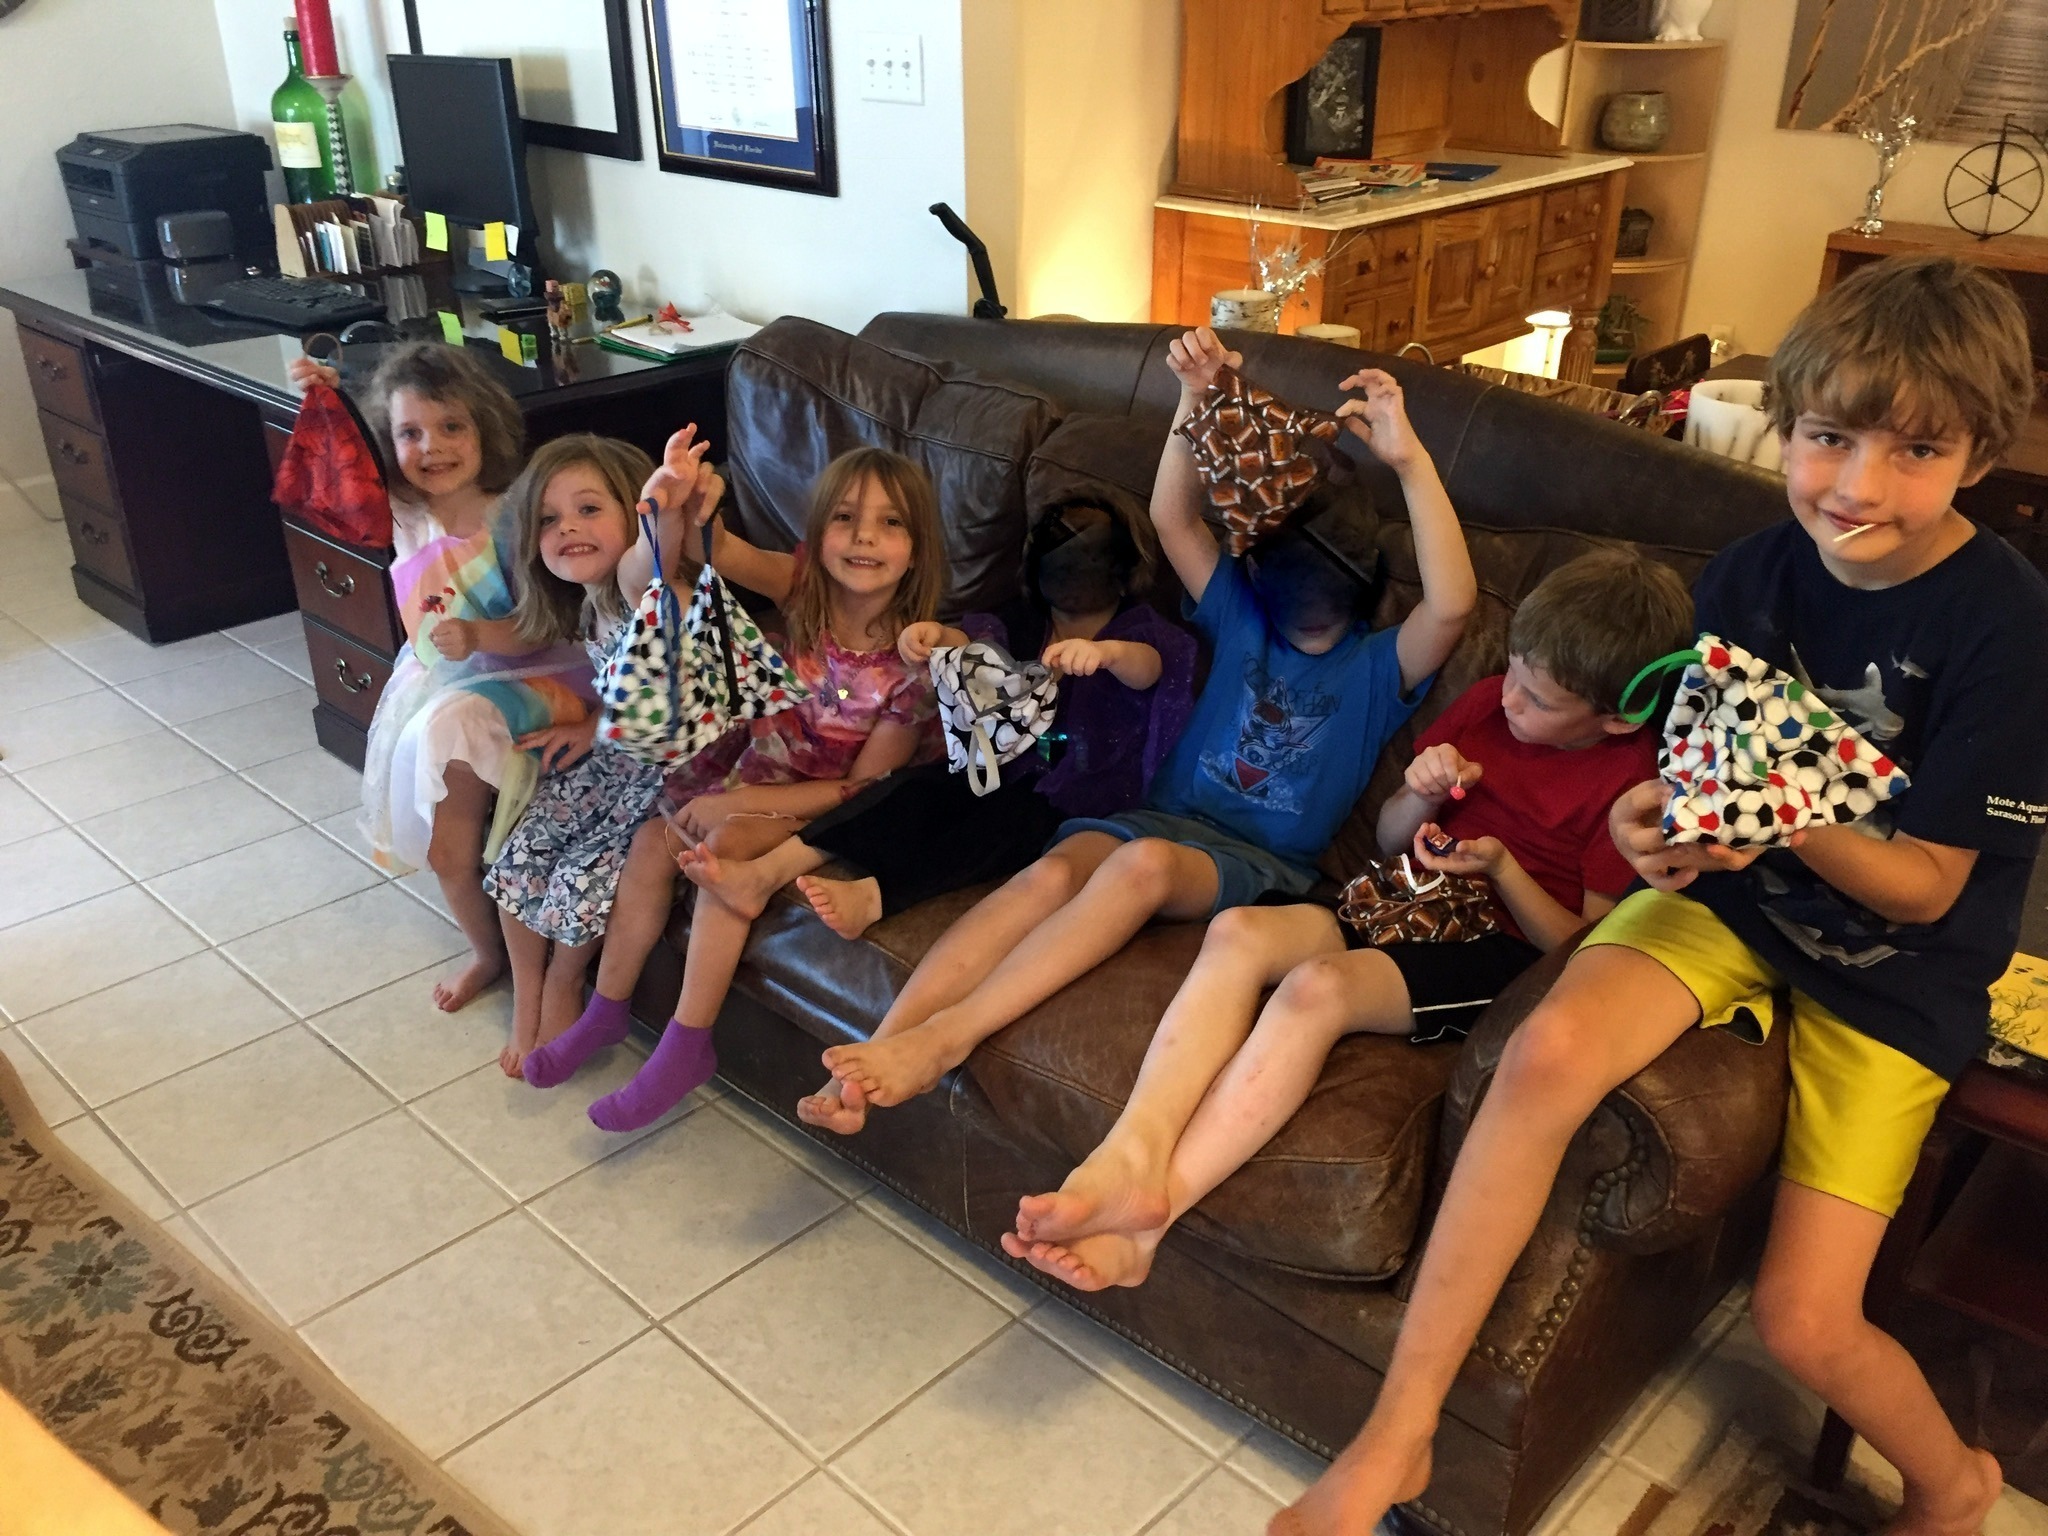
children with their teepee bags at my grandson’s 8th birthday party

This is a question I have struggle with frequently. Does EVERY project require or deserve perfection?

Most recently, my struggle focused on the party favor bags for my grandson’s 8th birthday. The party had a sports theme, with a football pinata and soccer field cake. My contribution to the festivities was 12 teepee bags (click here for the post with the free pattern) 3 each from football, baseball, basketball and soccer novelty fabrics. After enjoying the bounce house and the girls swapping clothes and changing again and again with the garments in the dress up box, the bags were stuffed by the children with the spilled contents of the smashed pinata.

Like most of you readers, I am very, very busy. But I am also very, very fussy about my sewing. Often I ask myself, is it better to sew more with a few imperfections or better to sew less and get my projects as close to perfect as possible? In fact, I rarely achieve results even close to perfect. Continue reading

Pete’s Dragon Sleepover Set

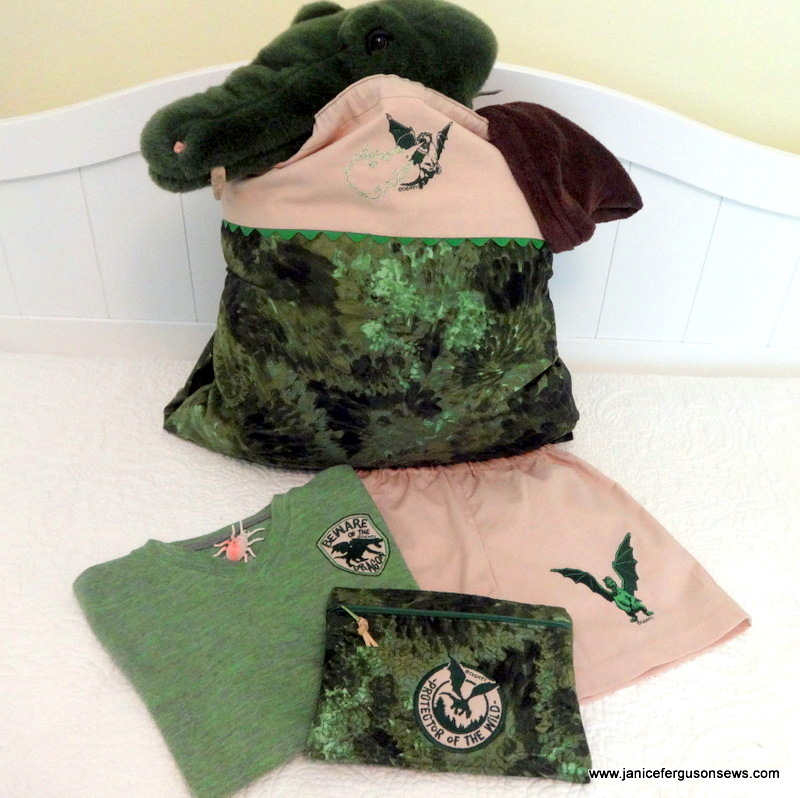
Part 1 of the 3-part detailed tutorial for the set is now posted here at Brother’s blog, Stitching Sewcial.

What a fun project this was! Disney’s machine embroidery designs at iBroidery.com reflect the awesome and mighty protector Elliot who has greater appeal for today’s action hungry youngsters. While the ’70’s version featured the sweet but goofy purple cartoon dragon Elliot, this 2016 dragon is the real deal. See the trailer here.

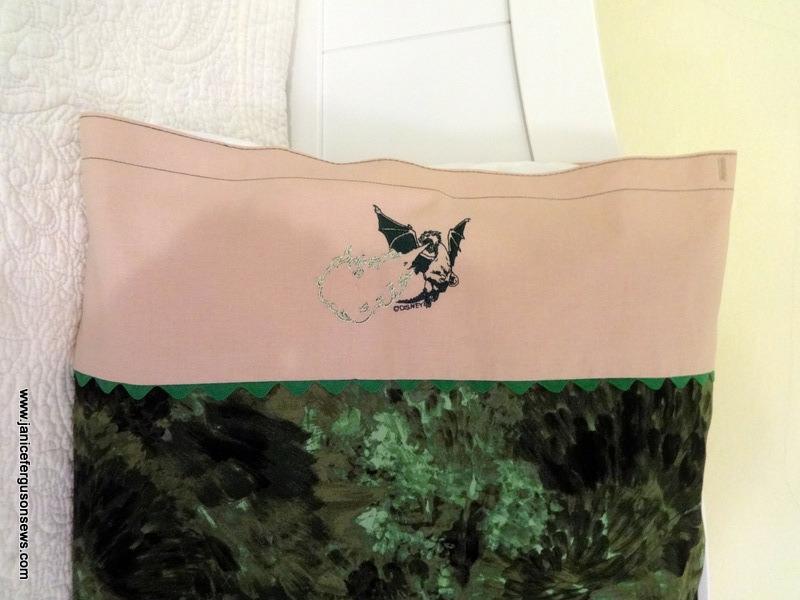
The set includes an a stippled sundry bag for his toothbrush and personal grooming items, embroidered shirt and shorts pajamas set, and a pillowcase with a burrito/turn tube hem. A drawstring makes it a tote for carrying all his gear to a sleepover.

You can see that the buttonhole is empty. For the child’s safety, the drawstring must be removed when the tote becomes a pillowcase.

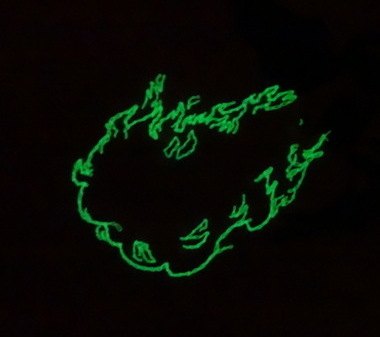
The fun part of this design is the glowing fire spewing from Pete’s angry mouth. After the design was embroidered, I went back over that section with glow-in-the-dark thread. The design is positioned so that as a child lays his head on the pillow, he is looking at the dragon. In the dark, this is what he sees:

Each of my 4 grandchildren are fascinated and delighted by glow-in-the-dark embroidery.  Why not try it on this pillowcase/tote? Part 1 of the tutorial is now posted here at Brother’s blog, Stitching Sewcial.

Wash Me!

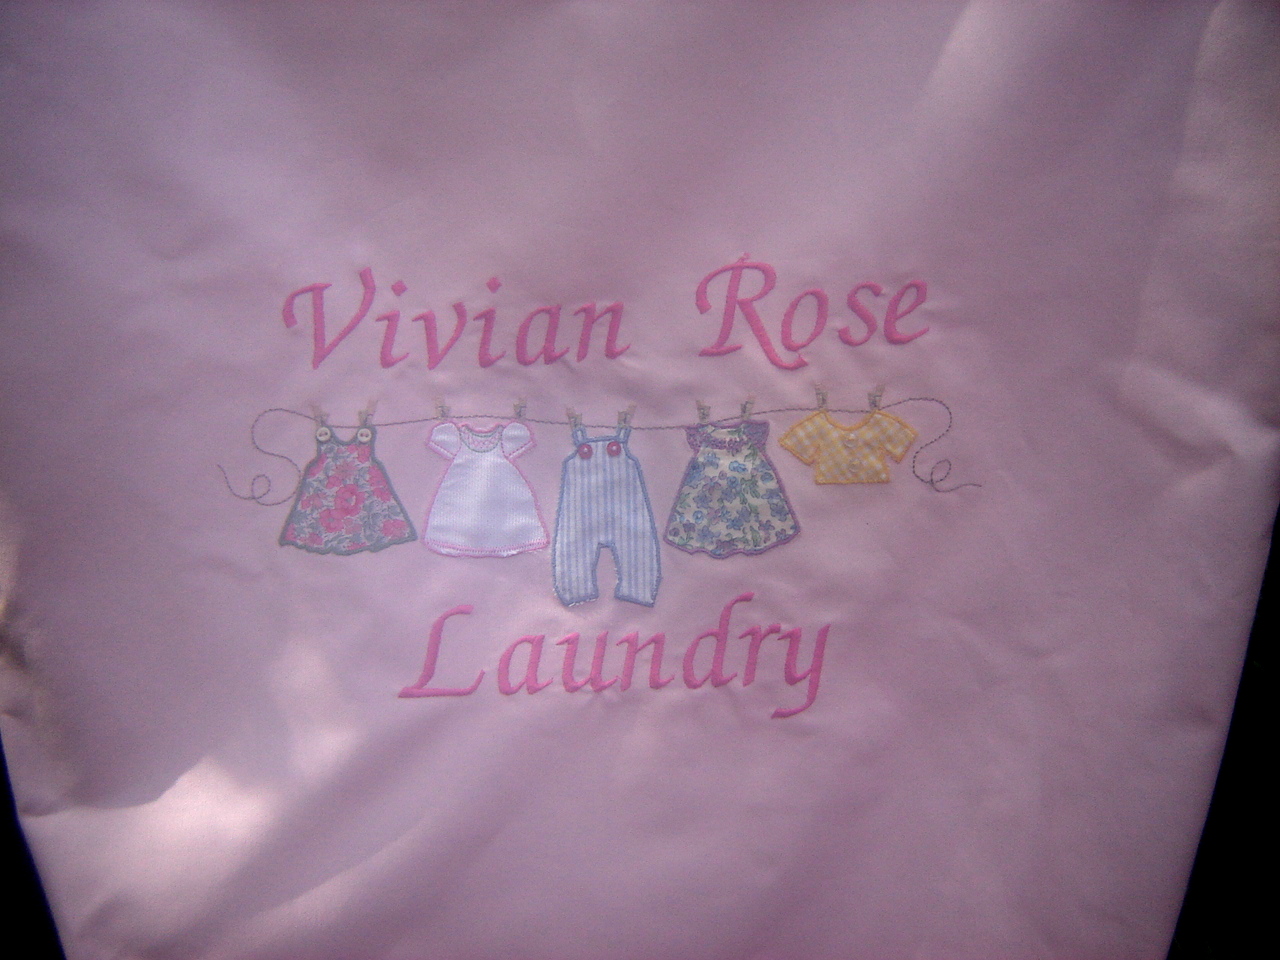
Wash Me – Personalized Laundry Bag

Yeah!  My personalized Disney Alphabet laundry bag tutorial has just been posted on Brother’s blog, Stitching Sewcial.  It was a fun and enjoyable project.  Those alphabet characters are cute as can be.  I felt like a real in-the-know and up-to-date Nana when I recognized most of characters.  I’m studying up on the others.

Check out the post for detailed construction and embroidery instructions.  If you  find it interesting or useful, I’d really appreciate a comment left on the blog.

Like dishtowels, my favorite hostess or whatever gift, a laundry bag can be used even if it’s not in the recipient’s favorite colors.  It’s good for children, campers, college students and even adults.  I meant to make one for my elderly Aunt Aileen when she moved into a nursing home.  Sadly, she left us before I got it made but I know she would have loved it.

“Laundry bag” sounds so utilitarian and boring.  But they can be a fun and gentle reminder for children (and others) to bag up those dirty clothes.  For each of my grandchildren I have made a bag and they are used regularly.  When she was here for the weekend, 3 yo Vivian Rose asked where her laundry bag was as she put on her pajamas. With no reminder, she put that day’s outfit in the bag and went to brush her teeth.


dsc06911 Continue reading

Star Wars Party Favors

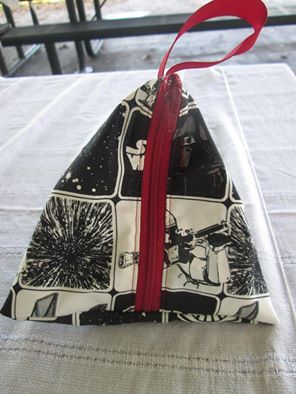
black tp front

The black and white bags were made from scraps, left over from this super hero cape.

Sometimes you can learn something that seems rather inconsequential at the time but, in fact, it turns out to be a pretty big deal. That’s how Mary Lou Nall’s “inconsequential” teepee bag project became one of the most useful sewing tidbits I have ever picked up. I still have the bag I made in that class more than 30 years ago!

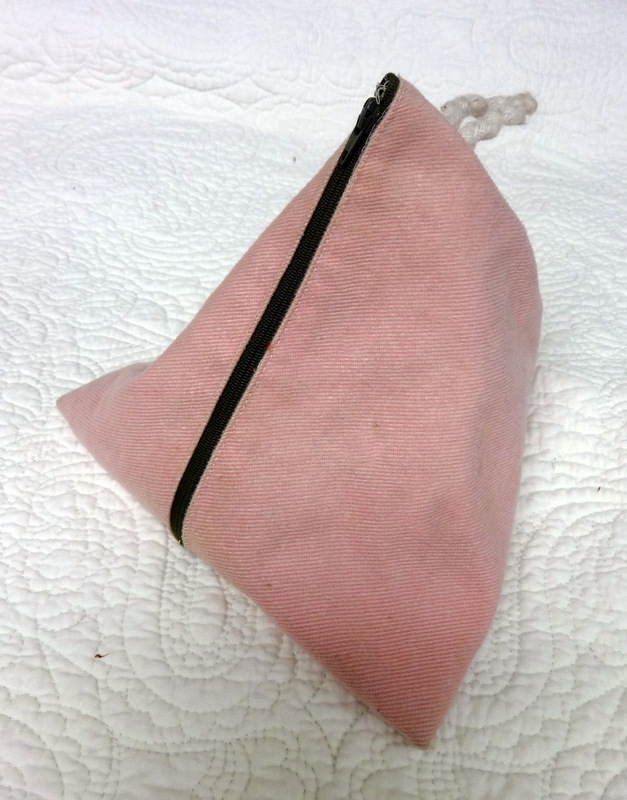
This grubby bag lives in my pleater box and holds my pleating supplies--screw driver, extra needles, small scissors, marking pen, etc. I guess I should wash it.

This grubby bag lives in my pleater box and holds my pleating supplies–screw driver, extra needles, small scissors, marking pen,needle threader, etc. Apparently, it’s long overdue for laundering. I guess I should wash it.

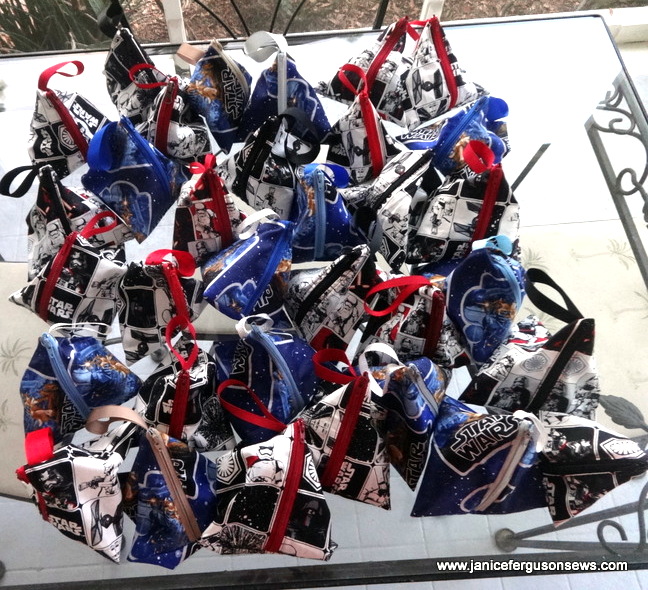
I’ve raved about this before, but I’m compelled to it up again, since I’ve just made 38 more as party favors for grandson Alastair’s 7th birthday.

38 Star Wars bags for party favors

38 Star Wars bags for party favors. Zipper and ribbon color is varied which makes it a little easier for children to identify their own personal bag.

Sometimes I wonder just how many I have made in these 30 years, but the number must be in the hundreds. Continue reading

Thanks to Blanks–Quick Gifts

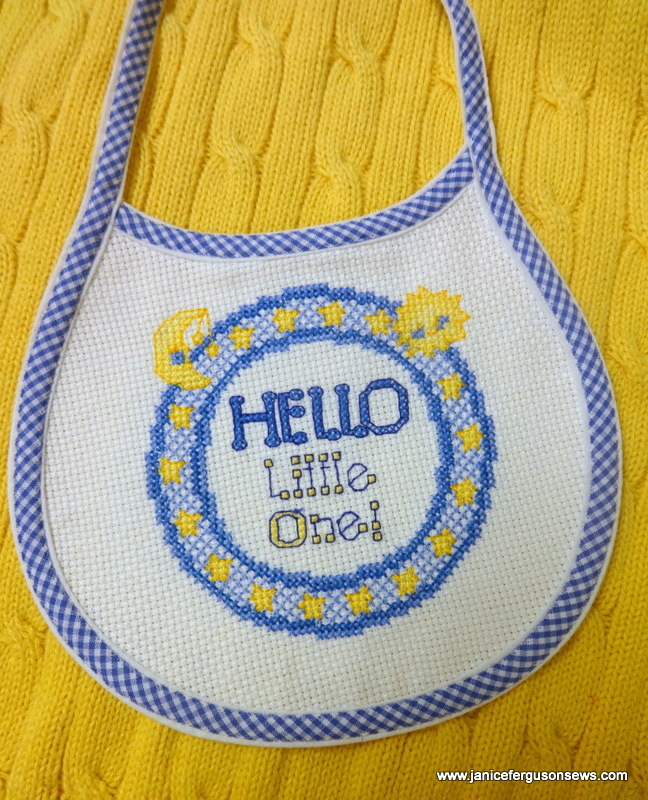
From ho-hum plain to sweet with the help of machine embroidery and spaghetti bias.

From ho-hum plain to sweet with the help of machine embroidery and spaghetti bias.


Lately, I’ve been in need of a variety of really fast projects, for a baby, a bride, a guy, a little girl and a young lady.  I know of nothing faster than starting with ready-made blank items.

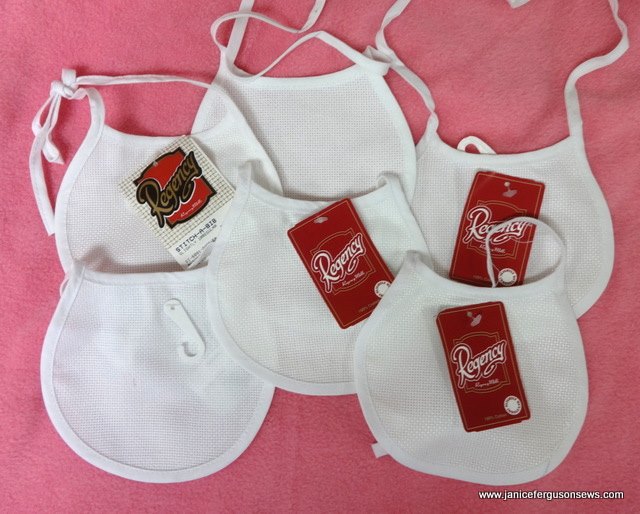
I started with the baby gift.  Years ago I bought several of these blank bibs, bonnets and caps made of Aida cloth or with Aida cloth inserts.   You know how a technique strikes you suddenly.  Machine embroidered cross stitch–yup!


plain aida bibs

The plan was to embroider all of these bibs, bonnets and baby baseball caps.   But that didn’t happen.  Oh, I did embroider several for the pregnancy center our church supports.  But I sold most of them for a pittance.

When the needs rolled in for these in-a-New York-minute projects,  only one plain white one bib was left, though I’d rather have had one with blue gingham binding.  Why does it always happen that you have things lying around for years, then once they are gone you need them ASAP?  Who knows?

Even with the cross stitch embroidery, the white bib was boring.  So I pulled out some spaghetti bias from my stash and stitched it right on top of the white bias binding.  I was generally pleased with this little gift.

It seems to me that cotton thread makes machine cross stitch look more like hand stitching.  So the bib was stitched with 50 wt. DMC machine embroidery thread.  I really like that thread.

Then I moved on to something for the bride.  A new but vintage handkerchief from my collection was just what I needed for a second project.   The linen, hand crocheted edging and hemstitching fit the bill for “something old, something new, something borrowed (well, it COULD be loaned), and something blue.”  This was reeeeeally fast. Continue reading

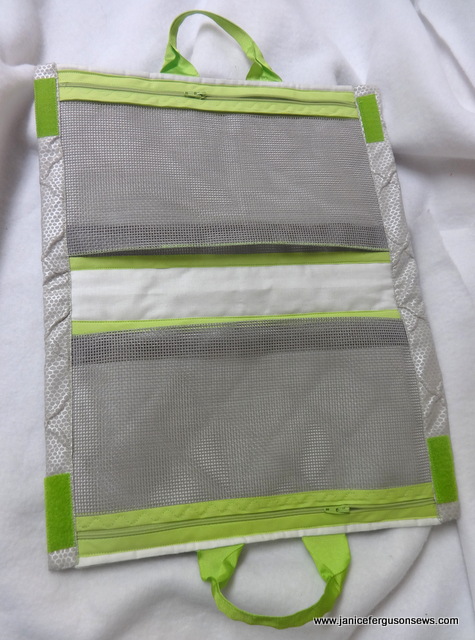
Cool Tool Case

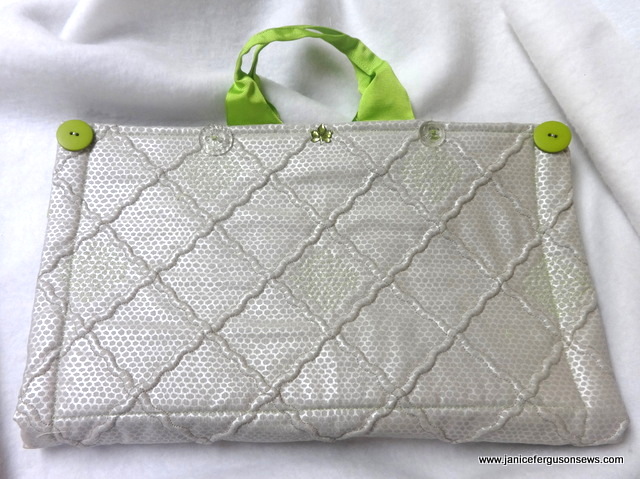
bag closed empty


As a self proclaimed Old Fashioned Nana, cool isn’t a style I embrace.  But this lime green and silver  sewing machine tool bag really is cool.  It looks almost futuristic, like something that should be a space shuttle carry on.

Of course, if I were to fly to the moon in that big, scary bird I would take my Dream Machine along.  And of course, I would need my accessories packed in this cool tool bag.


Notice the pleat at the bottom of each screening bag. The free edge has been zig zagged with lime green thread to secure the crease and to add another touch of lime.    color.

Notice the 1″ pleat at the bottom of each vinyl mesh compartment.  That allows the bag to expand in order to accommodate bulky  accessories like the walking foot.


This project was designed and taught by teacher extraodinaire Lyn Powers at my home-sweet-home sewing store,  The Sewing Studio , just outside of Orlando.  I am so fortunate to live near enough to shop and learn there.  The all-day class was one of a series of 8 for owners of Brother’s Dream Machine and Babylock’s Destiny. NOTE:  If you have an extra minute, you might enjoy the little story at the end of this post.

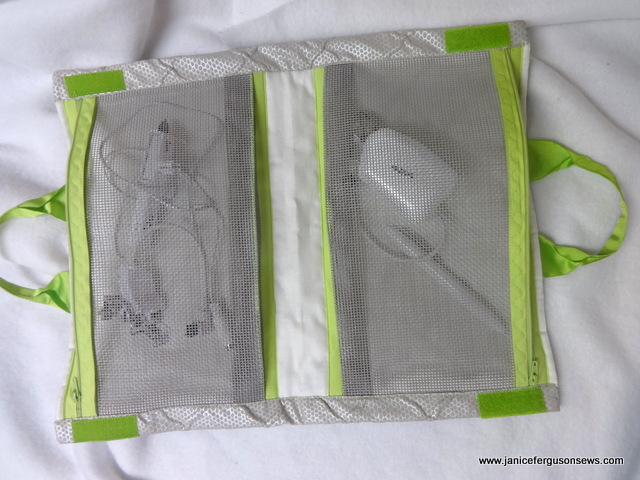
The bag is so useful!  It holds those miscellaneous, fabulous tools that go with today’s sewing machine.  Many of these do not fit in the machines’ accessory cases and many require careful handling.  They really shouldn’t just rattle around loose in a drawer by the machine.  The batting offers protection to these valuable accessories.


bag loaded open xx

Currently it is loaded with my walking foot, embroidery foot, and sensor pen with more to come.


The silvery cotton fabric was quilted with a serpentine stitch and a 6.0/100 twin needle.   Alternate diamonds were stippled in the hoop with lime green thread.  Have you ever seen lime green velcro????  It was imported from France just for this class– made me feel pretty important! Continue reading