

24″ quilt for American Girls dolls
I’ve always wished I could come up with a catchier name for this technique, but Flannel Board Quilting is the best I can do. Through the years in various classes taught and articles written, I have called it Grid Quilting or Faux Quilting, but none of those titles pleased me any more than Flannel Board, which has a meaningful basis.
 But enough about the name. This is a very useful technique for quick and easy projects. Let me tell you about it.
The idea for this method originated from a request by sweet Debbieanne Prusserman, hostess of the New England Academy of NeedleArts doll school held on Cape Cod some years ago. Mildred Turner and I were the teachers and had been charged with designing an American Girl’s wardrobe. The school was fabulous and we had a grand time, staying in Debbieanne’s historic 1790 home and teaching in her studio with a group of wonderful ladies.Â
After the school, we toured Cape Cod and Martha’s Vineyard with Debbieanne, her charming mother Mary and one of our students. This student was a darling lady who drove like a New York taxi driver in her mini van which belted out seafaring chants with no more provocation than a bump in the road. And there were lots of bumps.  Mildred and I alternated between laughter and prayer. But that’s another story.
Now back to the technique. Before the school was held and after Mildred and I were busily designing and sewing at home in our individual sewing rooms, Debbieanne called to request that I teach a doll quilt in a night class. My response was immediate and enthusiastic. “Sure! I would love that!!!”
But then came Debbieanne’s bombshell. None of the ladies had ever quilted. And there would be 3 hours of class to make the quilt. Whew! That was a big order.
The first thing I thought about was the 2-3,000 2″ squares left over from my brief fling with watercolor quilting (which I loved). After several ho-hum little quilts, I came up with the simple but do-able project shown above.
This is not a quilt in the traditional sense, with three layers of a top, batting and backing. It is simply a piece of flannel with the raw-edged print fabric fixed in place with decorative stitch.
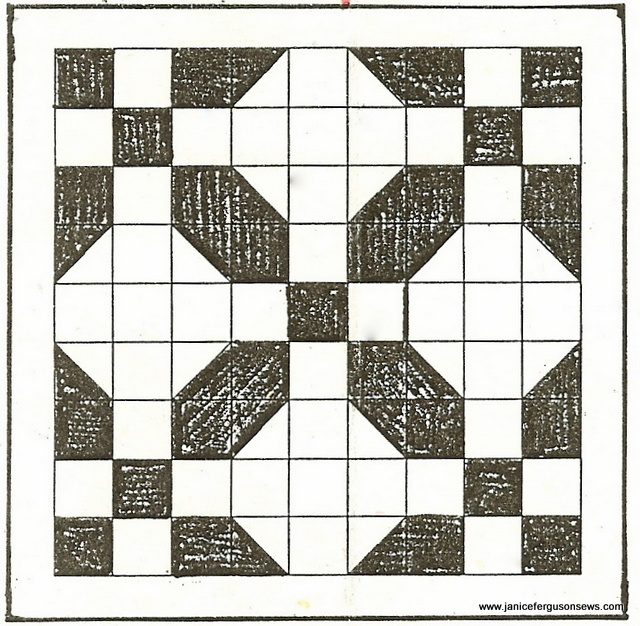
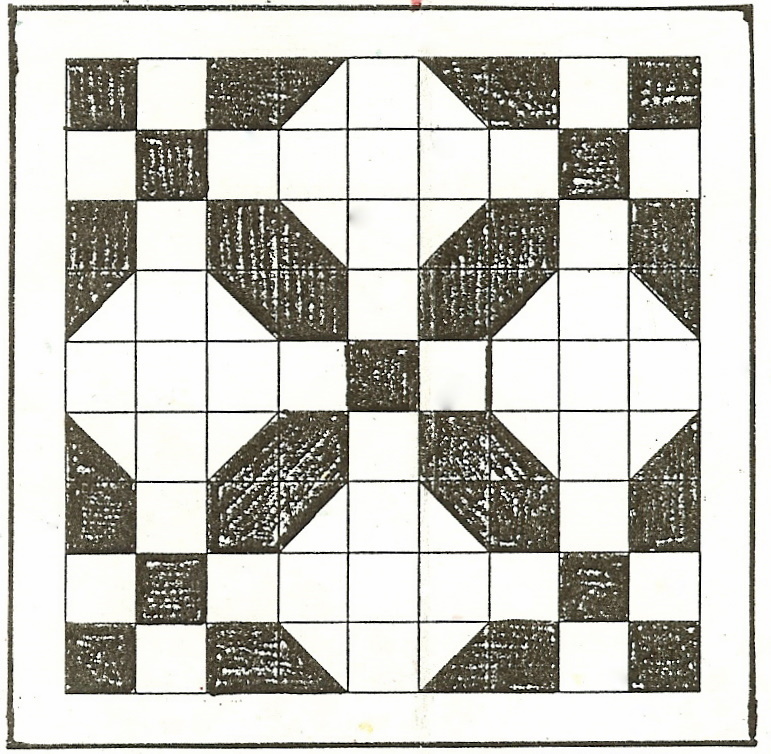
Essentially, the concept is dependent on a grid. On a 24″ square of chunky, lush flannel I drew a 2″ grid with a washaway marking pen. The plan was to place novelty print squares on the grid, creating a snowball pattern, and stitching them down with a wide decorative stitch. It reminded me of the flannel boards I used teaching Sunday School, hence the name, Flannel Board Quilting.
It didn’t take me long to figure out that butting a 2″ square to a half square triangle made little sense. The fabric shifted as I stitched and invariably, in a few places, the ivory base fabric peeked through.
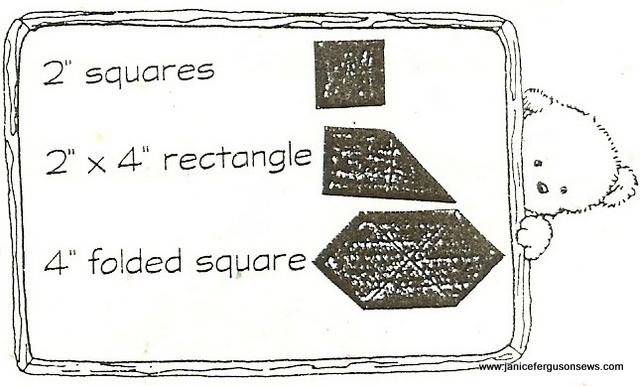
So instead, I used a 2″ x 4″ rectangle and folded one corner under. This created the second shape shown on the above.
In the same manner, diagonally opposite corners of a 4″ square were folded under to create the third shape needed. In both instances, this fold over prevented the exposure of a bias edge which would be most likely to ravel.
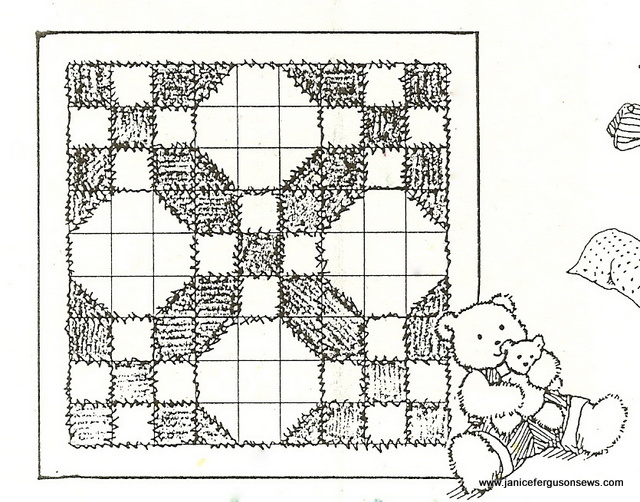
All the pieces were held in place with a glue stick or pin and then basted 1/4″ from the raw edge. Next, a 5 mm feather stitch was worked over the raw edges and through the all pieces where the grid was covered. This not only secured the print pieces but trapped the raw edges so that they could not ravel. By stitching through the whole pieces, the illusion of an honestly pieced quilt was perpetuated. However, the snowball portion was left unstitched so that a machine embroidery could be placed there.
The print fabric I selected for this project featured teddy bears. In the center of each snowball, a heart was fussy cut so that a bear was in the center of the machine embroidered applique’ heart.
I have two tips for executing this kind of quilting. First, heavily starch and press the print fabric before cutting. This gives a clean edge with no ravels before the stitching is begun. There are no wandering threads to corral as the decorative stitching is worked.
Secondly, use the same color thread in the bobbin as in the needle. By doing so, the back side of the quilt shows the pattern and is more attractive and interesting than if ivory thread were used.
The border was another whole matter, to be addressed another time. But even a simple binding would work.
This is such a fun technique, inspired by necessity and Debbieanne’s request. The flannel board quilting method was used on the Gingham Dog and Calico Cat Quilt  showown in a previous post. I have several other examples that will be posted at a later date. But I hope this gives you some ideas for projects of your own.

2 responses to “Flannel Board Quilting”