
This project was designed for Brother machines some time ago, but I am certain you clever readers with other machines can adapt the relatively simple directions and have fun with this. I apologize for the late posting so close to Halloween, but my home in central Florida was in the path of Hurricane Ian. This caused a significant delay. We were blessed to have suffered very minimal damage-a great deal of debris and a downed 60′ palm tree. This graceful palm had Confederate jasmine climbing to its very top before it fell conveniently away from our pool. We continue to pray for those less fortunate whose losses were devastating.
For the fortunate ones, life goes on. Children helped to pick up the fallen branches and asked about their Halloween costumes. Did you know that Halloween is the most popular secular holiday? Celebrate with this kid-pleasing Halloween wallhanging and learn a quick and easy technique. This can be used with other themes and holidays.
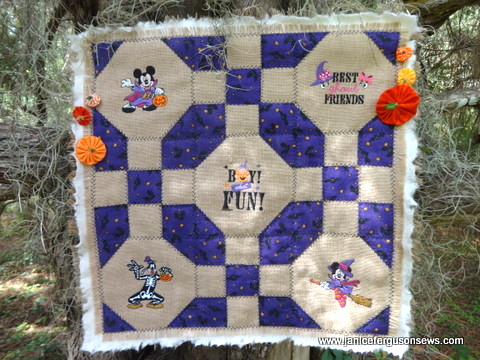
With some burlap, Brother’s wholesome Disney Halloween machine embroidery collection from ibroidery.com and some seasonal fabric you will be on your way. Discover and master a unique, easy and fun faux quilting technique. Children will be delighted when they see Goofy’s skeleton glow in the dark.
Requirements
Fabric:
*Halloween print—four 4” squares, eight 2 x 4” rectangles, eight 2” squares, 19 x 3 ½” for sleeve
- burlap 19 1/2” square for front, 25” square for backing. This is extra large to account for the many ravels as the piece is handled. Later it will be trimmed to size.
*orange scraps for yo-yo’s
Cotton batting 22” square
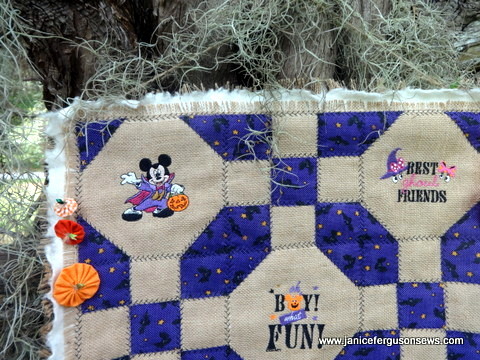
Ibroidery.com Disney Halloween designs: DMHLW01–Mickey with pumpkin, DMHLW02–Minnie with broom
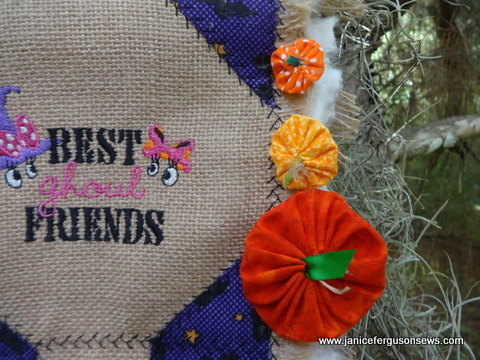
DMHLW03—Goofy skeleton costume, DMHLW04—Best Ghoul friends, DMHLW05—Oh boy what fun
Notions: tearaway stabilizer, spray adhesive, chalk marker, glow-in-the-dark thread, embroidery threads, black cotton sewing thread for decorative stitching, bits of green ribbon for pumpkin stems OPTIONAL: glow-in-the-dark thread, chalk marker, spray adhesive
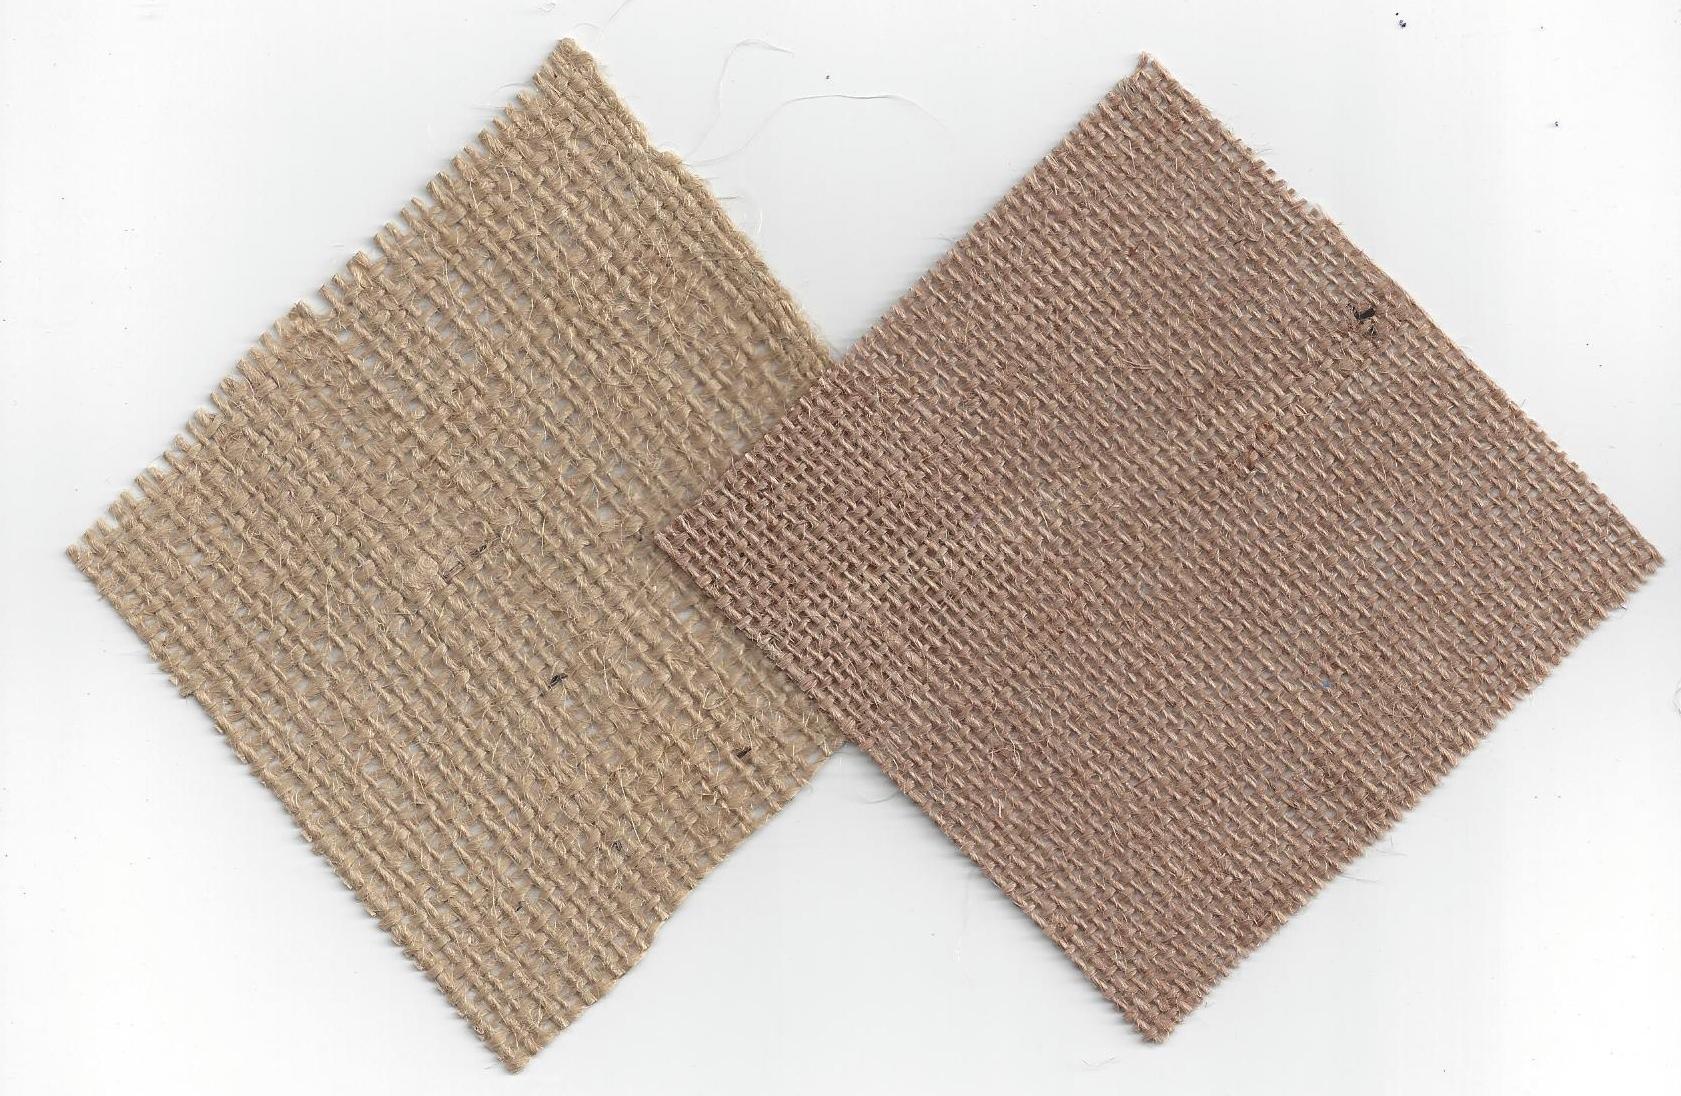
TIP: While any burlap can be used, a better quality makes it much easier to create the necessarily accurate grid. Note the difference in the two qualities of burlap.
PREPARATION
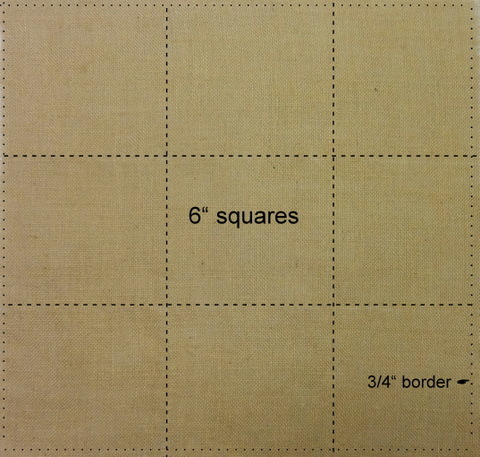
- Pull threads on burlap creating a 6” grid with ¾” border.
2. Starch and press the Halloween print until very stiff and crisp.
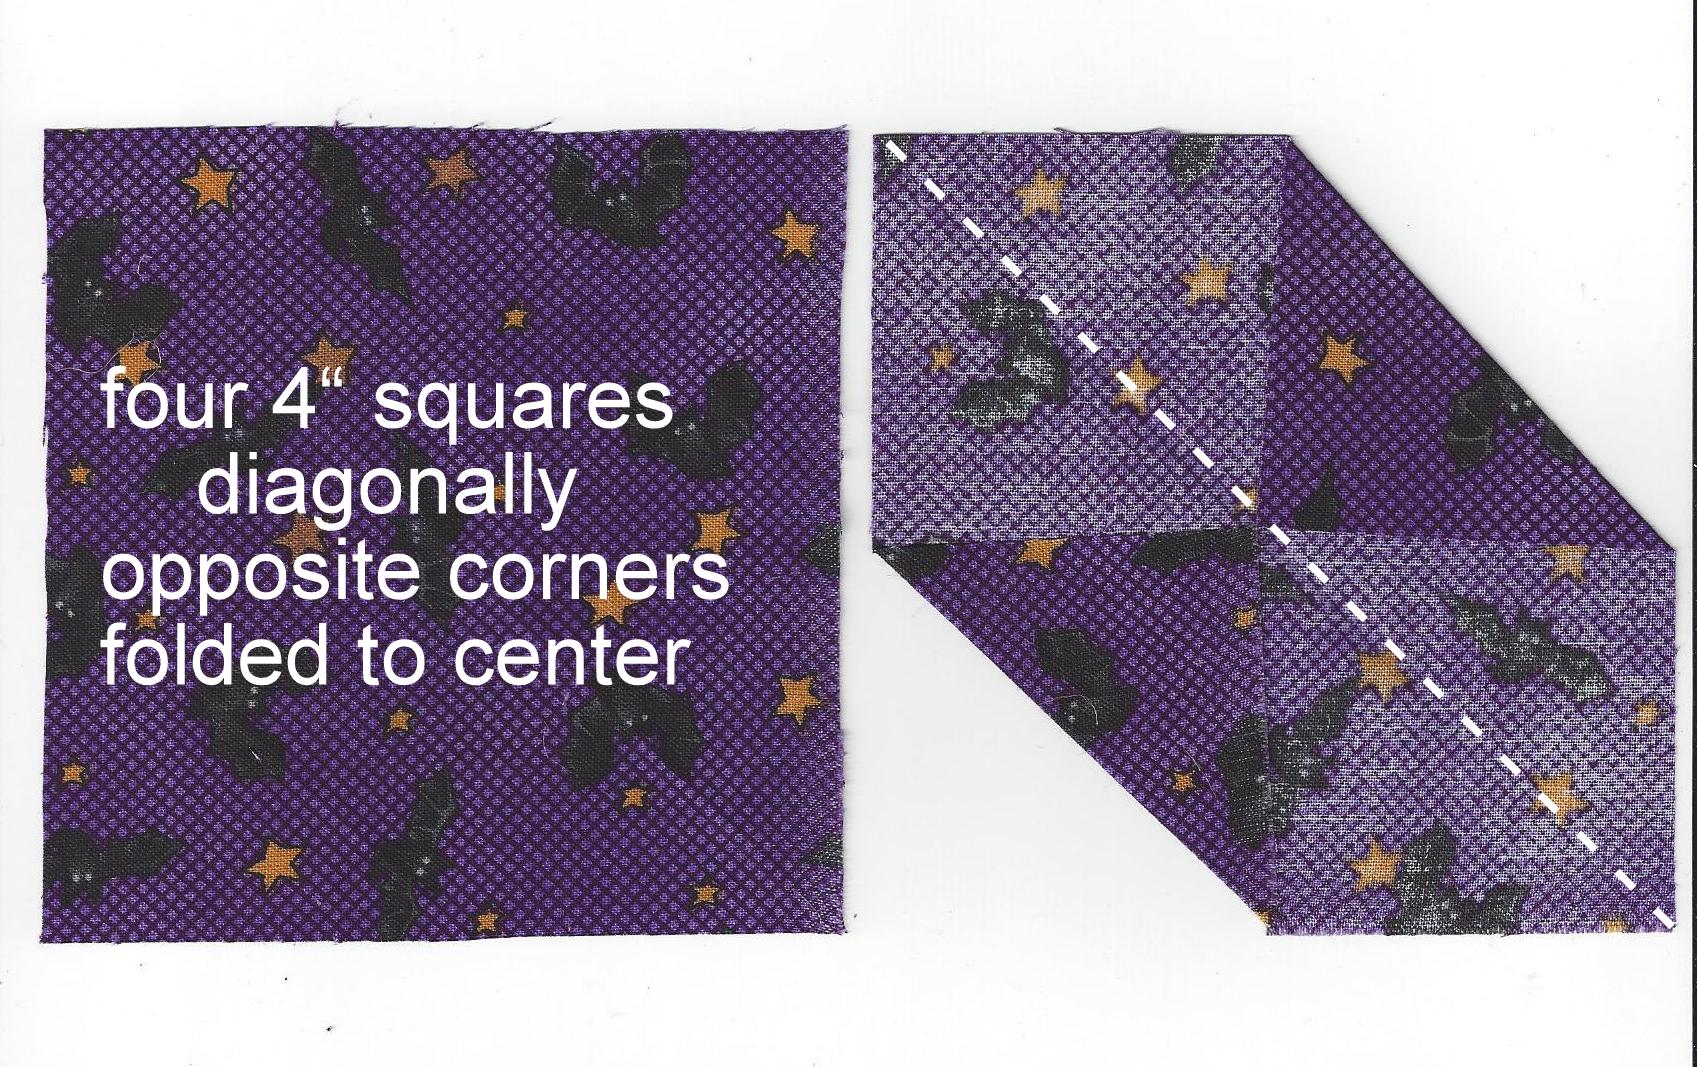
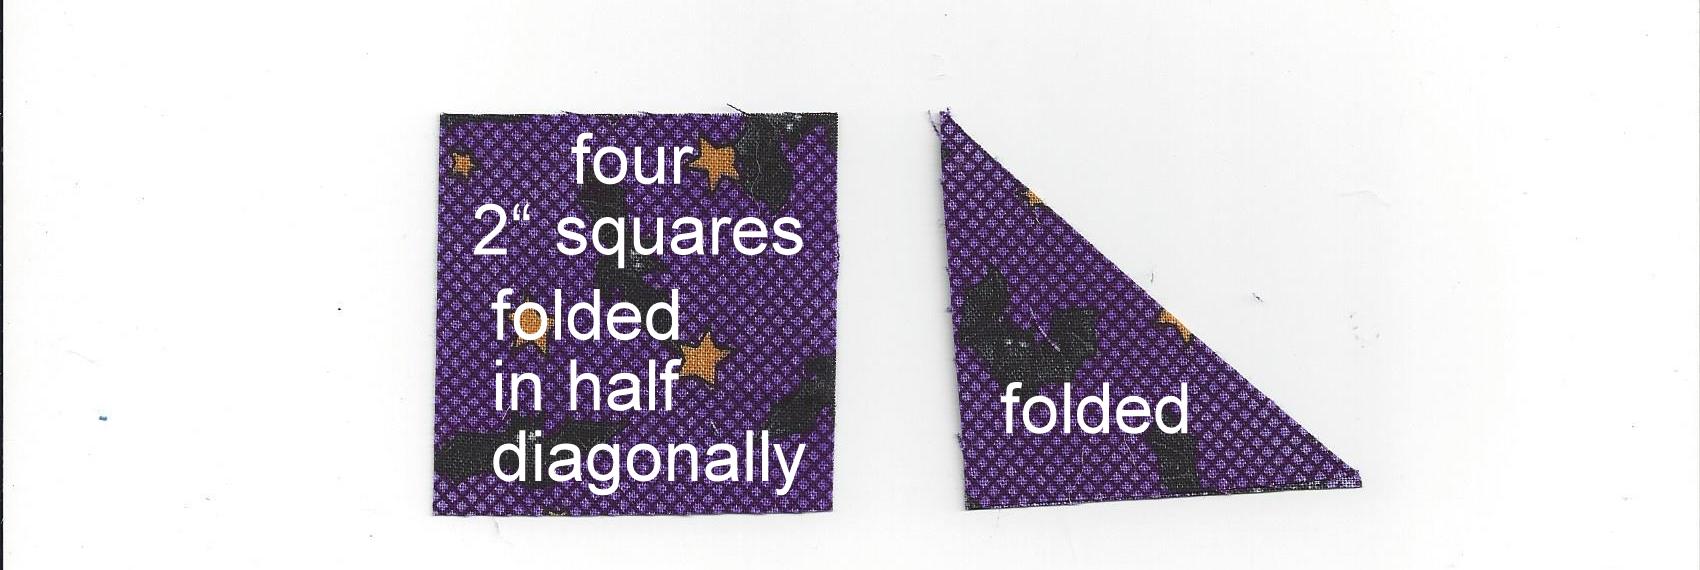
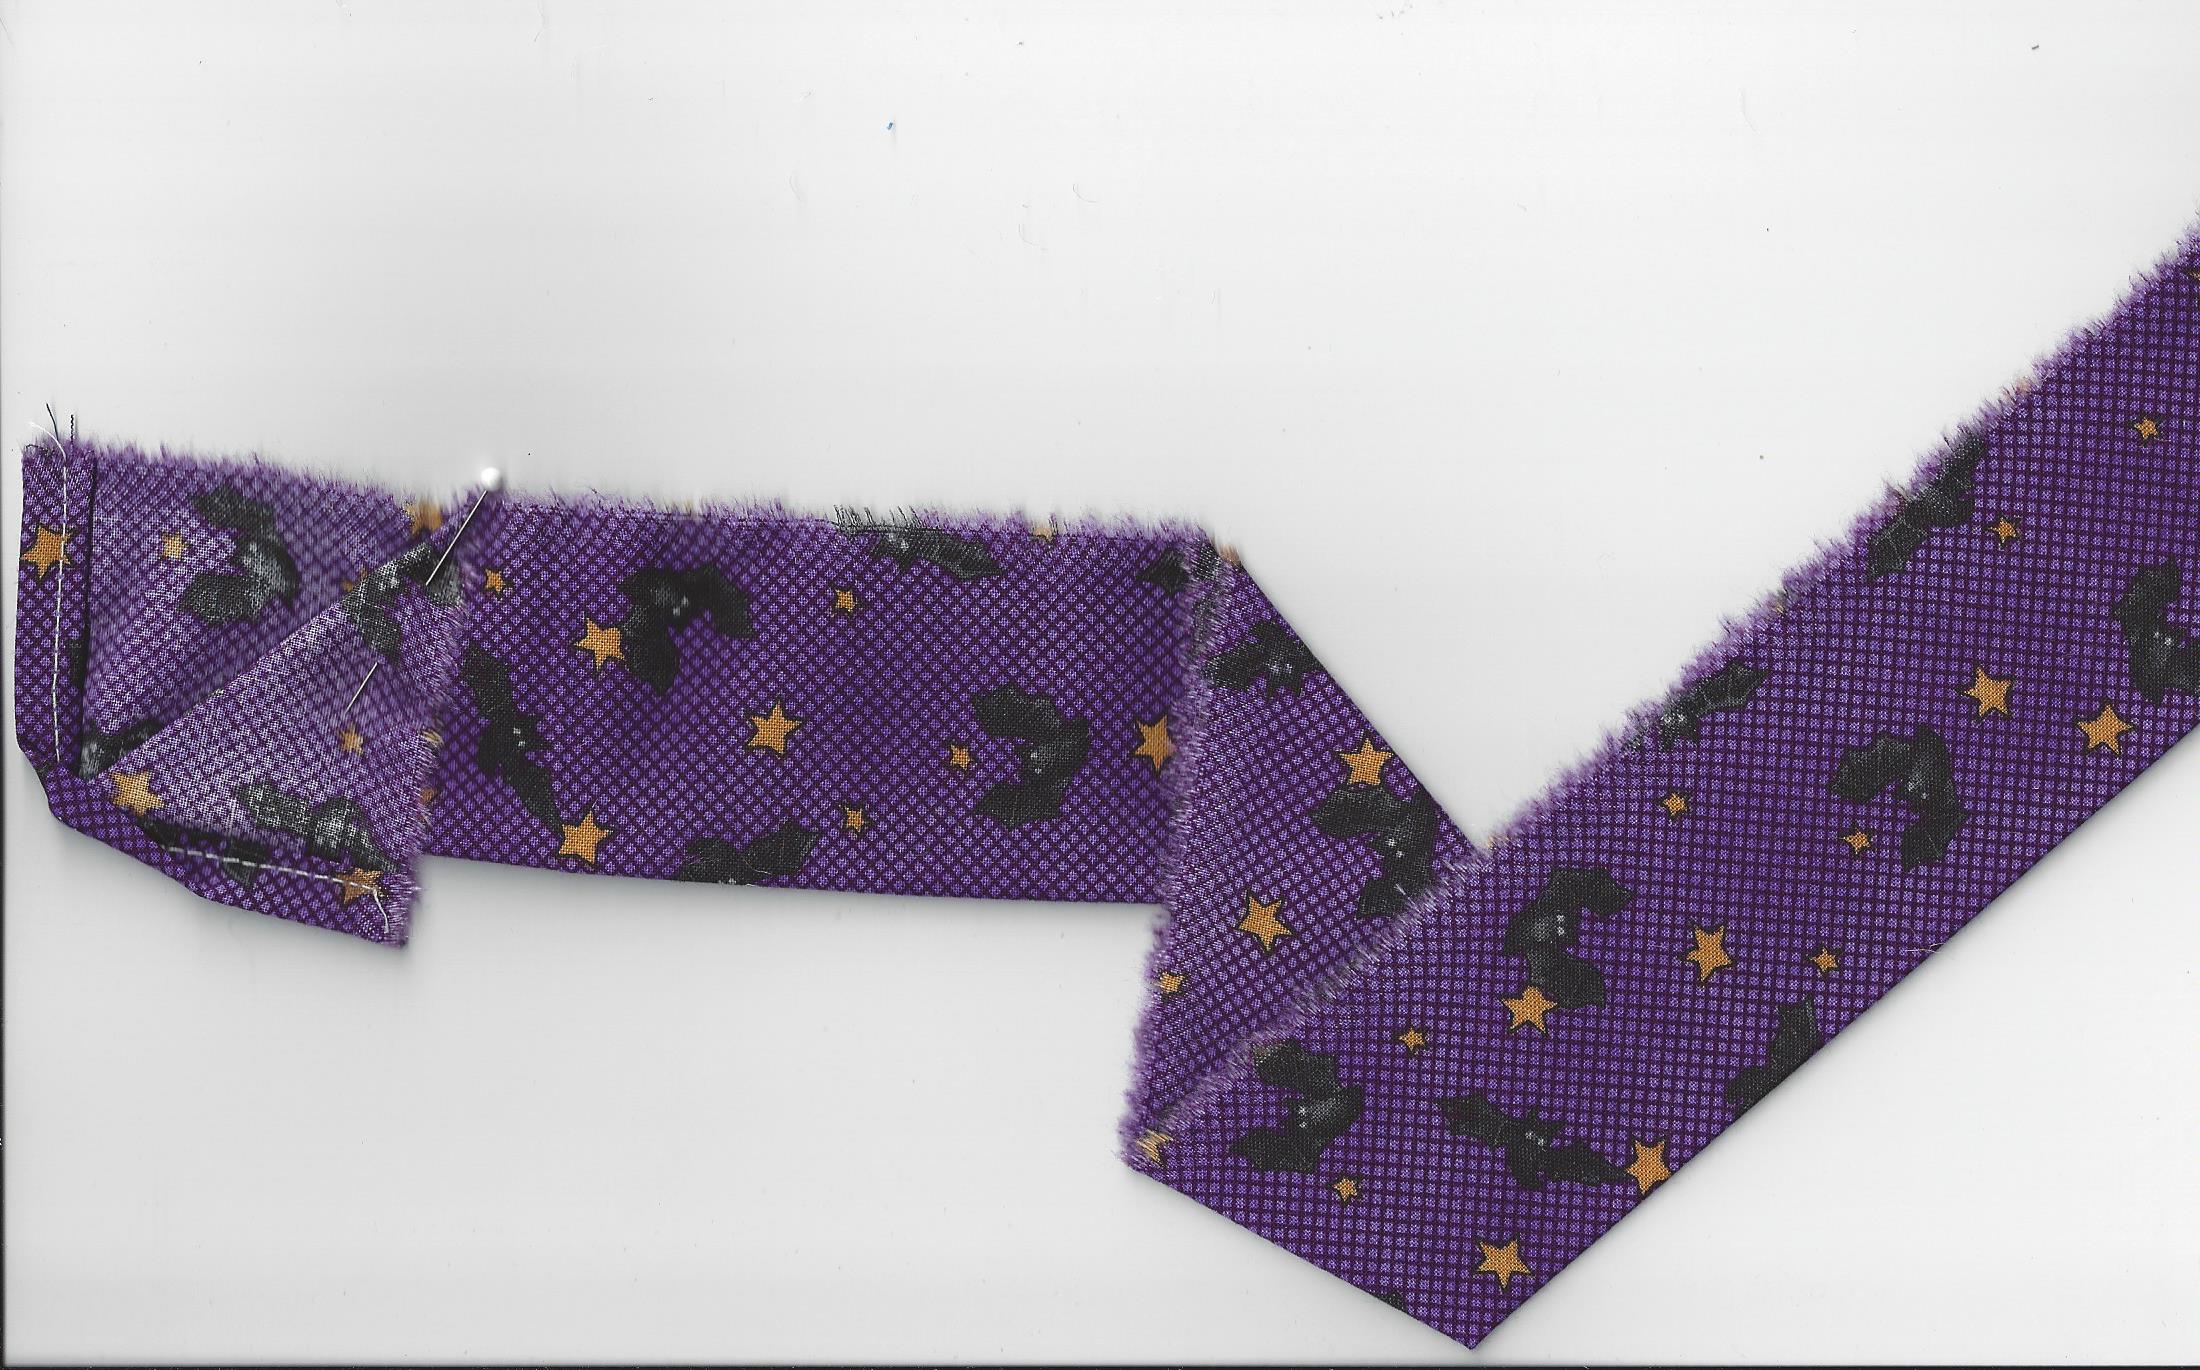
3. Press four 4” squares as shown, with diagonally opposite corners folded to center.
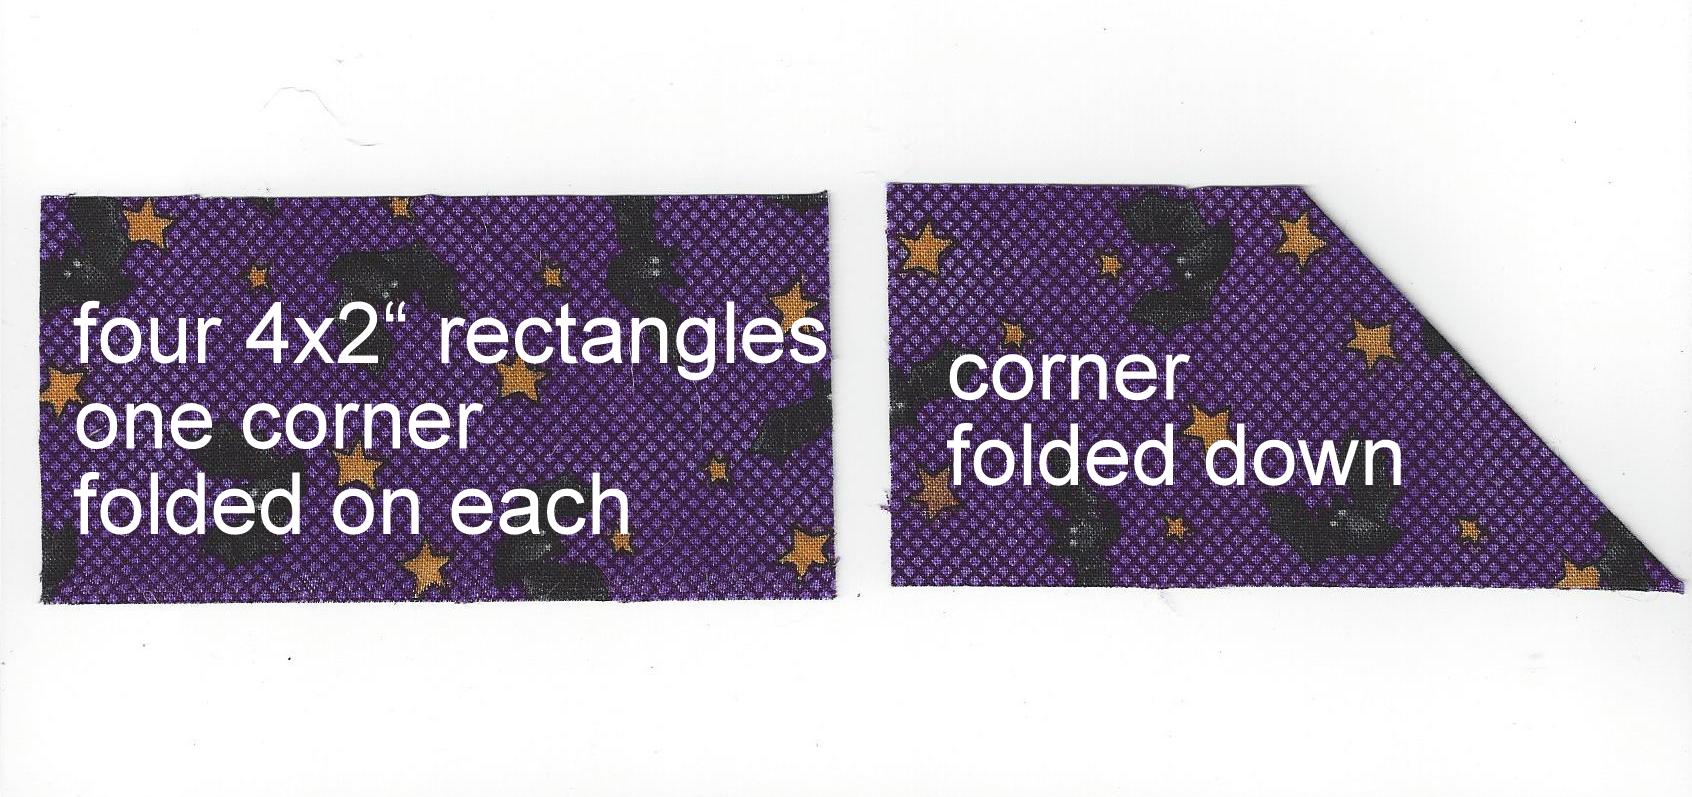
4. Press four 2 x 4” rectangles with one corner folded up as shown.
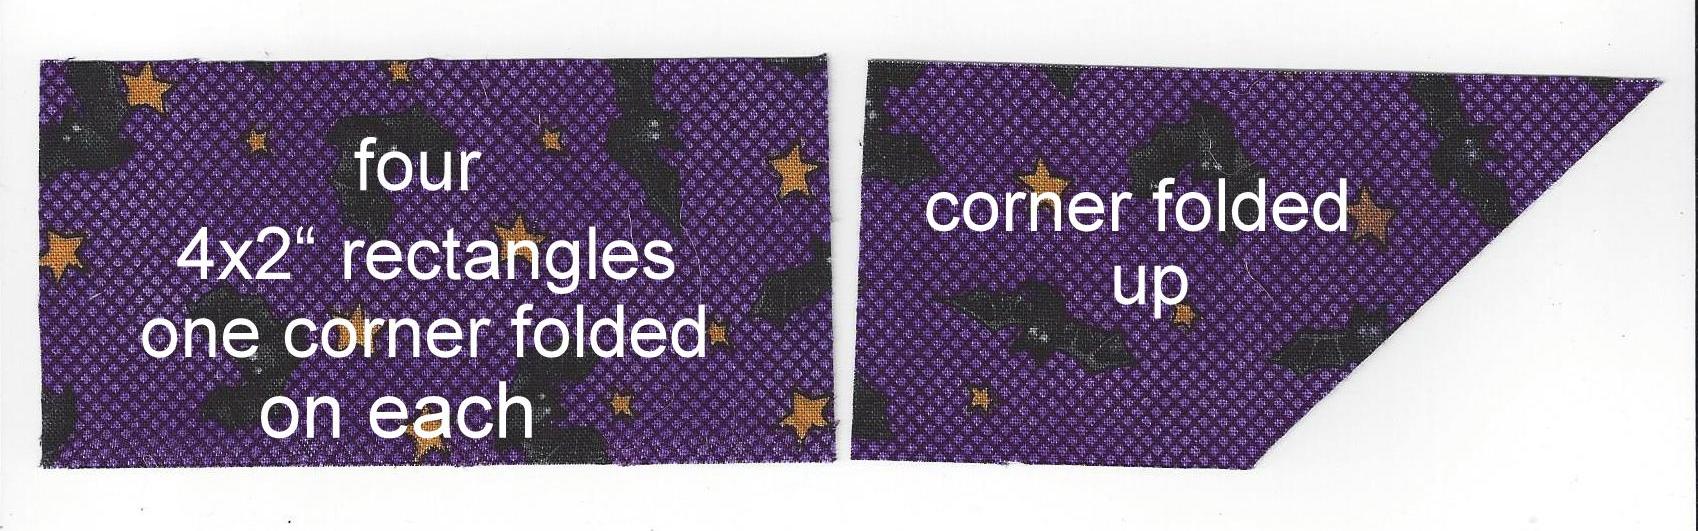
5. Press four 4” x 2” rectangles with one corner folded down as shown.
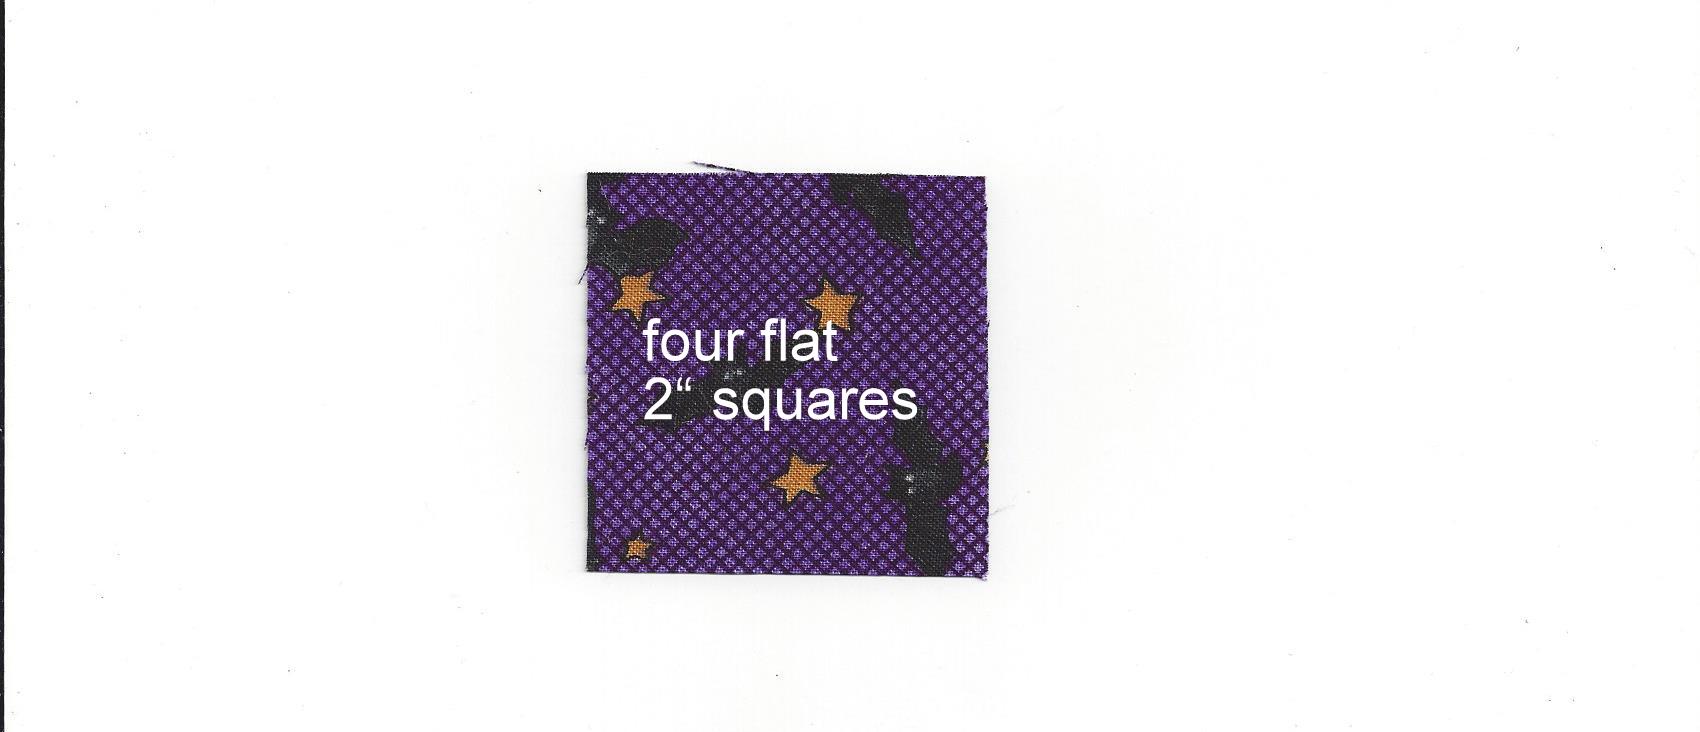
7. Press four 2” squares flat.
By combining the shapes into larger pieces, then stitching over where seams would have been, it gives the illusion of many pieces being joined quite perfectly to create this pattern. Folding many of the edges under, particularly the bias edges, gives a very neat appearance. The decorative stitching covers the raw edges and makes short work of what could be a very time consuming project.
8. Press under ½” on each short end of sleeve piece and stitch in place. Fold in half lengthwise, wrong sides together. Set aside.
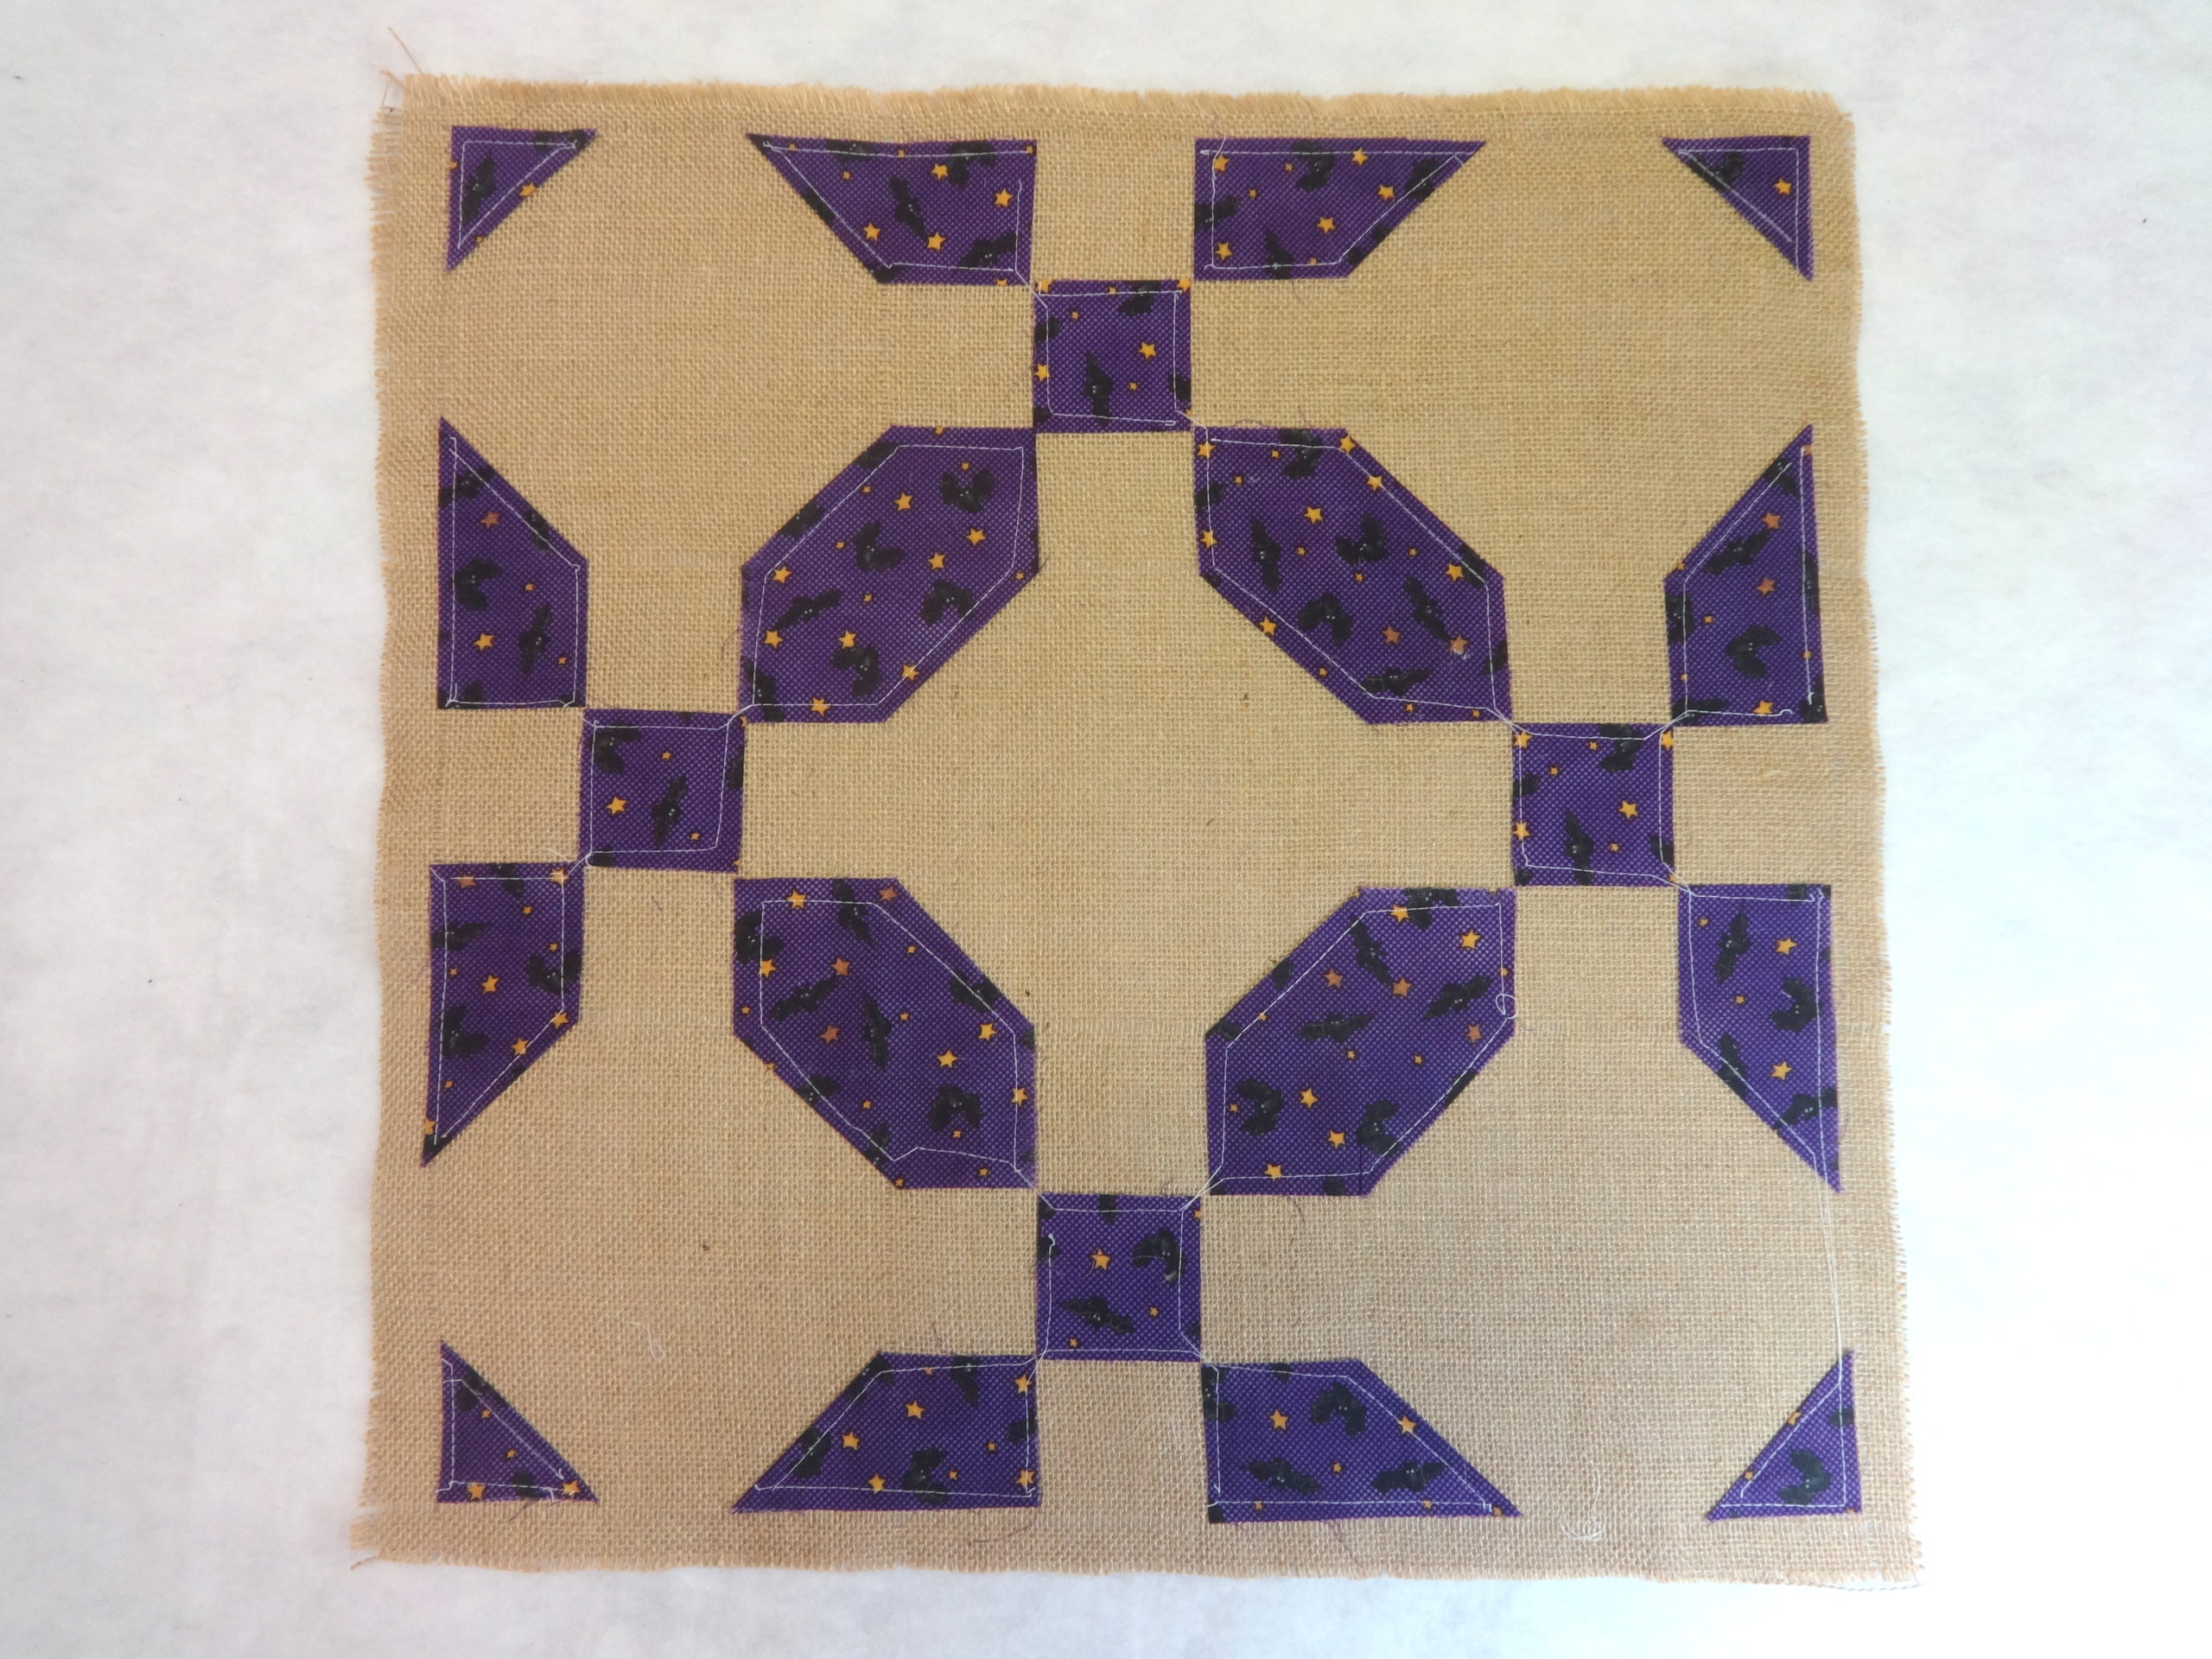
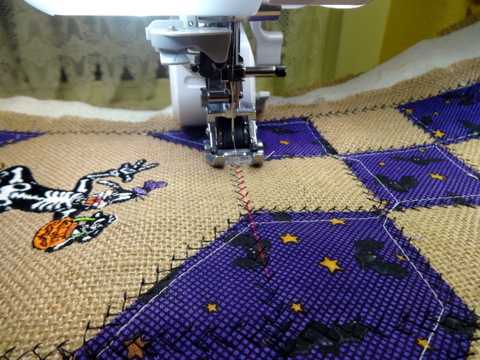
9. Baste Halloween pieces in place on burlap. Use of the knee lift leaves both hands free for frequent pivoting.
10. Spray batting with adhesive. Place burlap on top of batting.
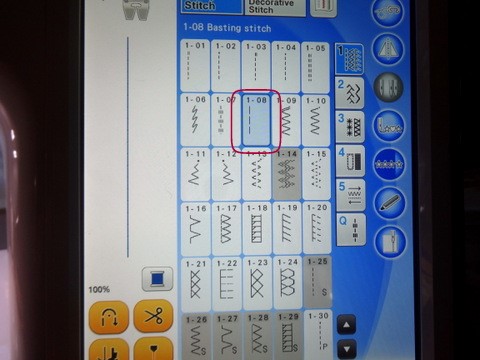
11. Select stitch # 108 in the utility menu. Baste through all three layers.
TIP: The Muvit dual feed foot makes quick work of this process. The walking foot is also effective.
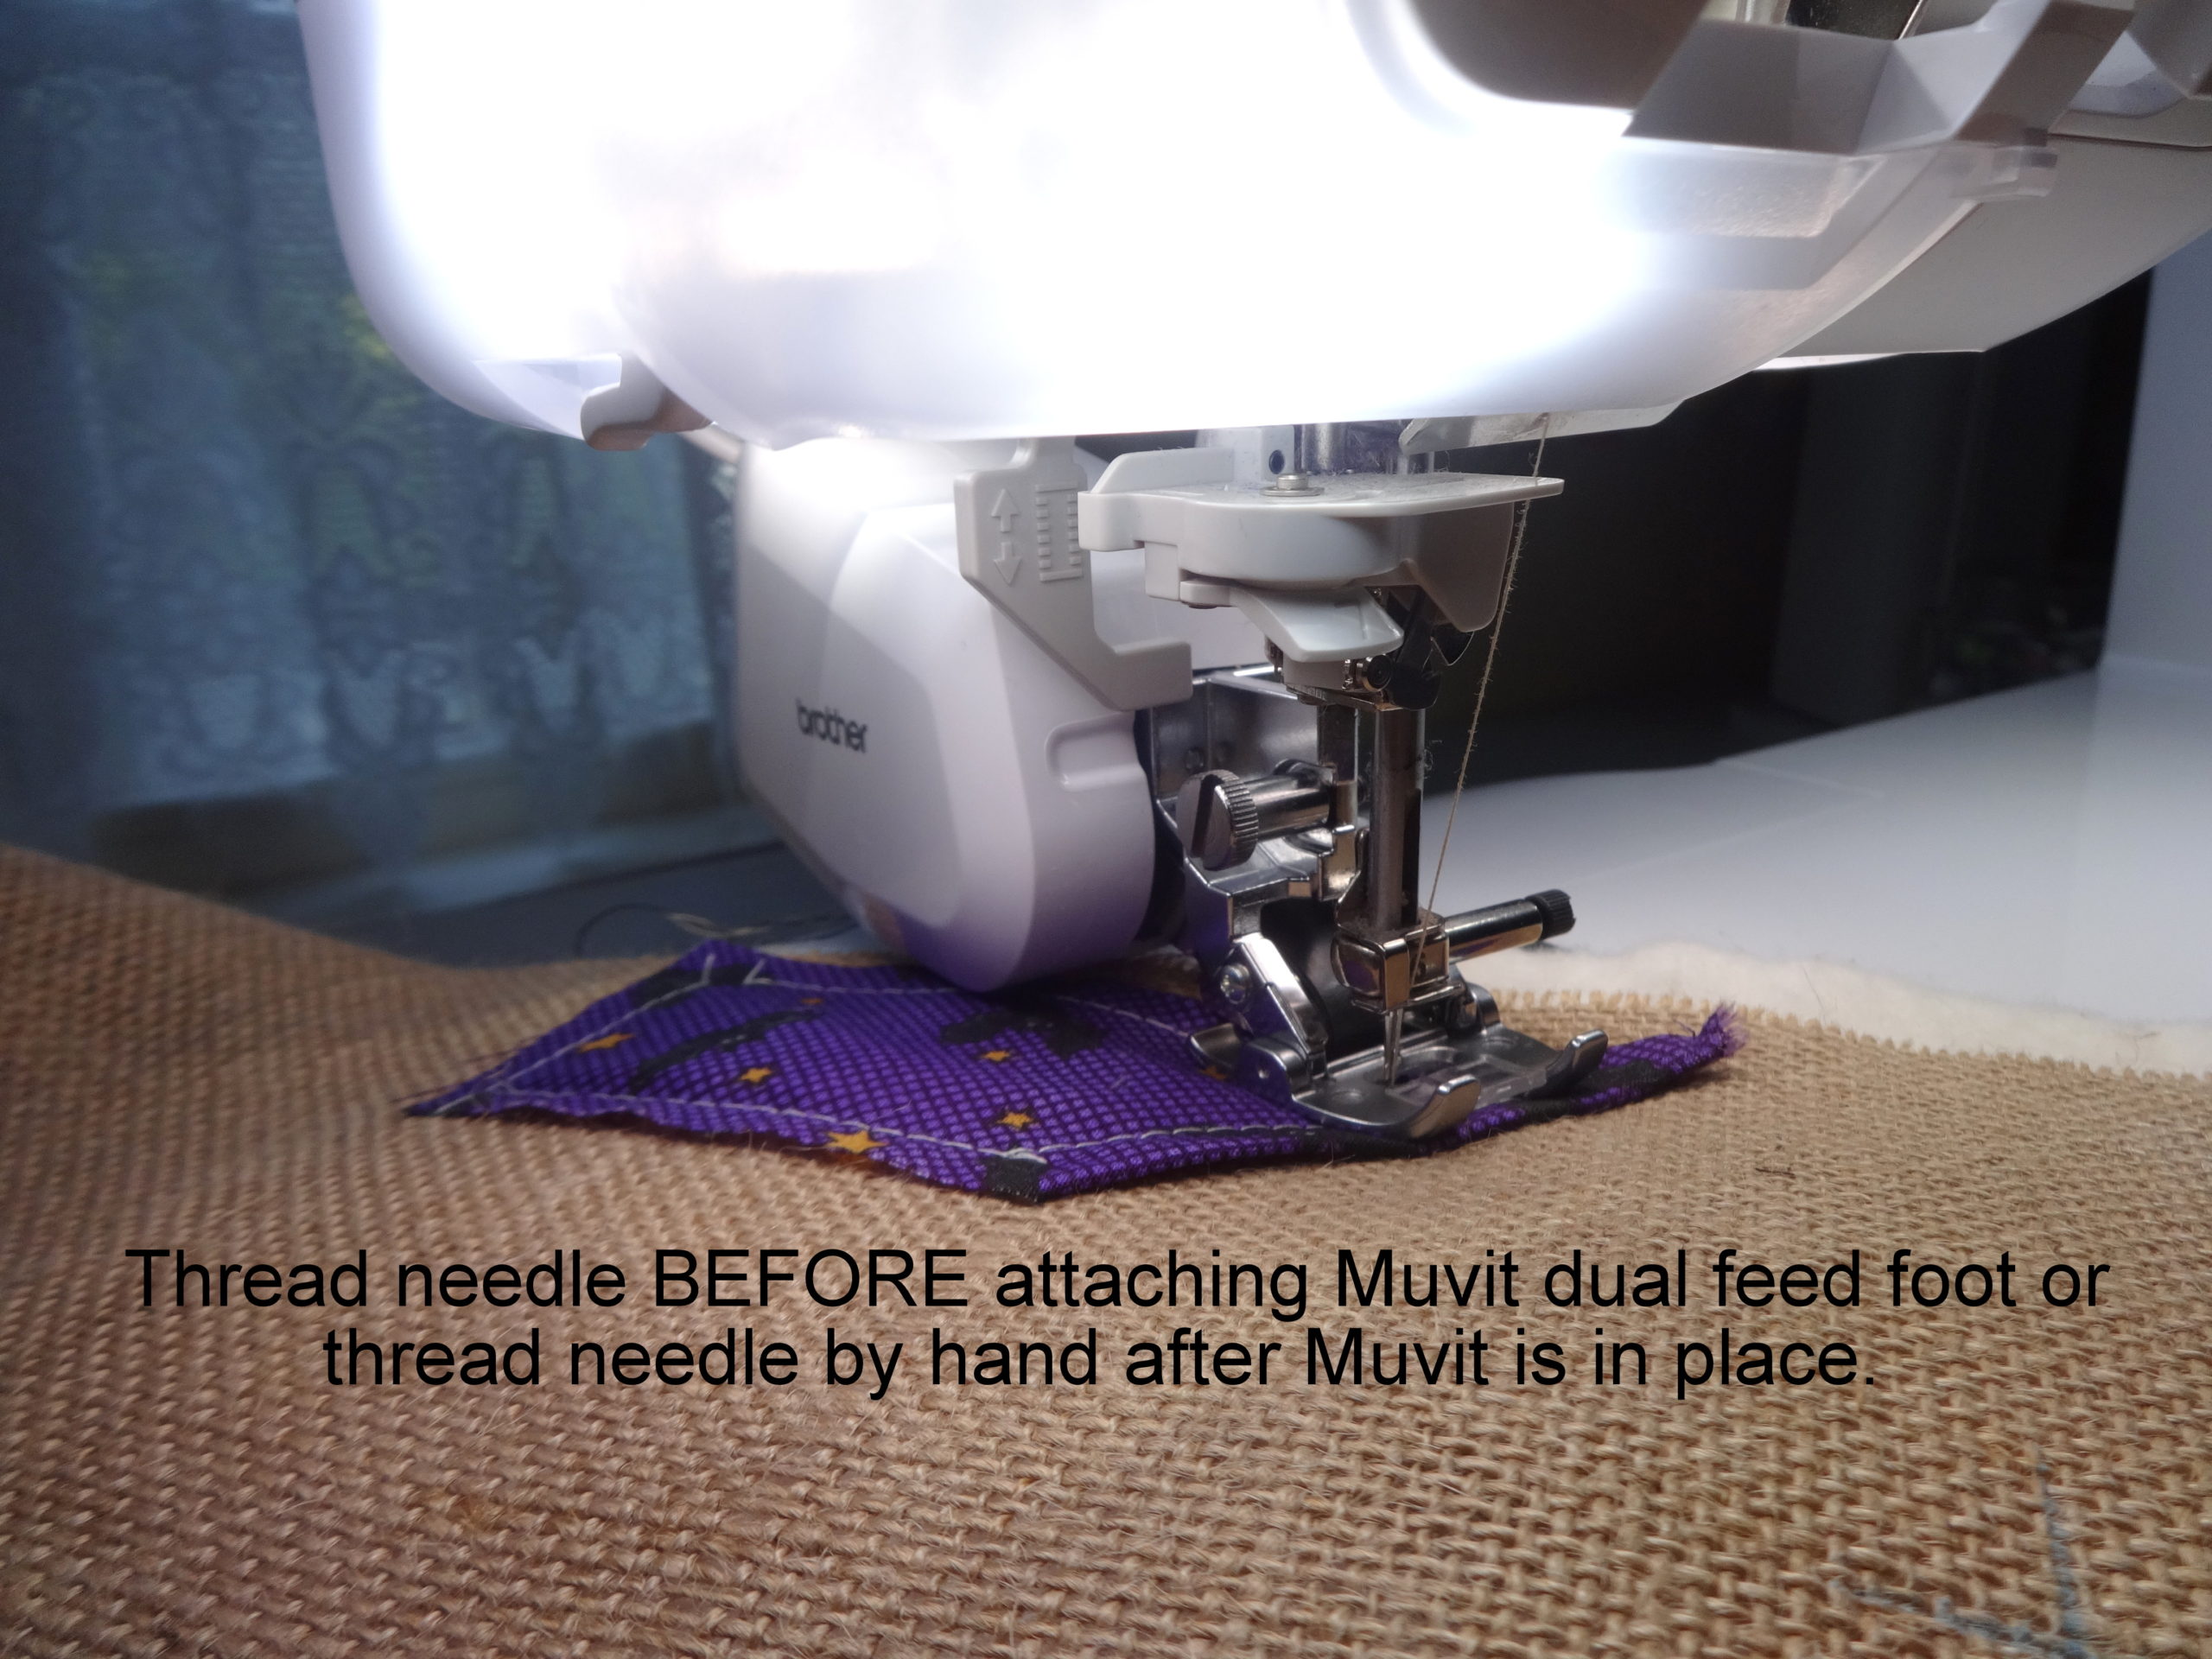
ANOTHER TIP: Use thread color to match Halloween fabric. If basting threads become trapped in the embroidery, they will not show.
AND ONE MORE—CAUTION: Be alert when embroidery foot approaches the lengthy basting stitches. It helps to remove nearby basting threads when embroidering.
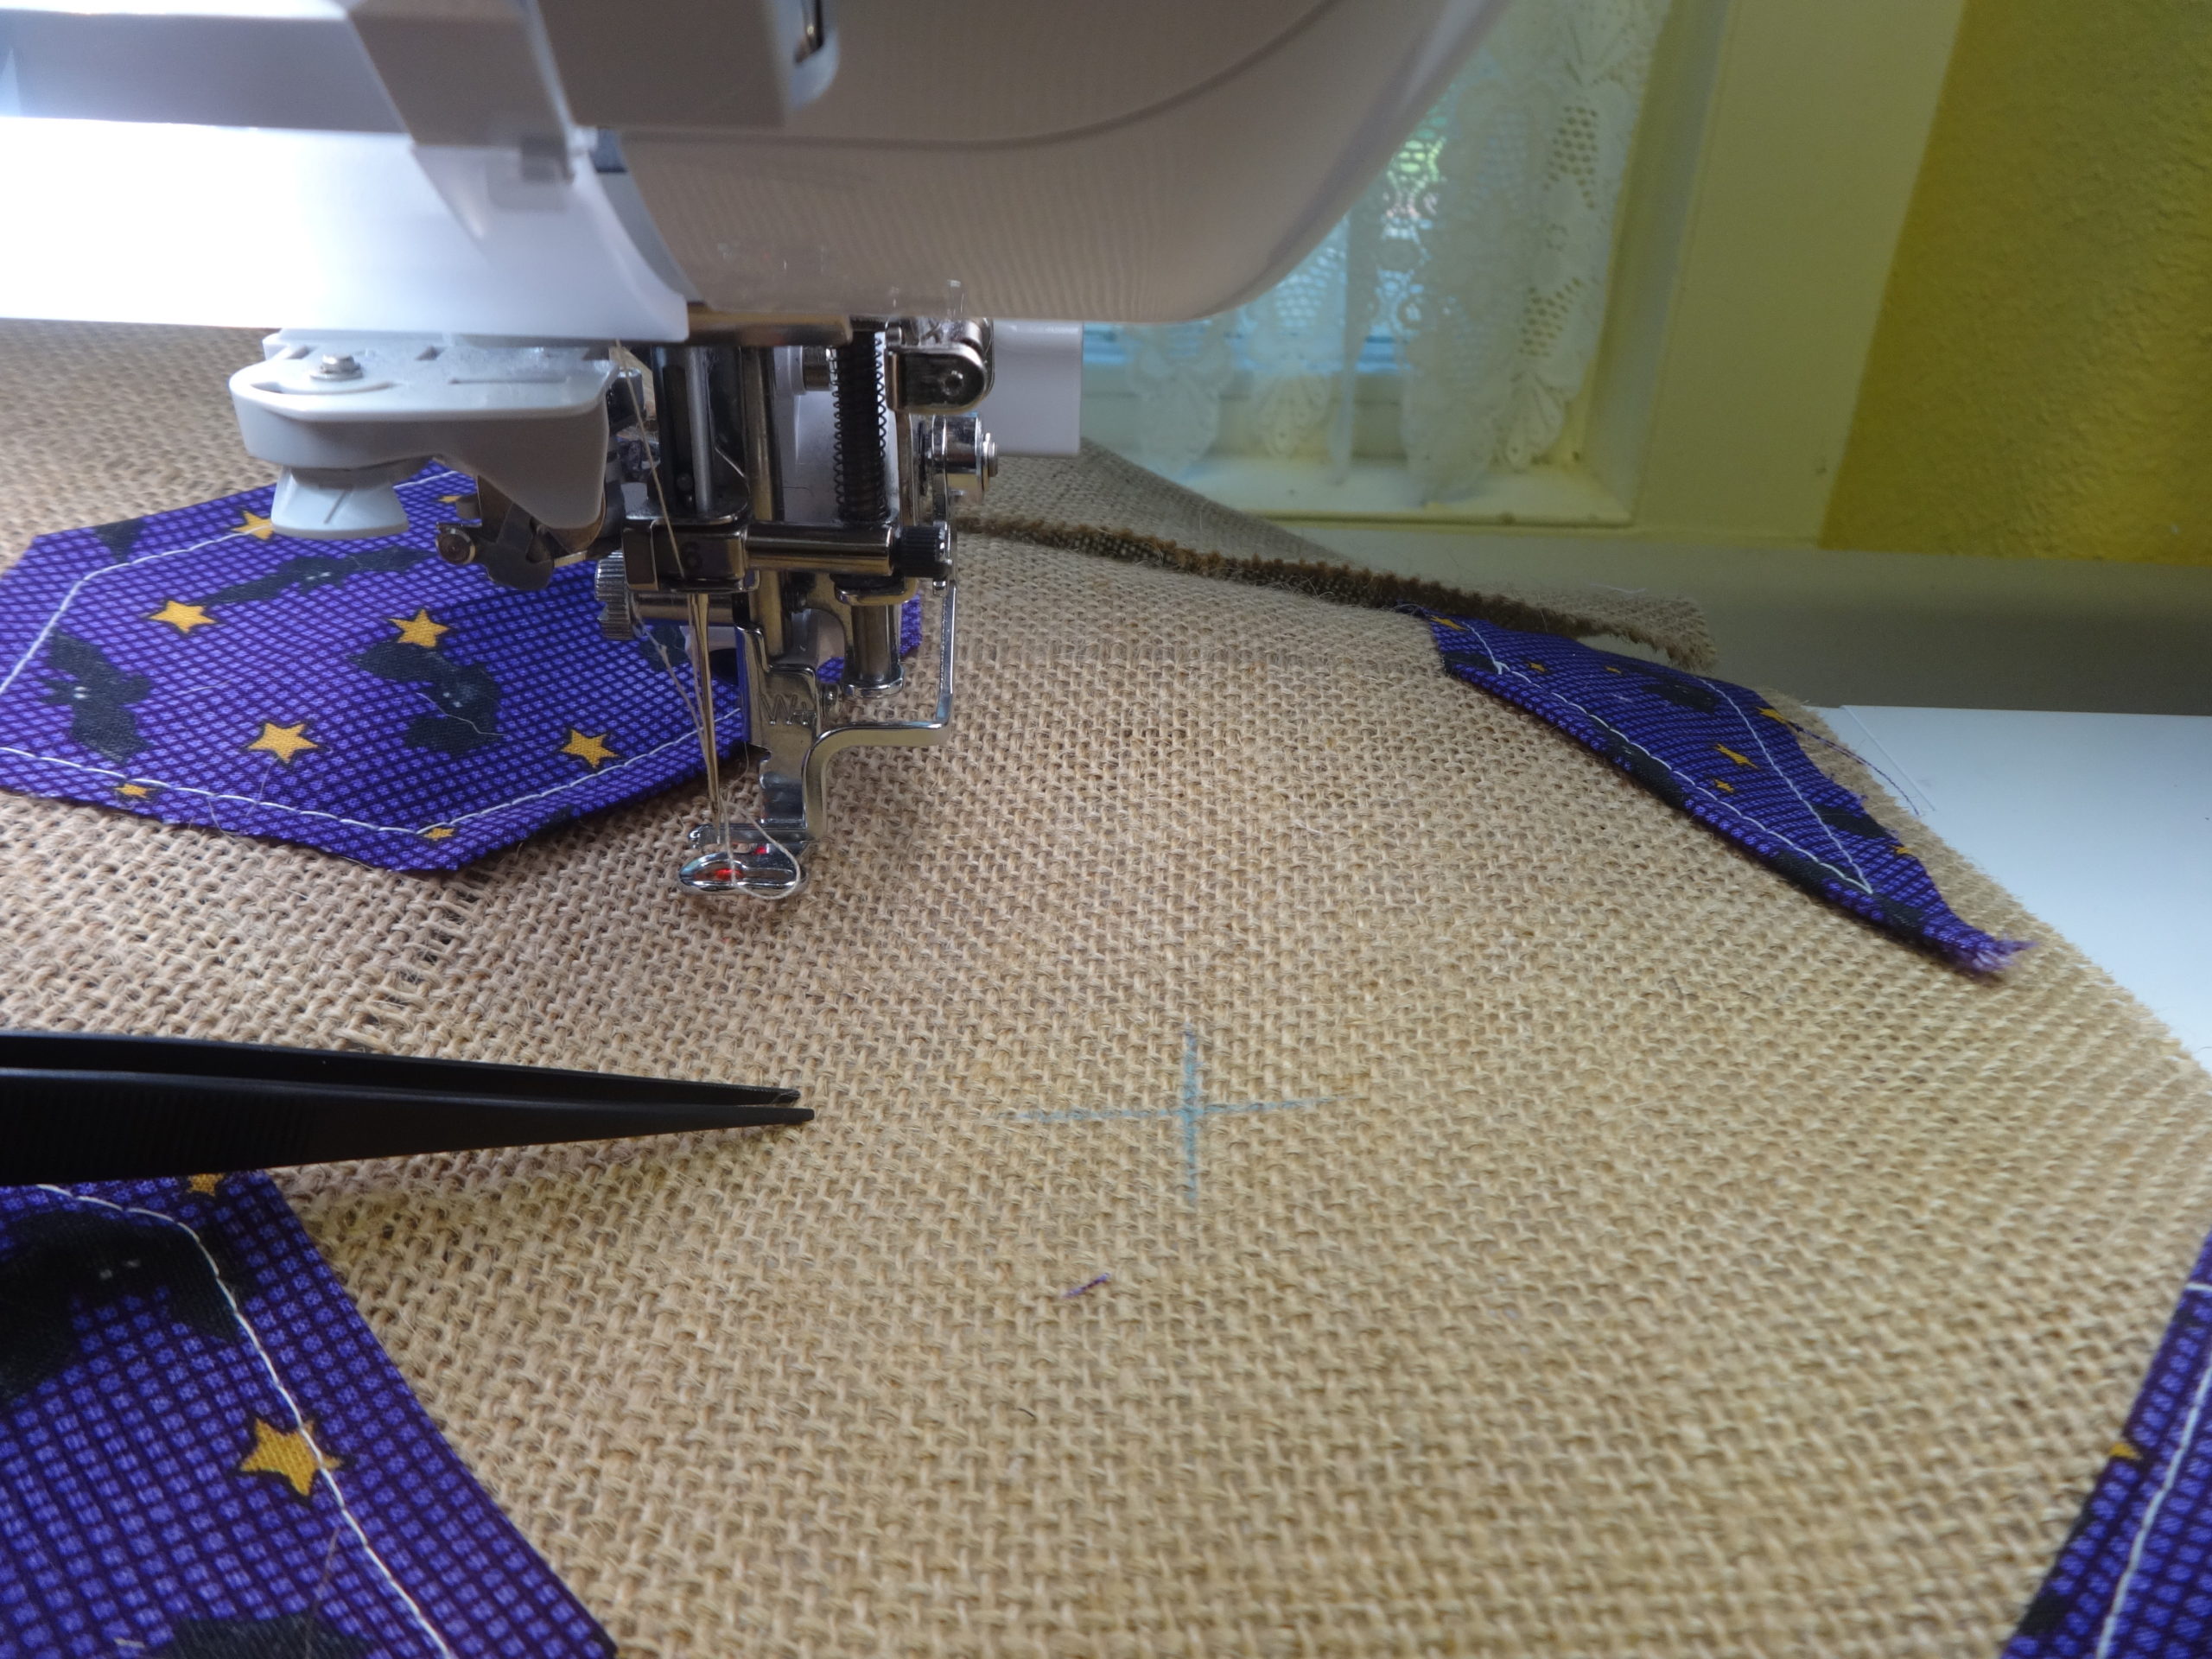
12. Mark centers of ”snowballs” for placement of embroidery designs.
TIP: A chalk device works best. A small crosshair can be brushed away if the embroidery does not cover .the mark.
13. Hoop tearaway stabilizer in 4×4 frame.
14. Open “Oh Boy” design and edit to add basting frame. This will secure the quilt top to the frame without leaving hoop burn (an imprint of the hoop on the burlap and batting).
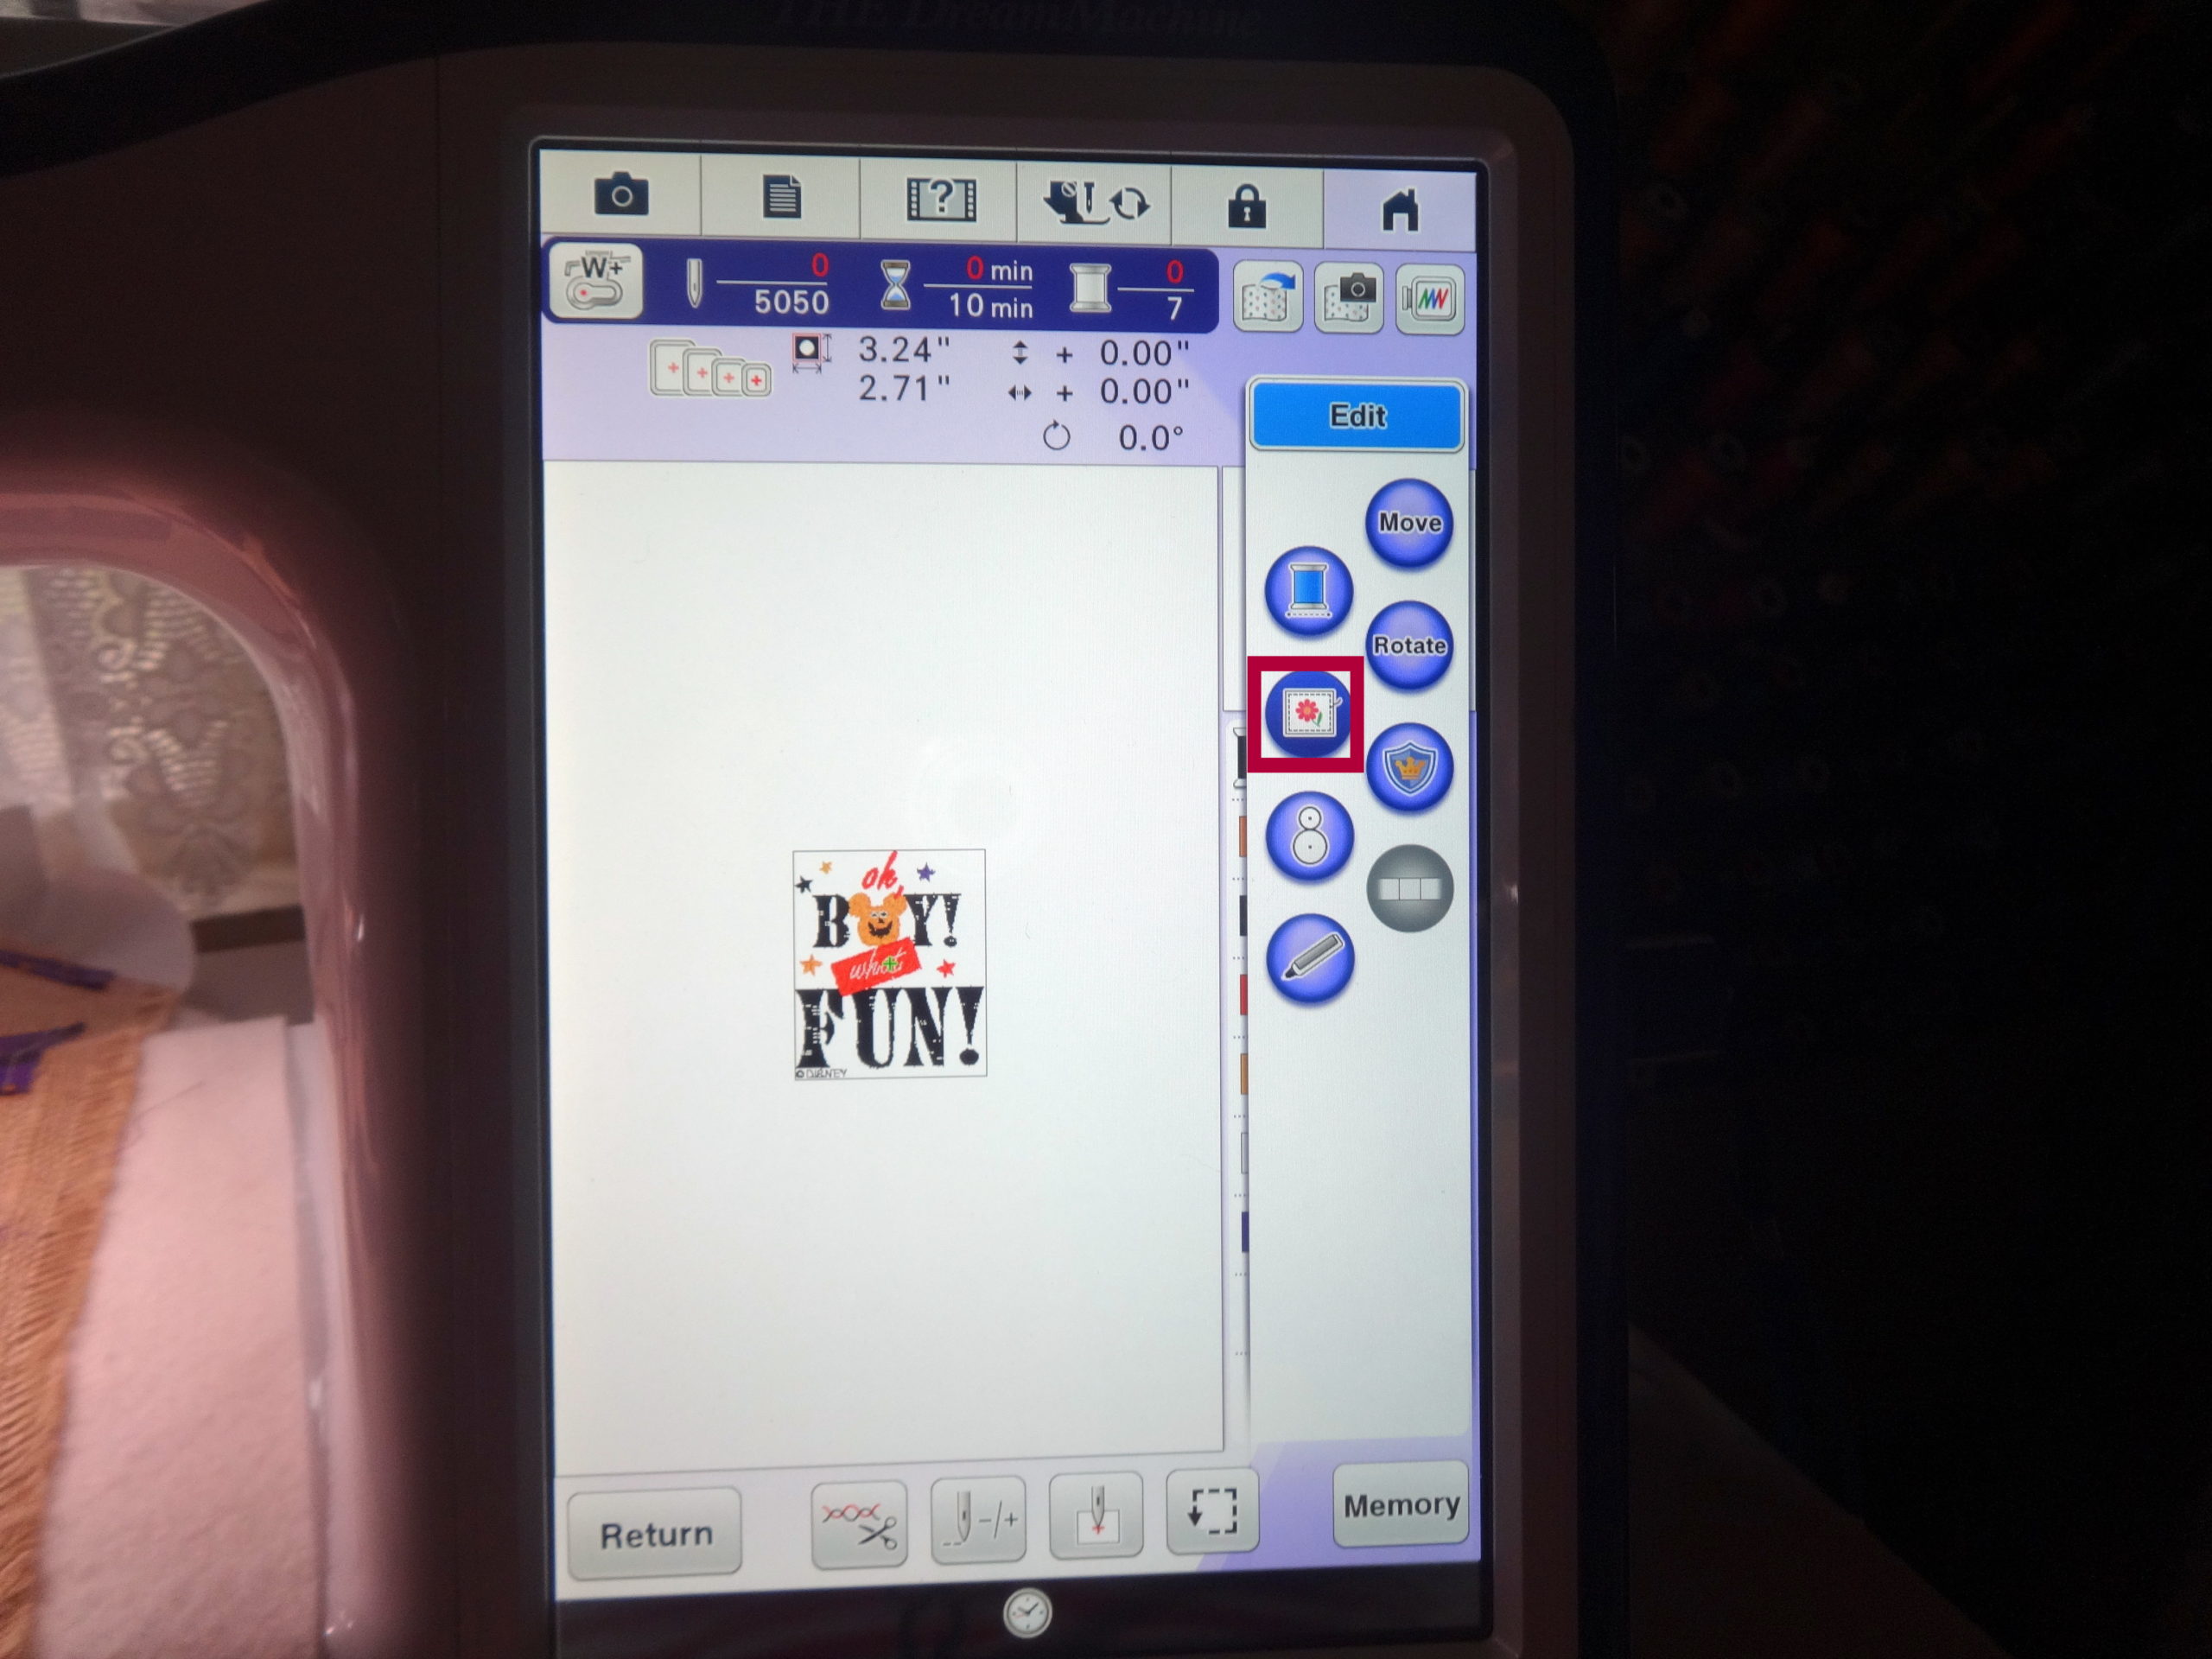
Boy oh Boy baste frame key
NOTE: Remember that the basting frame option does not appear until the Embroidery screen appears, after SET and EDIT screens.
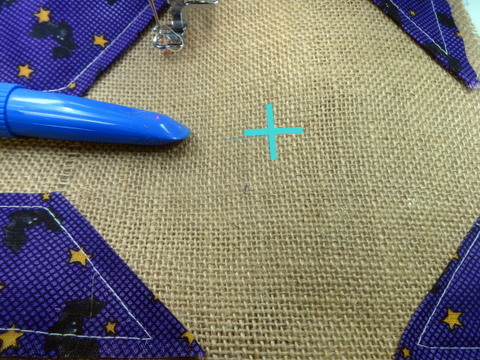
15. Position the center square over the frame.
16. Engage the needle placement laser feature.
17. A red dot will appear in the middle of the frame. Move the burlap so the red dot sits precisely on the crosshairs.
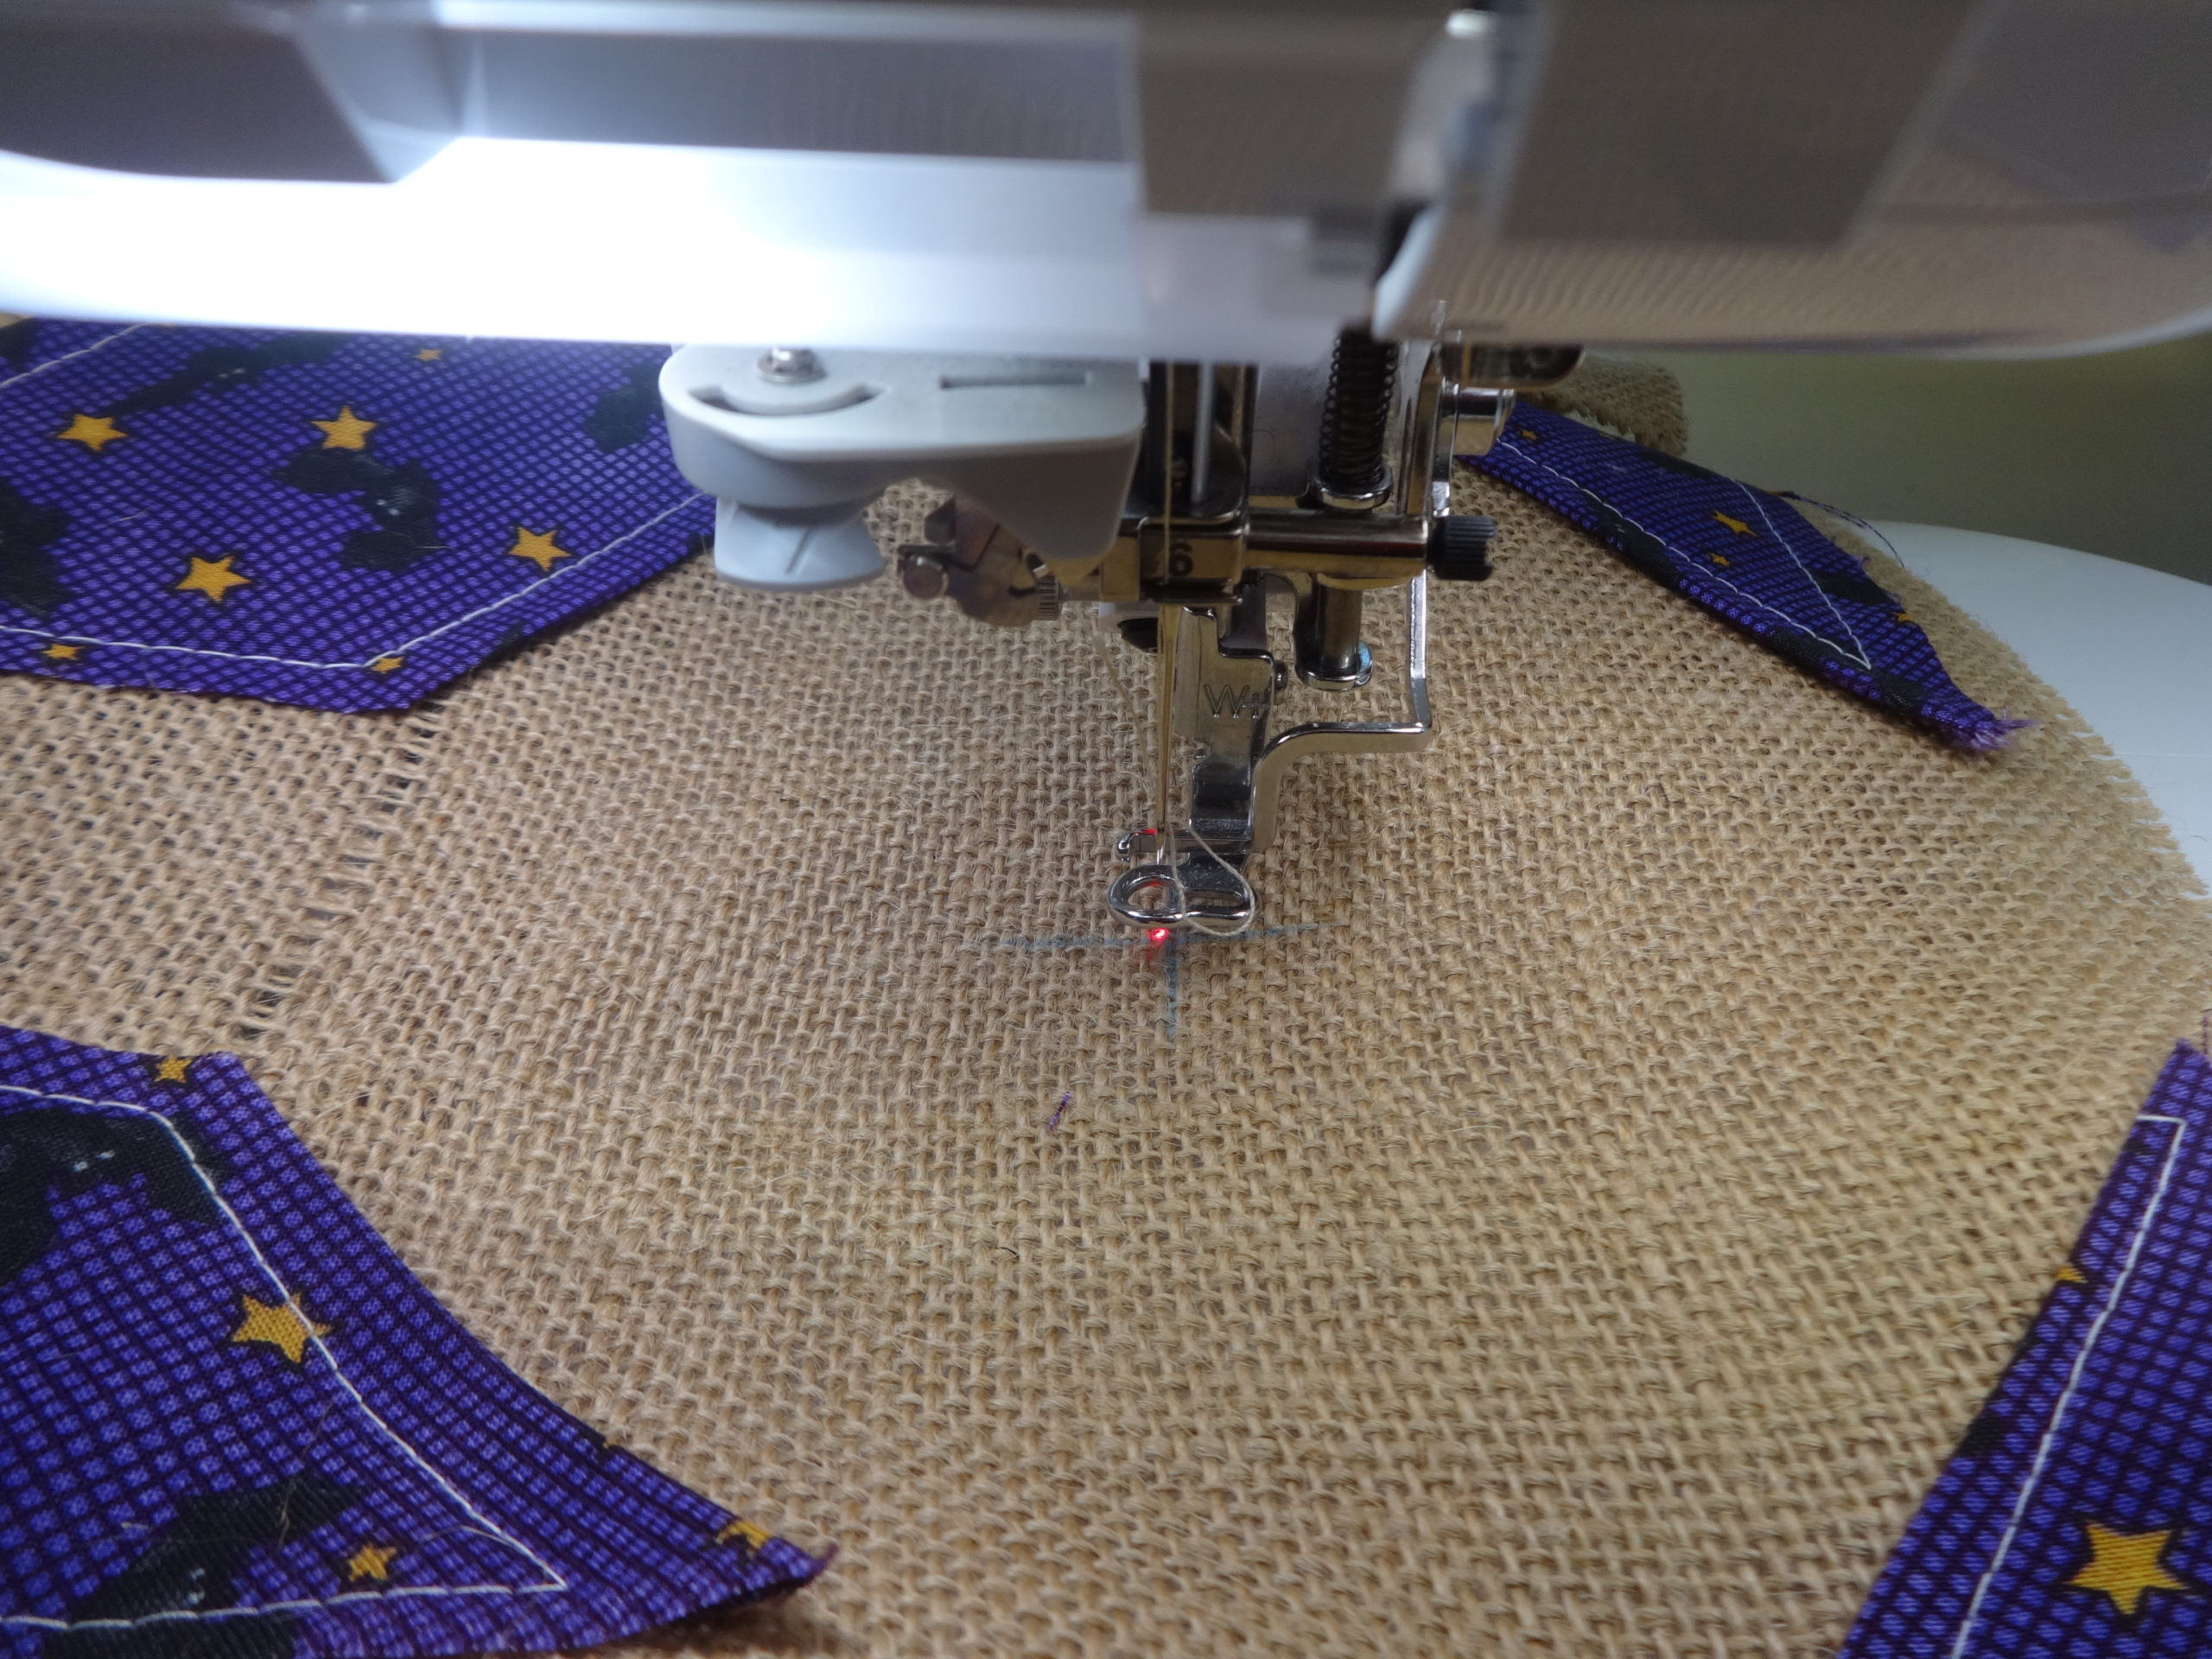
18. Hold the burlap in place securely with tweezers or your stylus. Advance to the first stitch in the basting frame. When you are certain that the burlap is still in its proper place continue with basting.
19. Embrooider “Oh Boy Fun.”
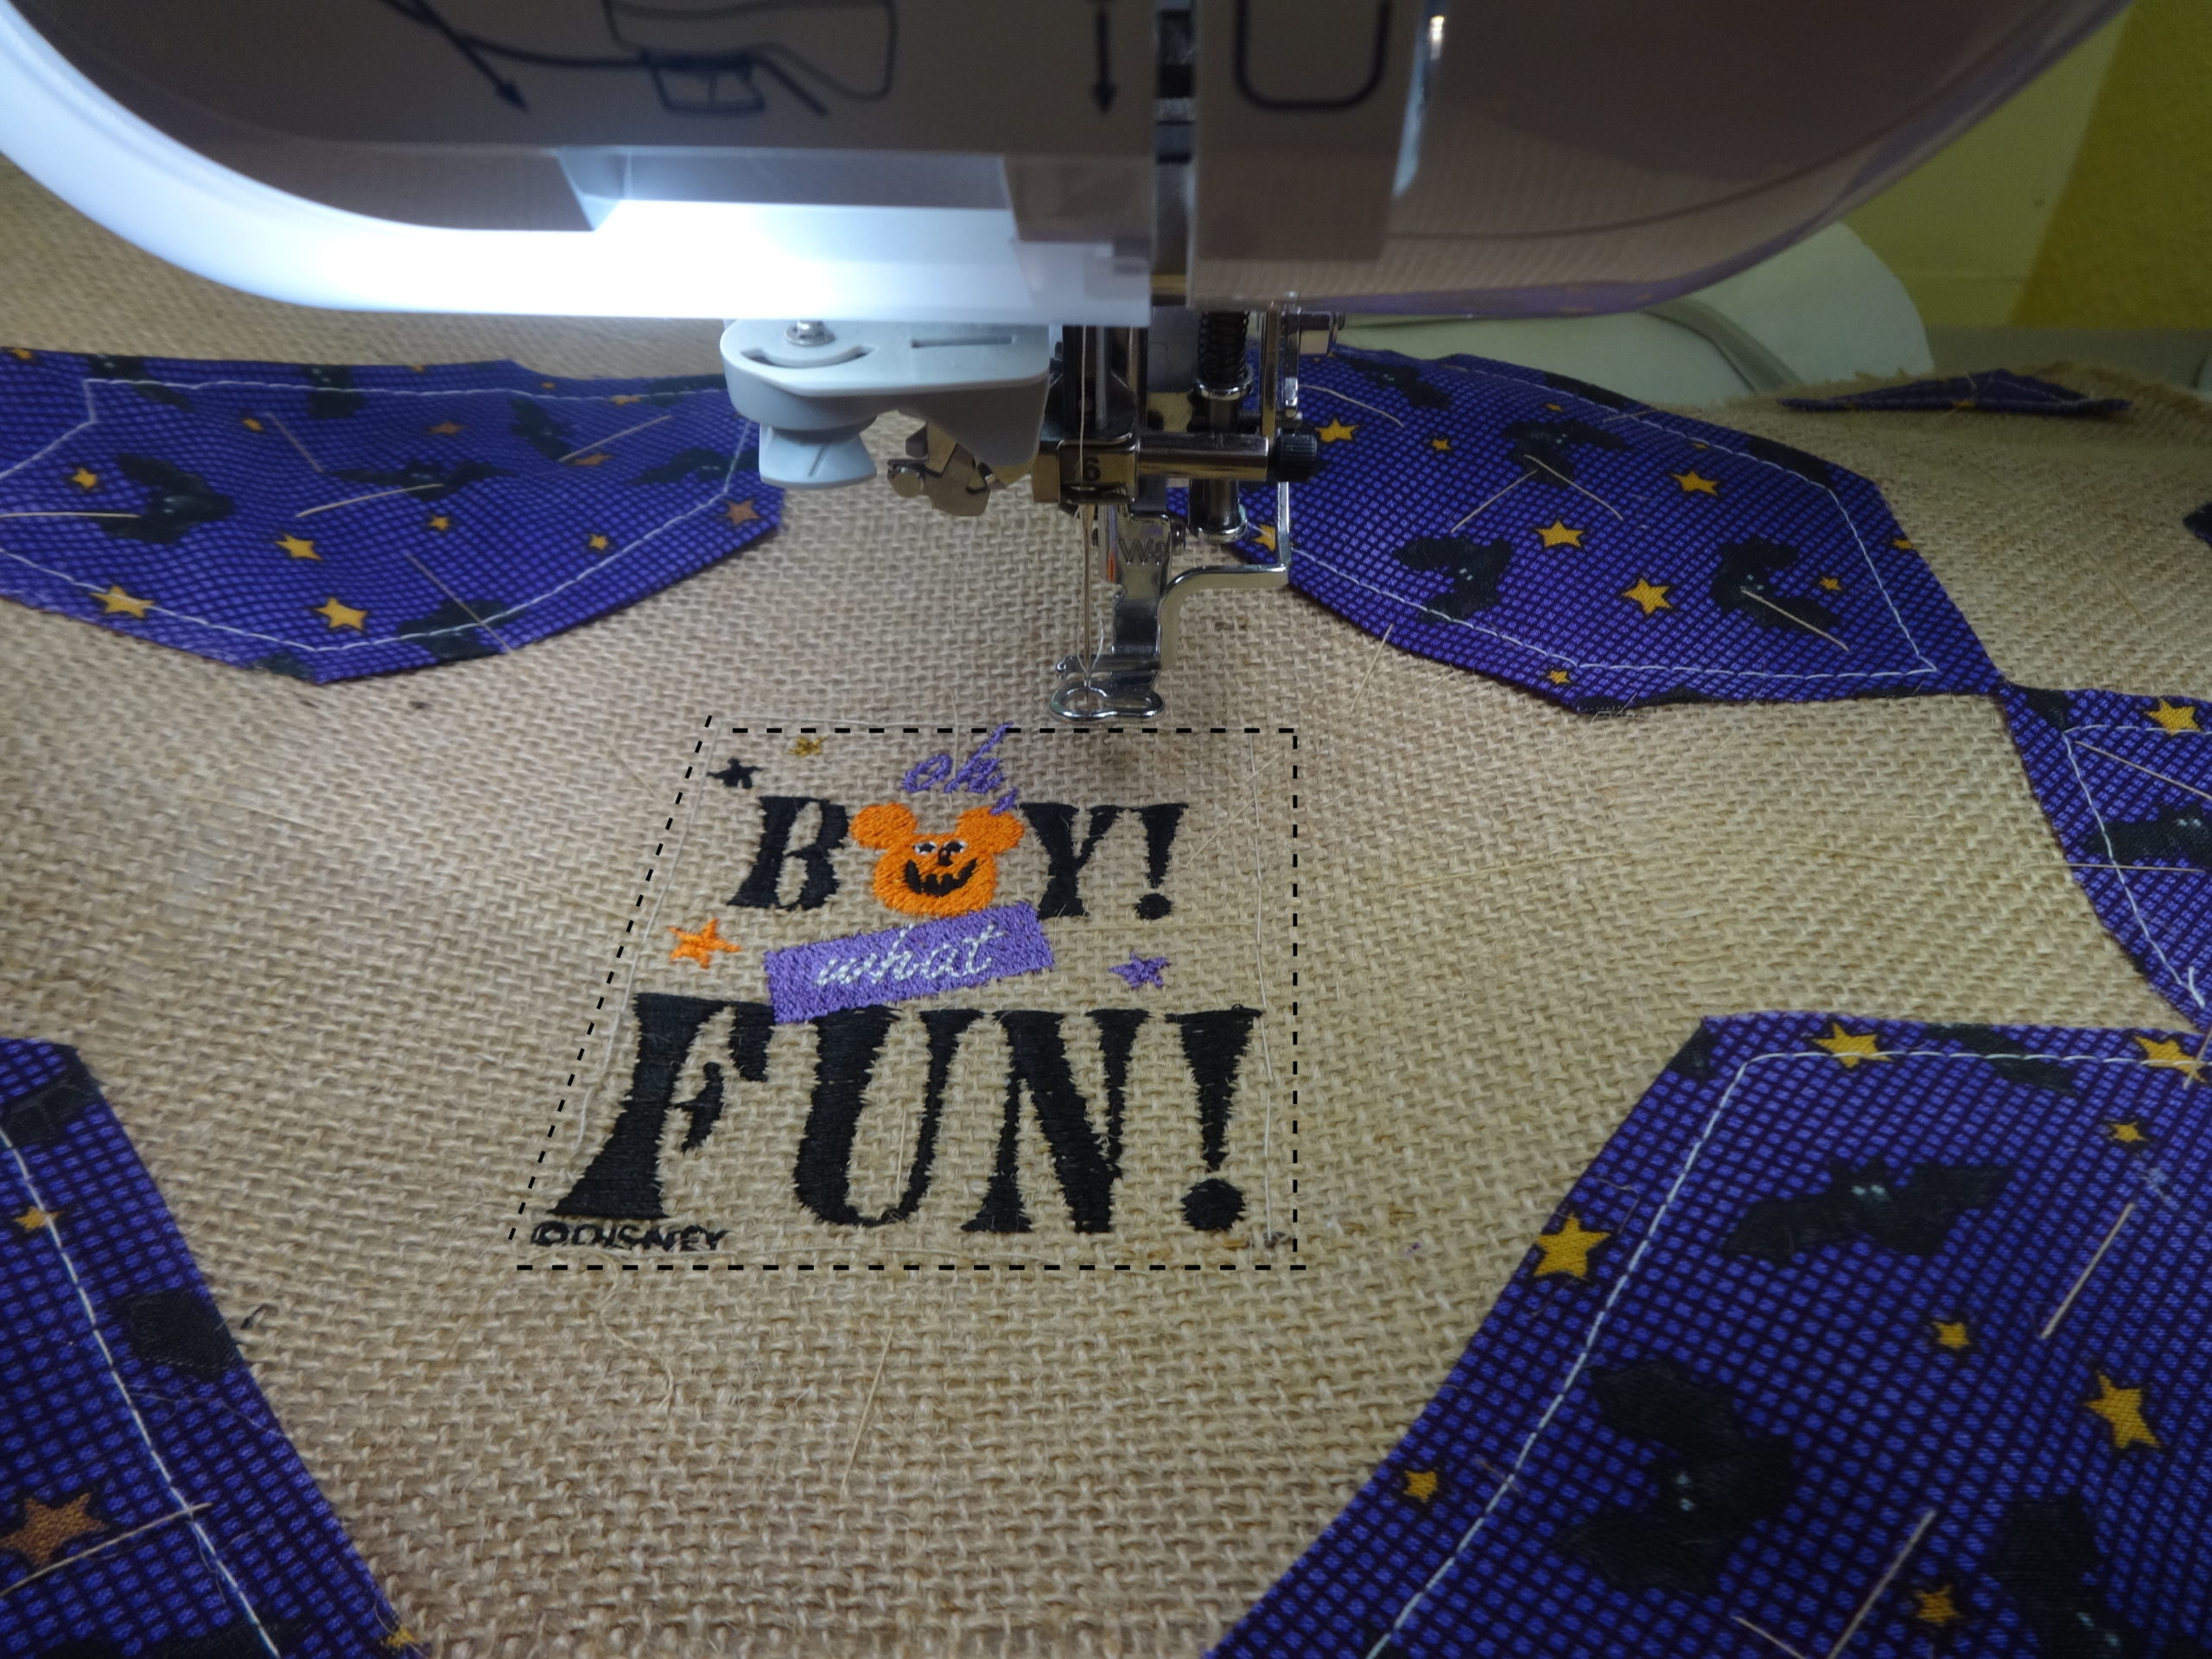
20. Remove stabilizer and remove burlap from frame. Repeat this process for the remaining 4 snowballs.
TIP: Stitch Goofy’s skeleton with glow-in-the-dark thread for extra fun.
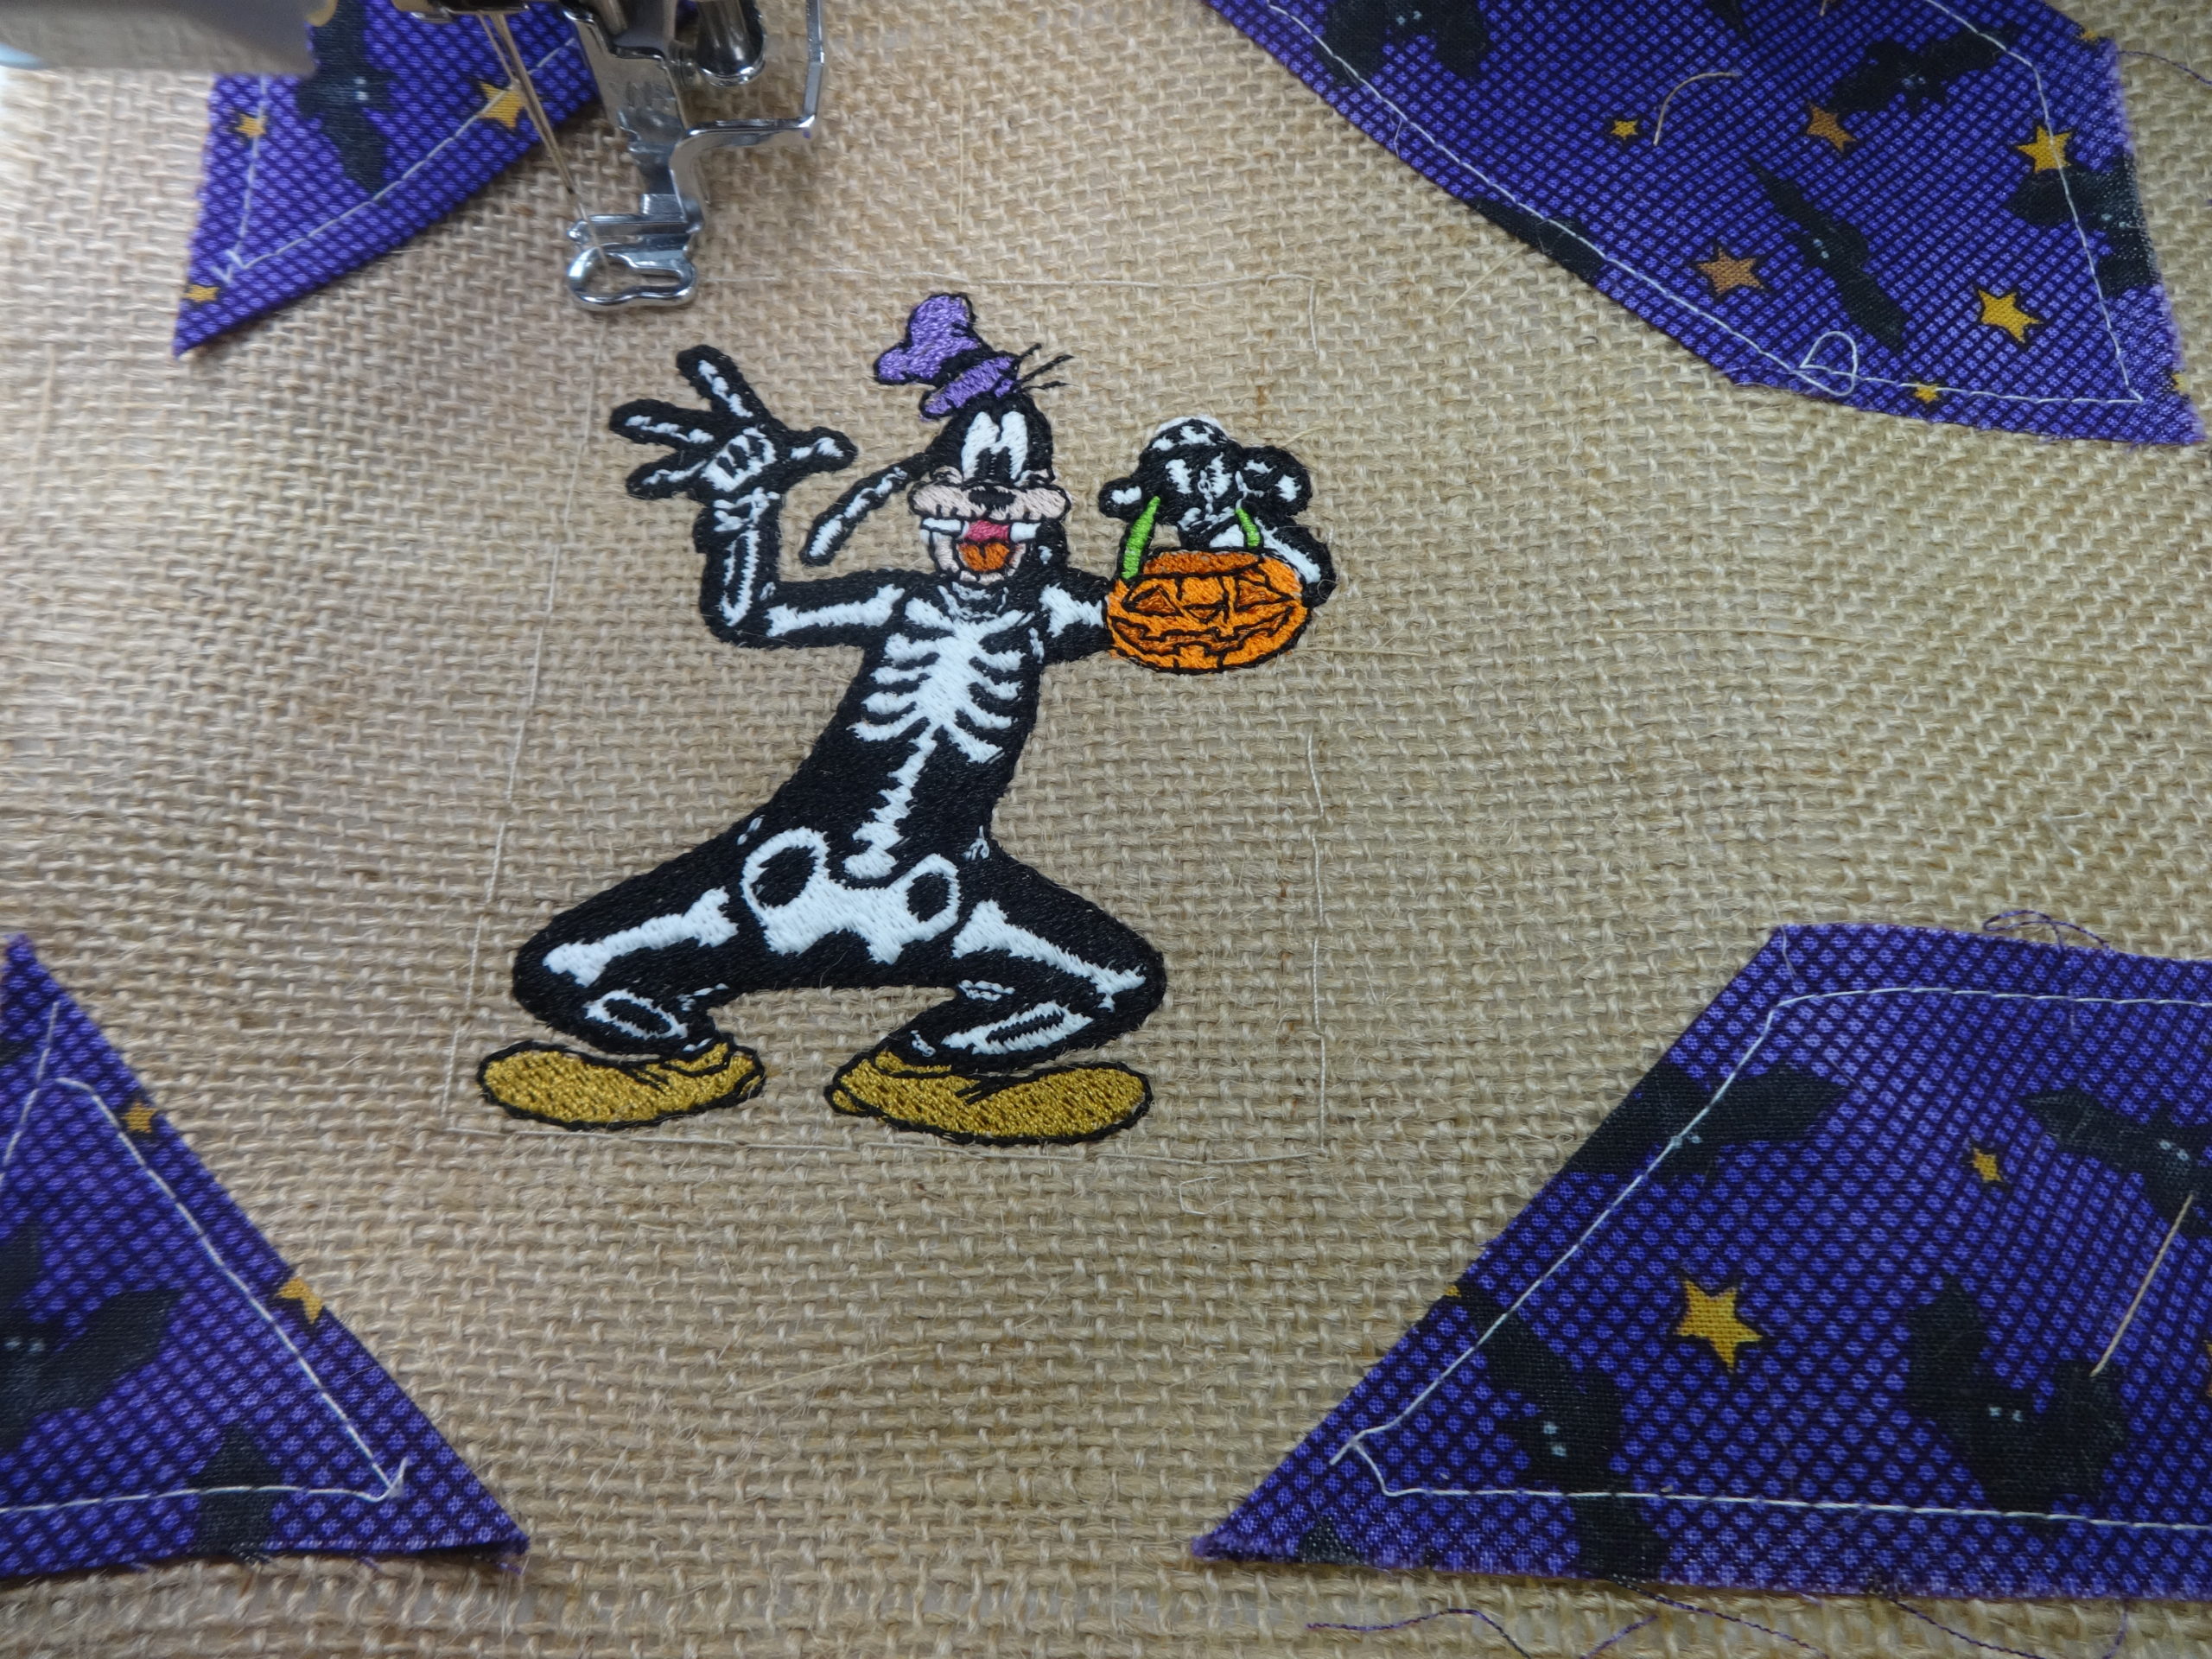
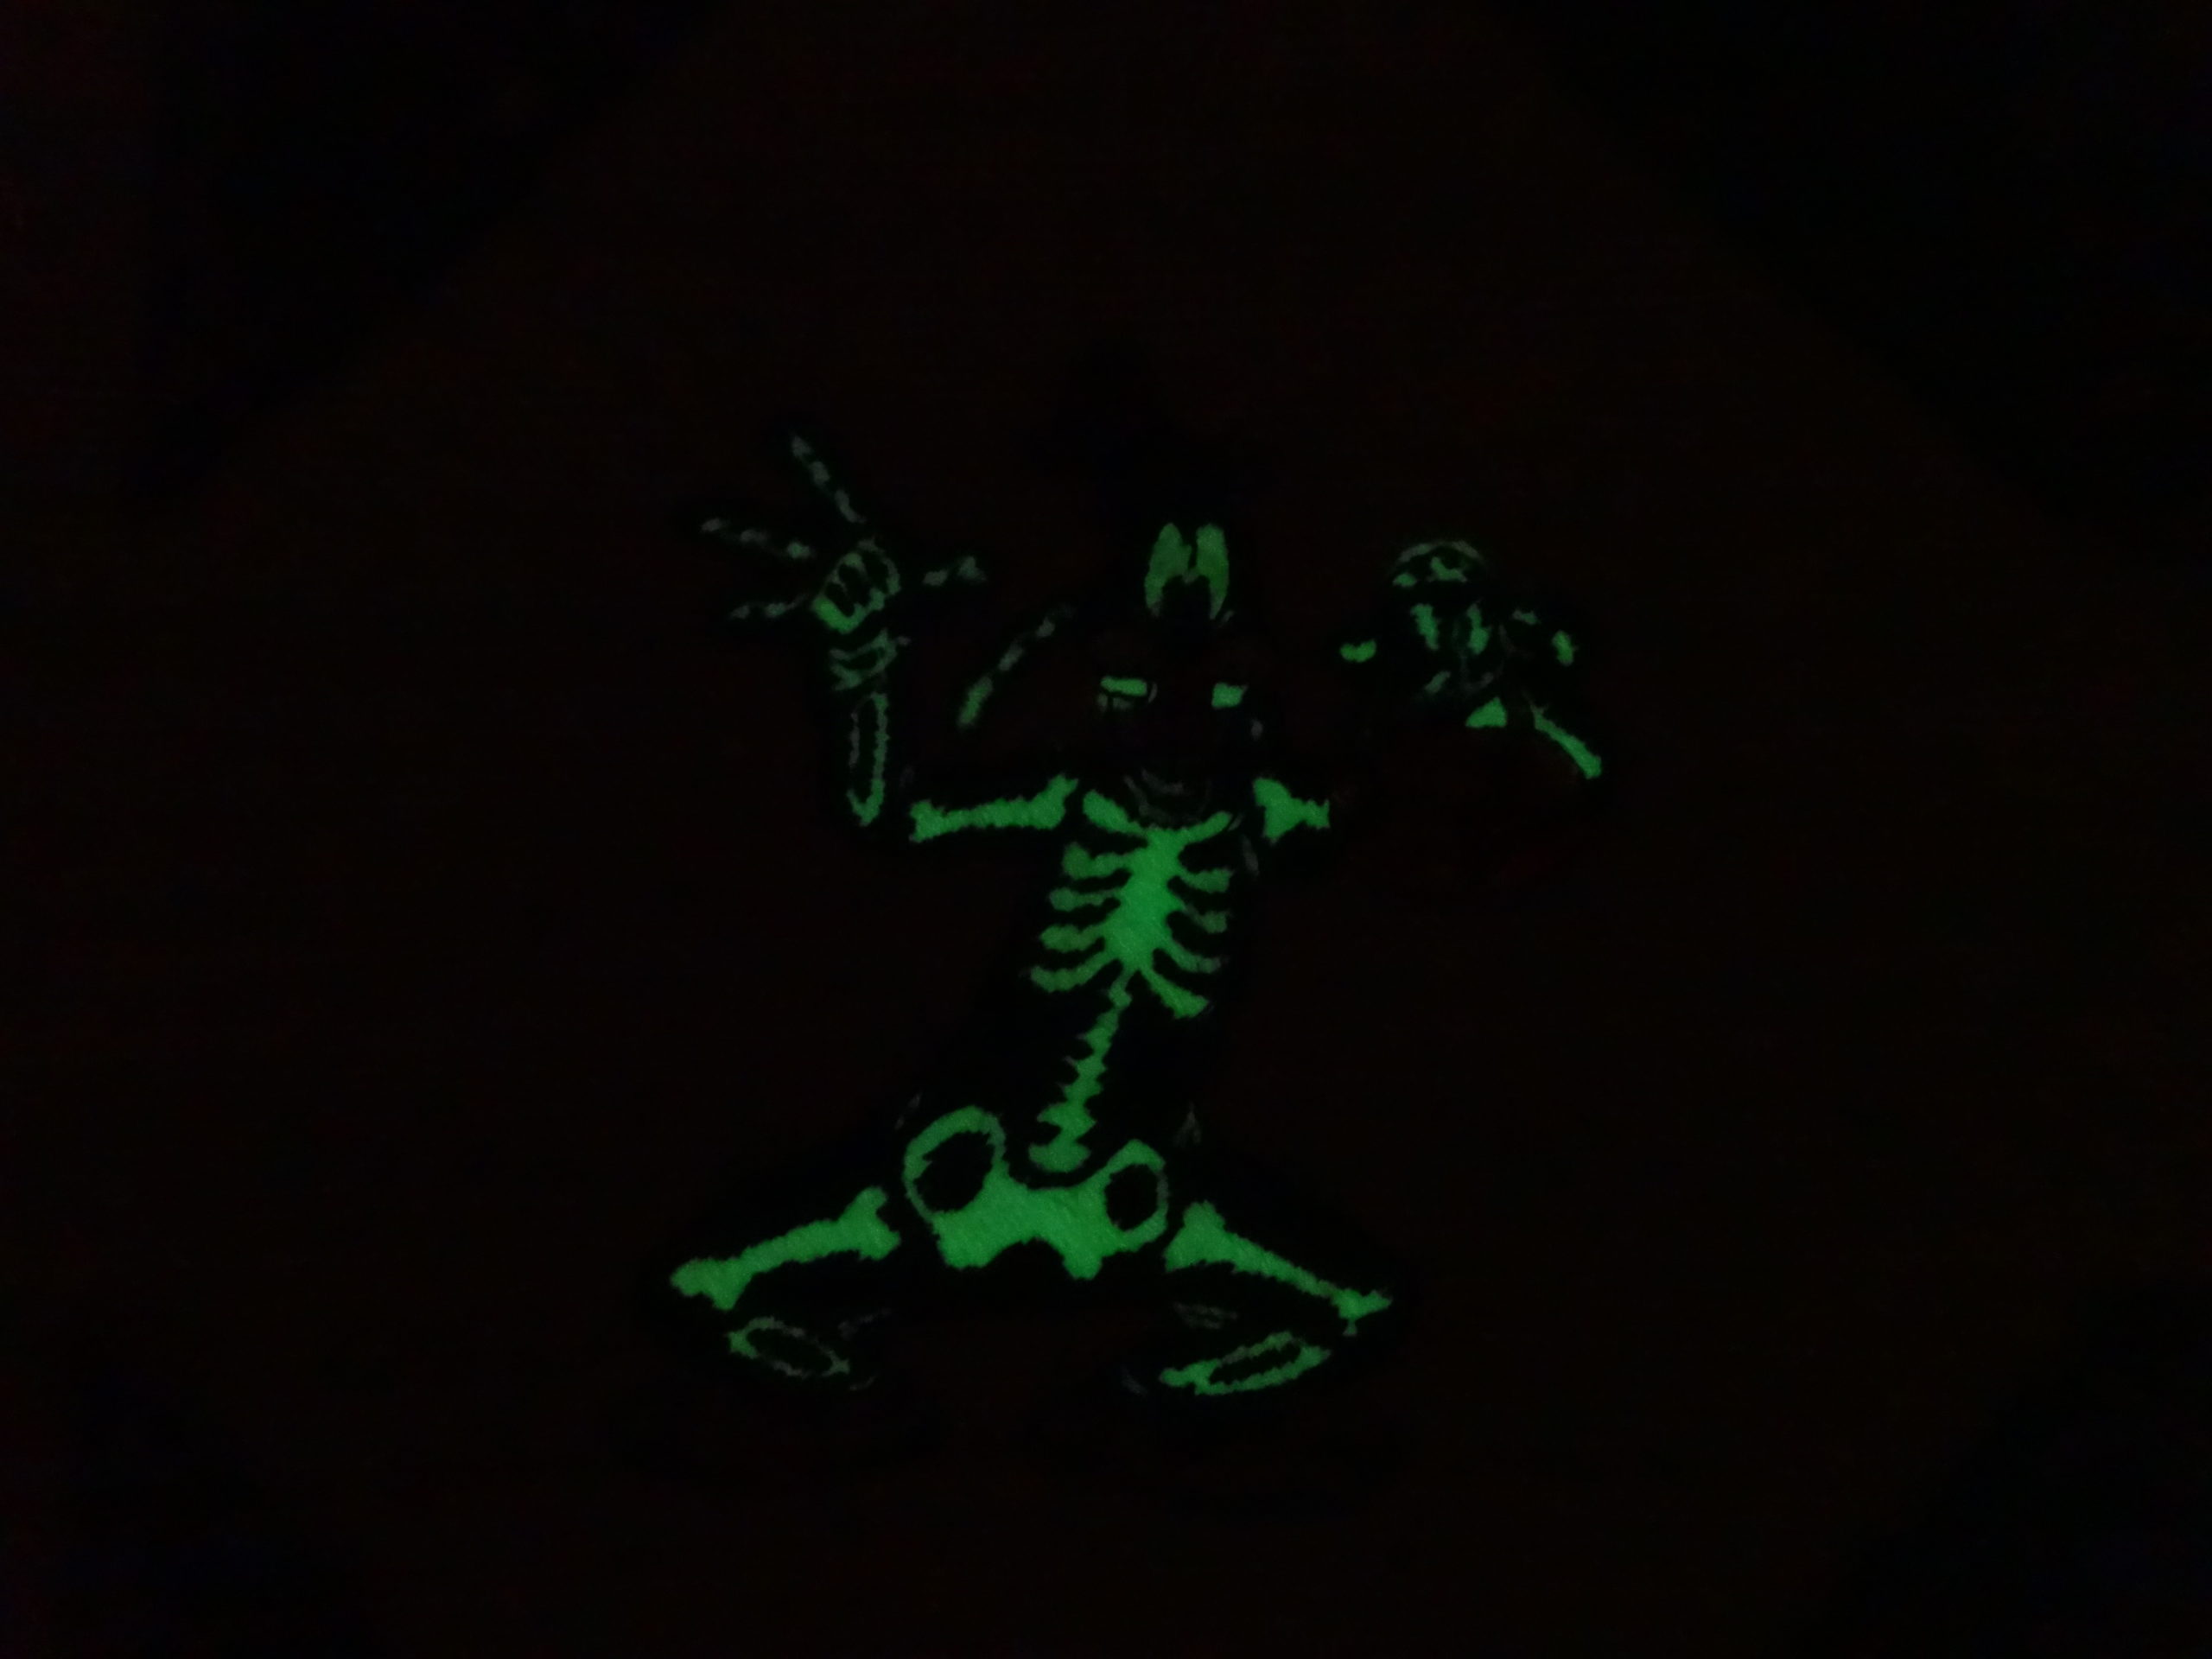
Spooky!!! Children will love it!
TIP: When stitching with glow-in-the-dark-thread, use a #90 needle and reduce speed.
21. Center embroidered burlap and batting on second piece of burlap, creating a true “quit sandwich.” This backing is extra large to account for the inevitable ravels which result from handling. Later it will be trimmed to its proper size.
22. Baste through all three layers. Again, use the Muvit dual feed foot to baste with stitch #108 on the utility menu.
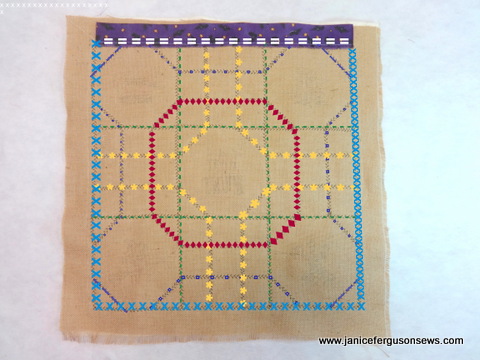
23. Keep Muvit foot attached. Select a decorative stitch with a width of no less than 6. The stitch shown is #211 on The Dream Machine, Quattro and Duetta, W 7, L 3. 5.
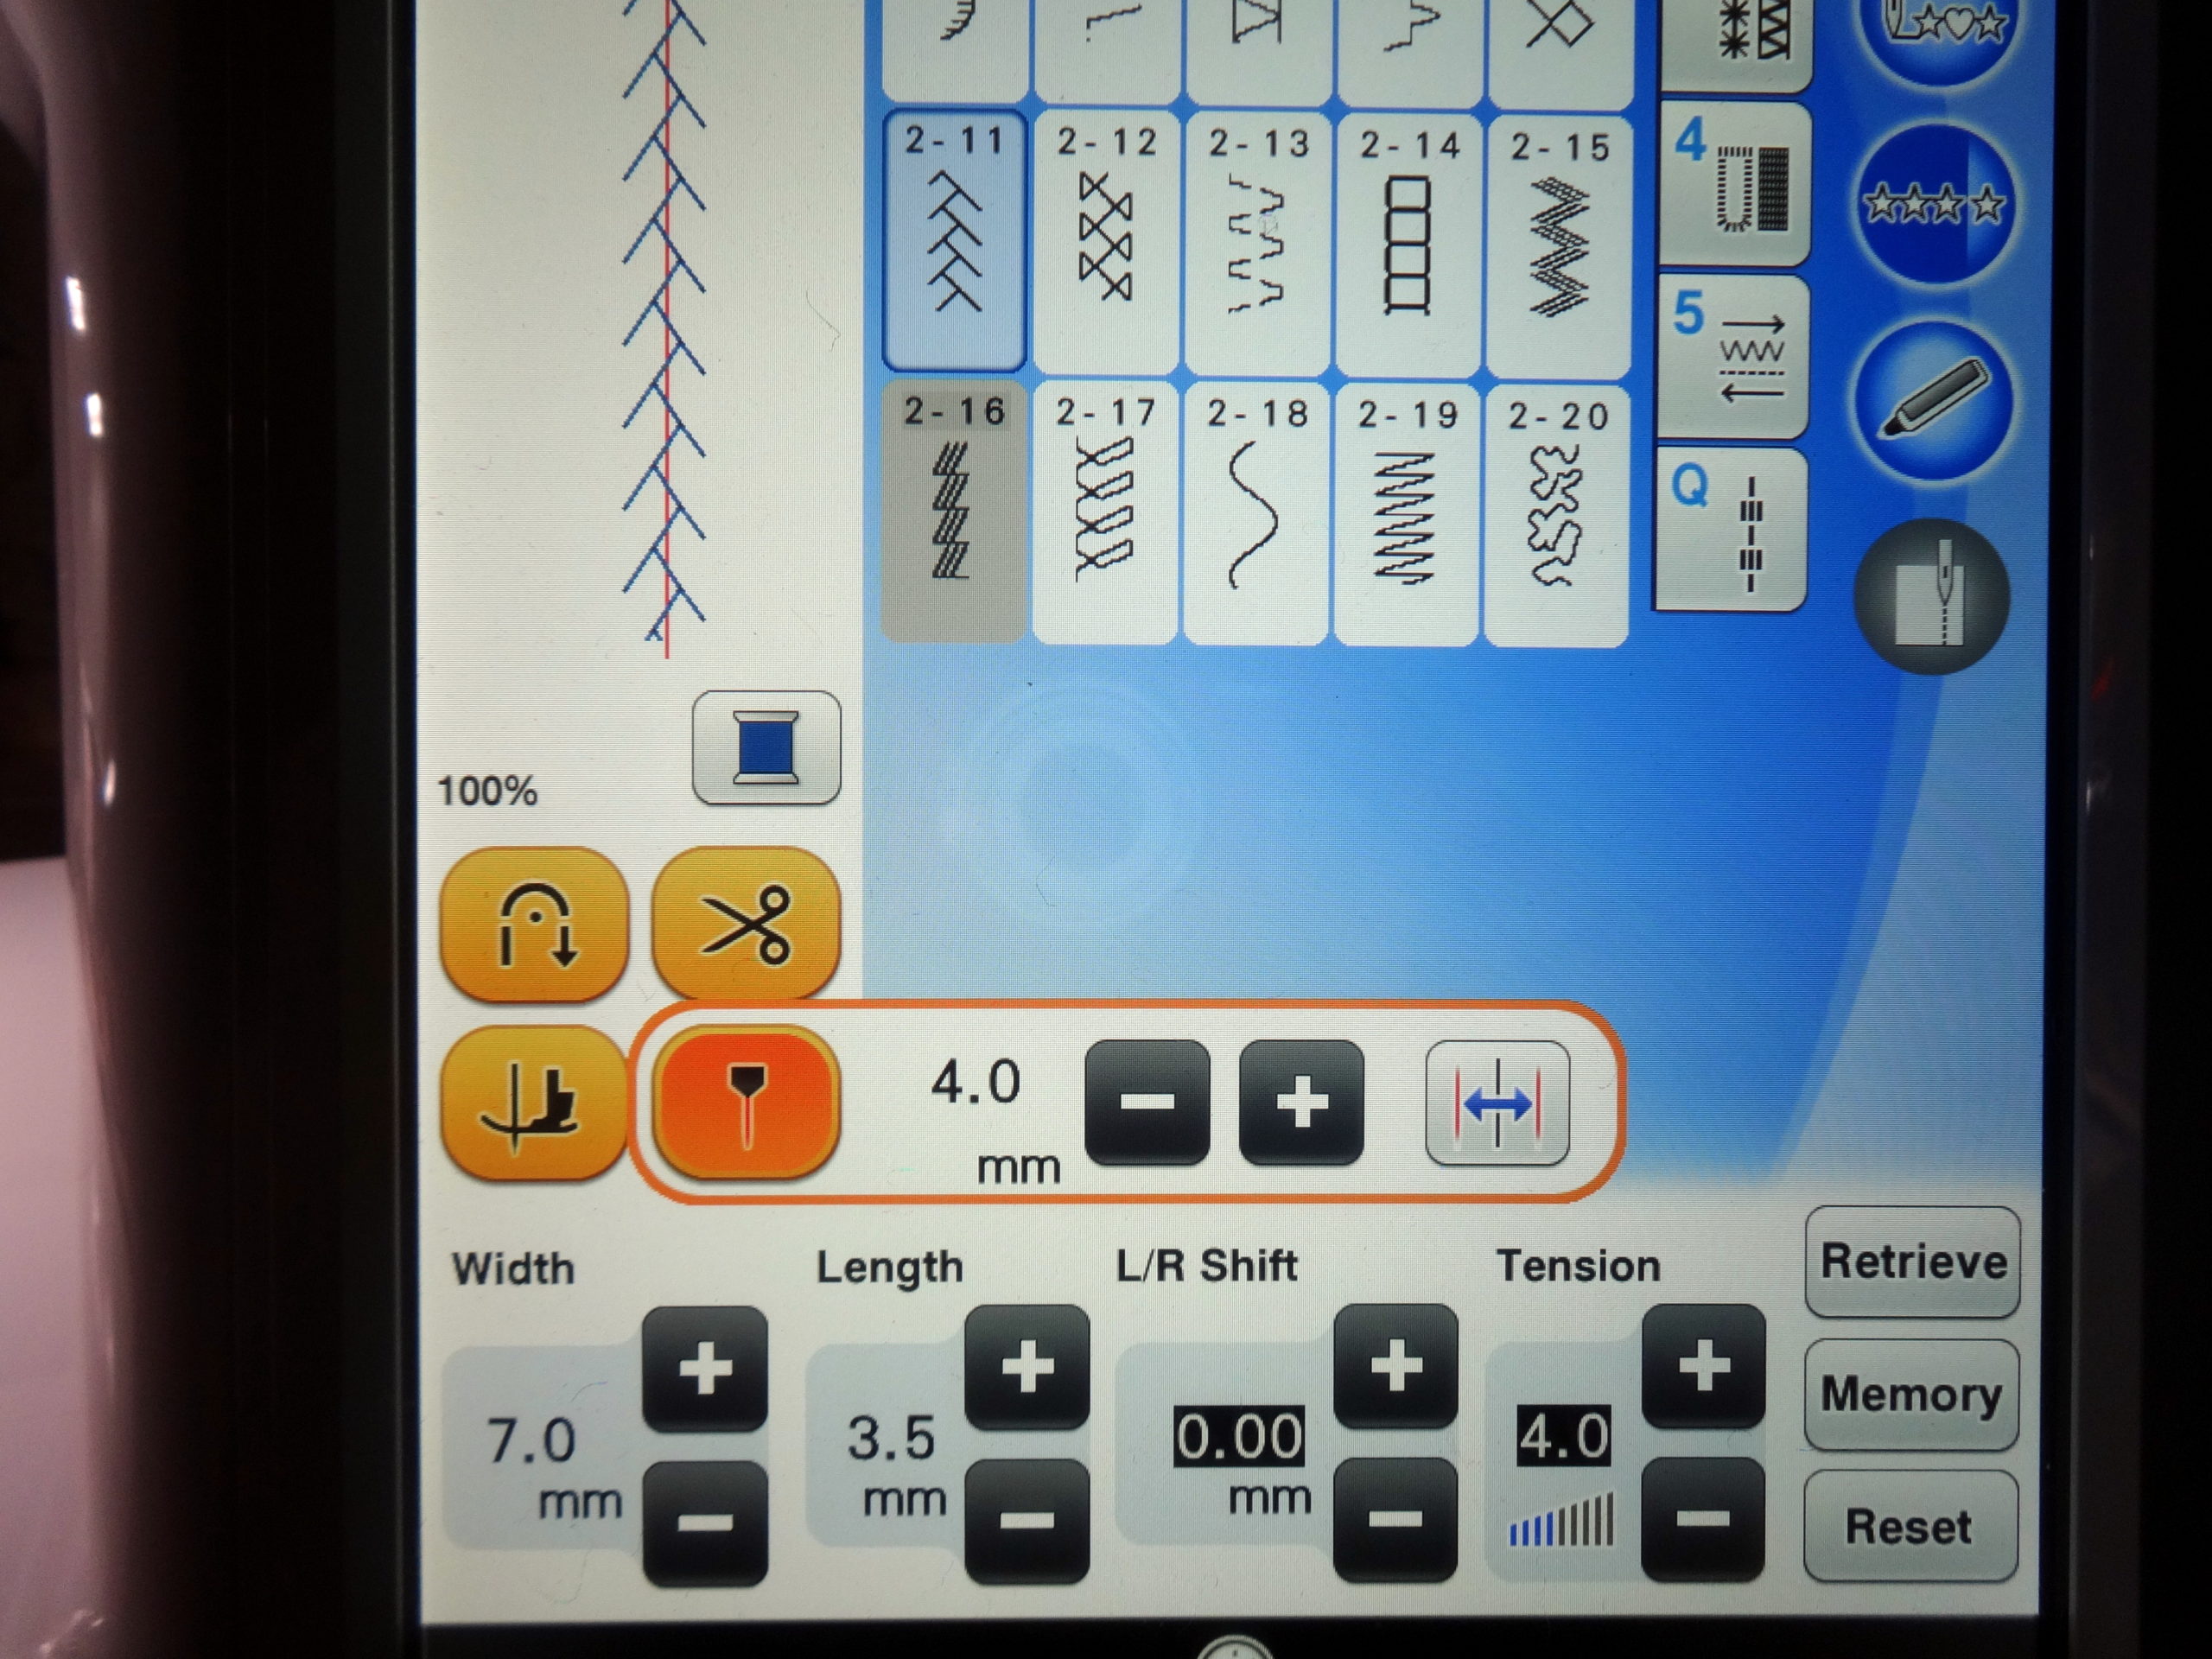
25. Engage the laser guide, shown in the orange rectangle above.
26. Work decorative stitching in whatever sequence you prefer, but this route is efficient. NOTE: This is shown on the back of the quilt top for clarity. Stitching is actually done on the right side.
NOTE: The purple sleeve at the top is to be sewn in place AFTER all the decorative stitching is done except the white along the top. Somehow, the photo without the sleeve was corrupted, so just imagine the sleeve is not yet there.
a.Green (grid which creates 6” squares)
b.Dark blue (trapezoid shapes at center of each side)
c.Red (center shape-I should have paid more attention in high school geometry. There must be a name for this.)
d.Yellow (whatever)
e.Purple (corner triangles)
f .Blue (perimeter on three sides)
g.Purple (corner triangles)
h.Light blue (perimeter on three sides)
i.White—top edge stitched AFTER sleeve is sewn in place.
This stitch will enclose the raw edges of the pieces. Its design prevents loose threads breaking free to create an untidy appearance.
It is best to start each run of decorative stitching at the beginning of the pattern. Save the stitch and its settings in memory. After finishing a section of stitching, tie off thread tails. Then select #211 again and it will come up with your saved settings. Stitching will start at the beginning of the pattern.
27.Remove all basting threads.
28. Position sleeve with raw edge toward bottom of quilt piece. Place ¼” below the top of the snowballs. Baste in place.
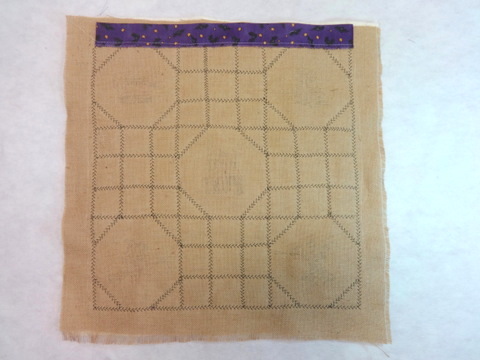
29. Work decorative stitch along top edge of quilt on right side. This will secure the top of the sleeve.
30. Remove basting threads on sleeve and press down. Hand whip folded edge to burlap.
FINISHING
31. Remove burlap threads up to stitching line to create fringe.
32. Trim away any fringe that exceeds ½” beyond the center of the decorative stitching.

33. Trim batting to 1” beyond the fringe. Measure from center of decorative stitching.
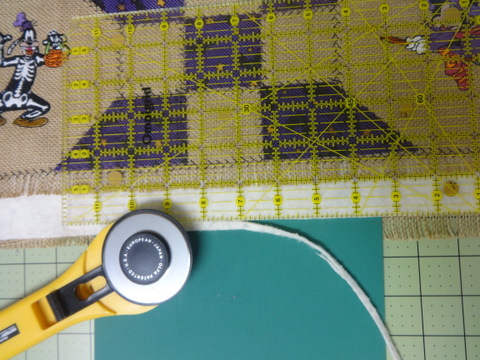
34. Pull batting to create the ragged look shown. Use of tweezers works well.
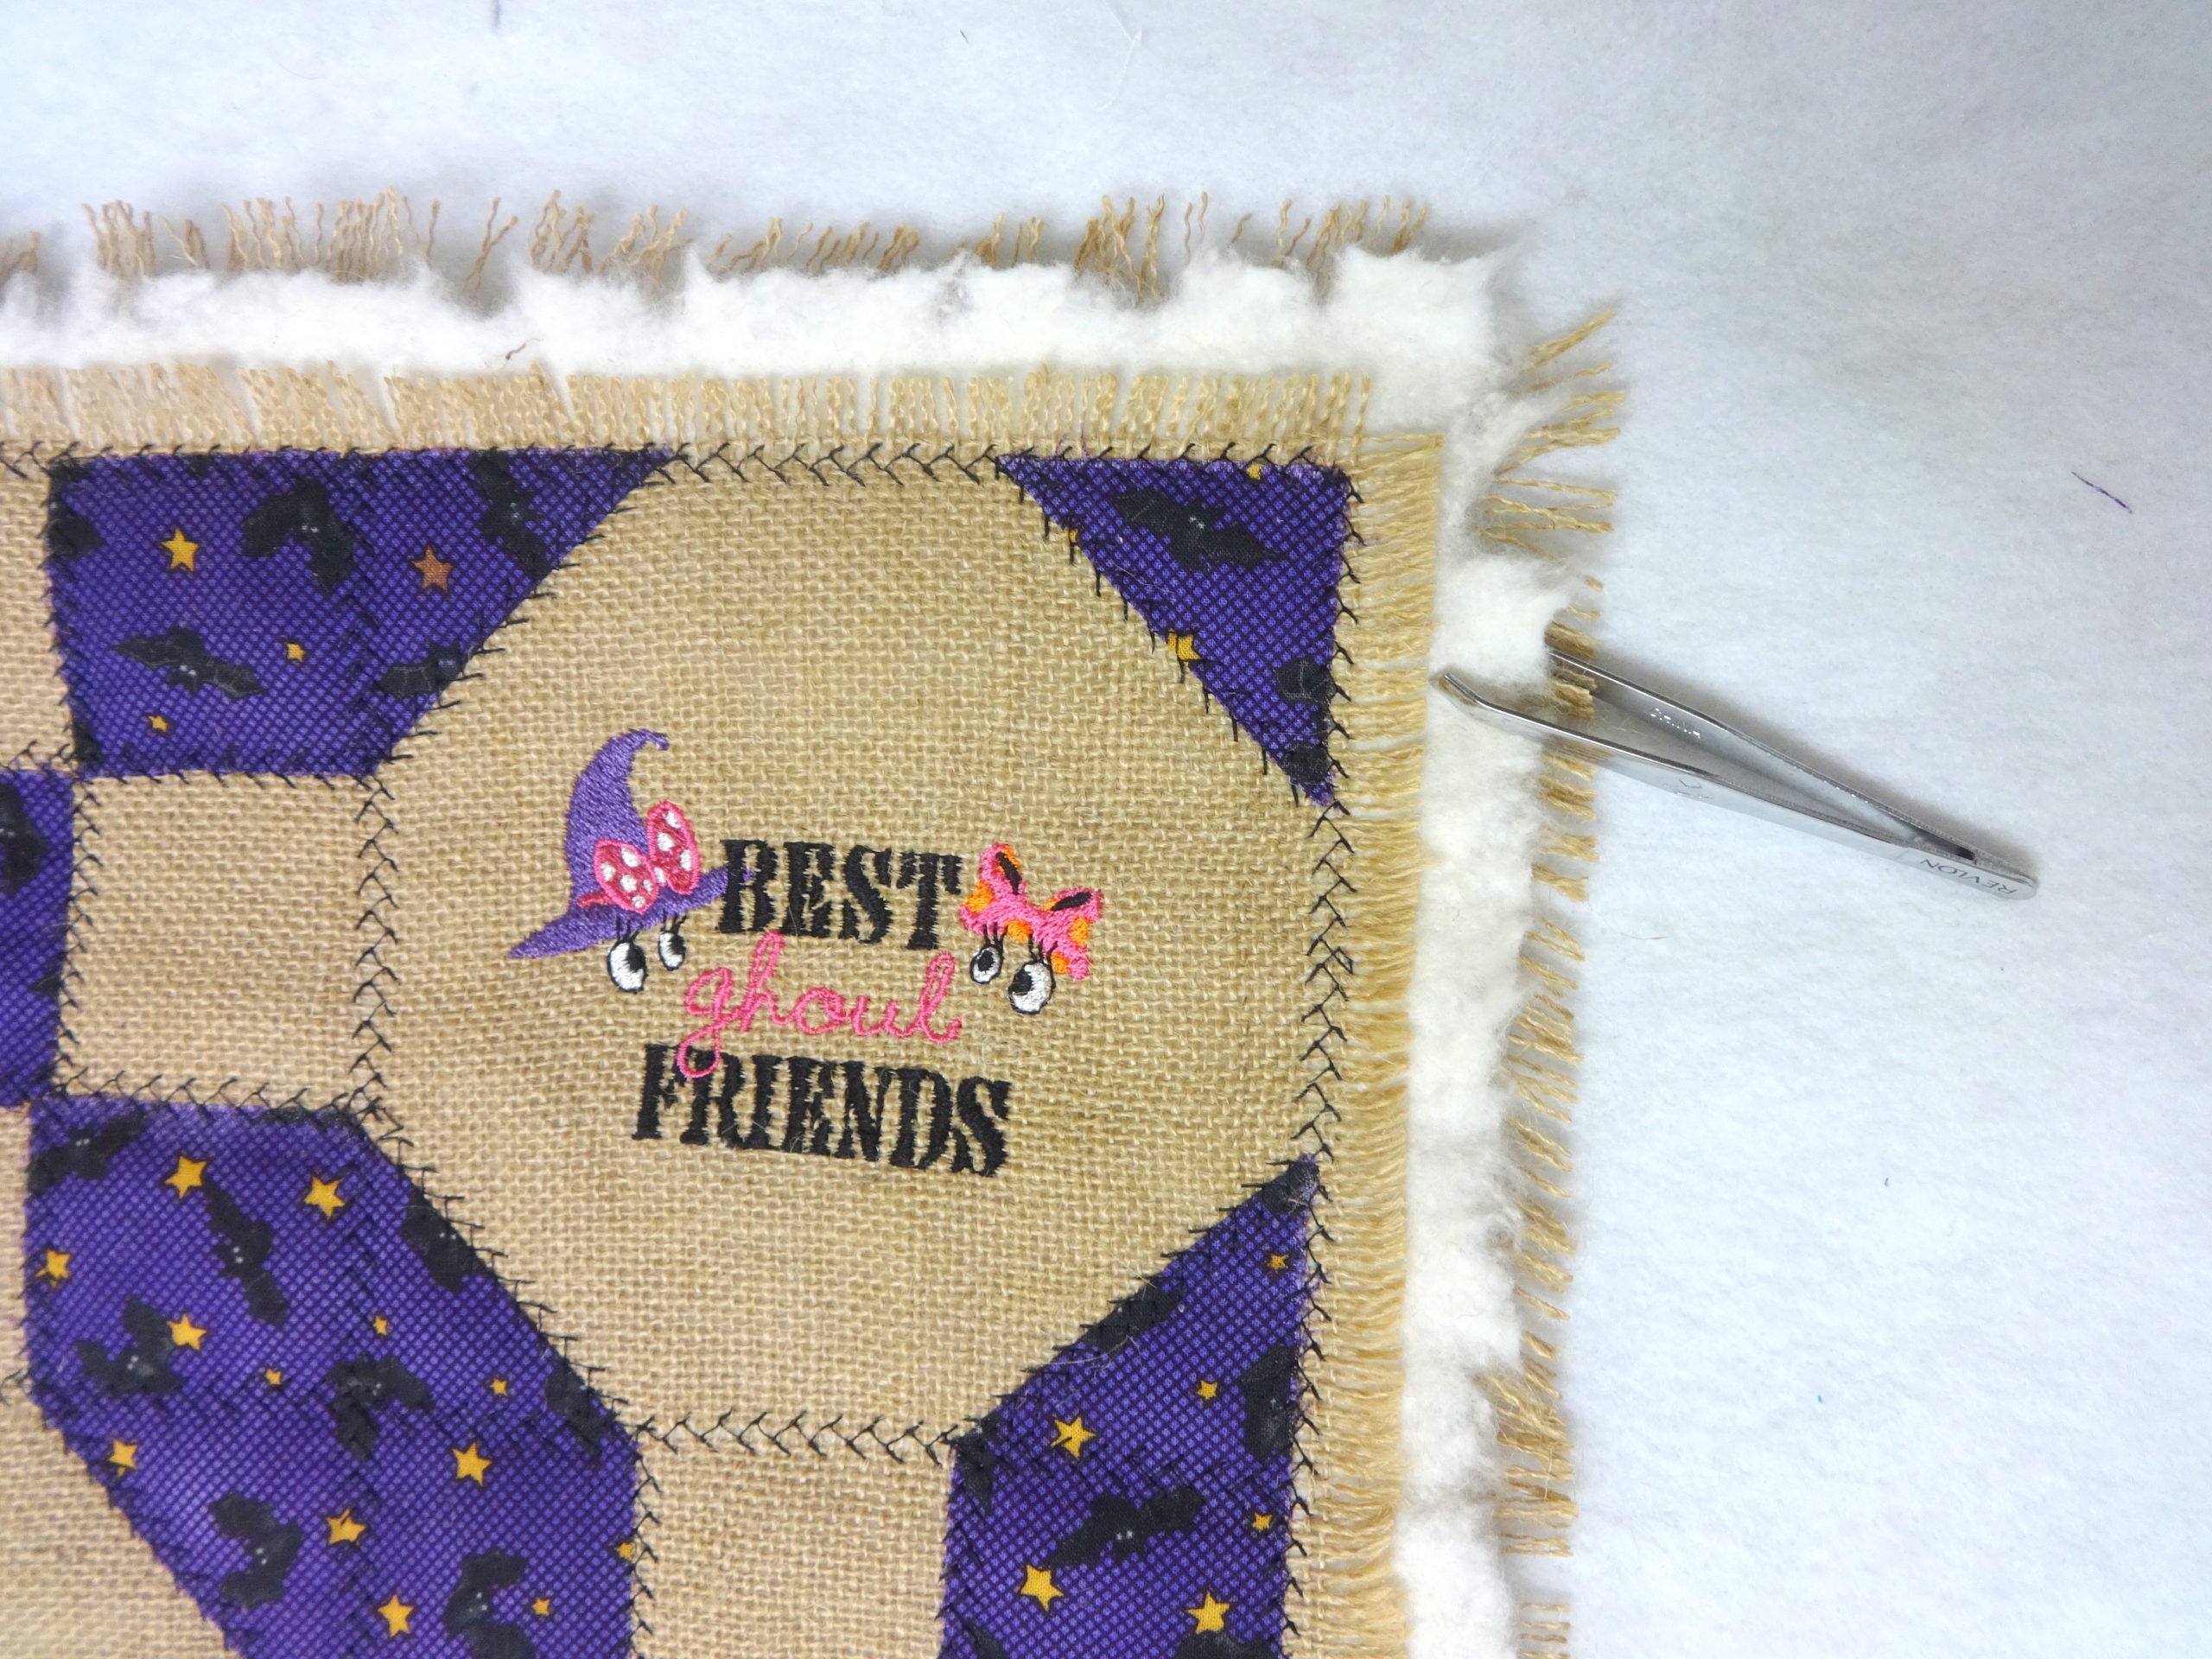
35. Remove burlap threads to create fringe.
36. Insert a 22 x 1” flat wooden piece into the sleeve.
37. Braid three threads (pull from full width of burlap) to create a 26” cord. As the threads become frayed simply add another in its place and continue braiding. After approximately ½”, simply cut away the frayed piece and continue with the new thread.
38.Tie braided cord to each end of the wood rod.
39. Make 6 orange yo-yo’s. Instructions for easy creation of these faux pumpkins are included in the Finding Dory blog post.
40. Tuck a piece of green ribbon in the center of each yo-yo and hand stitch in place.
41. Retrieve six 18” threads removed from the burlap. Tie to the wood rod.
42. Attach a yo-yo to each thread in staggering lengths.
43. Hang this little quilt, call the children and turn out the lights. Happy Halloween!

Required disclosure: I am a paid Brother Ambassador. Not required: I LOVE my Brother sewing machines!
