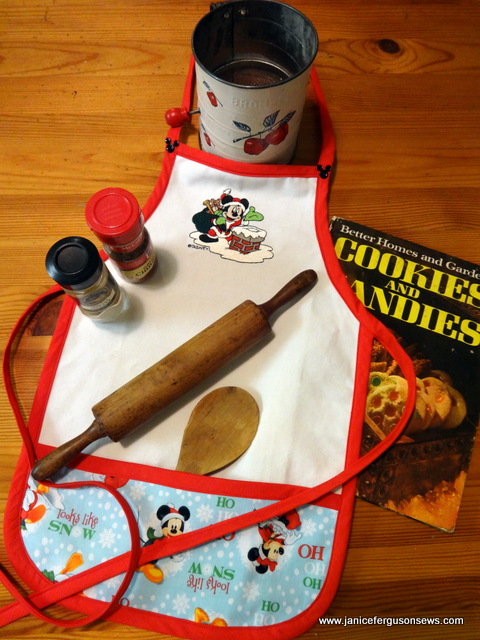
It’s time to bake everyone’s favorite Christmas cookies. Children love to “help” though even with youthful assistance, really delicious holiday treats CAN be made.
We all know that if you start too early, the goodies are all eaten up before Dec. 25. (Be sure to read the cookie storage tip at the end of this post.) “Helpers” often love to be “tasters,” and require great quantities of cookies to be certain they are fit to serve.
A special child’s apron, whether plain or gussied up with embroidery, will make the experience even more fun. Plain, personalized or embellished with embroidery–whatever–a child will love it.
Here’s how this one was made.
Materials:
- white canvas child’s apron–make or buy one at Amazon, All About Blanks or JoAnn’s
- ½ yd. holiday Mickey fabric
- ¼ yd white broadcloth
- buttons: round 2- or 4-hole black 3/8†wide, 4 black ¼†wide
- 3 3/4 yds. red double-fold bias tape wide enough to cover existing apron binding
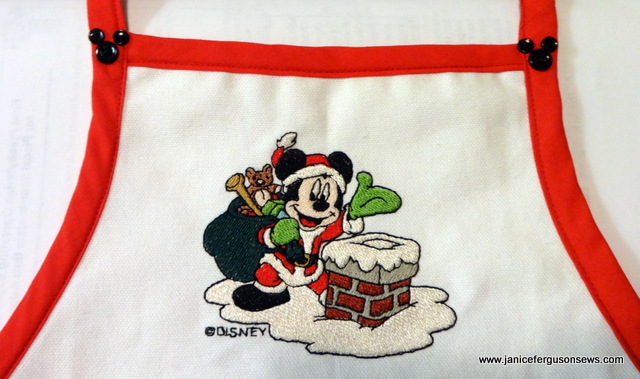
- Mickey on Roof embroidery design (25% off until Dec. 31!)
- notions: embroidery threads, stabilizer and red thread for bias tape application. NOTE: Measure bias binding on apron to determine exact yardage needed.
Directions:
Pocket
1. Tear top edge of Mickey fabric to straighten.
2. A piece 12†down selvage and 20†across is needed for the pocket. This piece will be folded, with the folded edge at the top of the pocket. Try to “fussy cut†a piece so that Mickey or featured design will be centered below the fold.
3. Slip a piece of white fabric into the fold, lining the pocket. There will be three layers of fabric. Most holiday fabric prints will shadow through. The white fabric prevents that and gives the pocket a little more strength.
4. Bind the fold with red bias tape.
5. Place this piece of bias bound holiday fabric with raw edges hanging down just barely below the existing white bias binding. Center Mickey or featured design. Baste this piece to the outer edge of the white binding. Trim excess close to basting stitches.
Top Binding
1. Release the stitching that holds the white binding to the top edge. Removing stitches 1†above and below makes bias attachment easier.
2. Apply double fold red bias tape over existing white bias tape. Extend ends of red bias ½†beyond the white bias.
Bottom Binding
1. Release white bias stitching 1†above the ties.
2. Starting at right side, begin stitching red binding ½†above existing white binding. Stitch from right tie to left tie.
Ties and Side Binding
1. Beginning at tail end of one tie, apply red bias tape over existing white tape. Trim red bias to fit snugly into bias binding.
Embroidery
1. Hoop two layers of cutaway stabilizer.
2. Select square straight stitch frame and enlarge to fill hoop.
3. Stitch apron to stabilizer with square straight stitch frame.
4. Embroider Mickey on Roof design.
5. Remove embroidery from hoop and stabilizer from back of embroidery.
Mickey Silhouette Buttons
1. At side of top binding stitch one 3/8†button for Mickey head.
2. Just above and slightly to each side, stitch in place ¼†buttons for Mickey ears. NOTE: I found it helpful to glue-stick the buttons in place before sewing them to the apron.
Put the apron on a well-loved child and bake cookies.
Cookie Storage
When my children were young, I read this tip in the newspaper. It must have been from Erma Bombeck (anyone remember her?). She said, “Christmas cookies are best stored in the freezer, in a metal tin labeled RAT POISON.”
I can’t say if it works. Our cookies were always eaten before I could find a metal tin.
Bake on!


4 responses to “Christmas Apron How-to”