Judy Day continues to dazzle all who see her flawless, elegant sewing projects. Recently, she made a wedding veil for a bride for whom Judy’s granddaughter was the flower girl. Her creative approach to design and problem solving are inspiring.
In Judy’s words:
Last January I was honored to be asked to make the veil and flower girl dress for an early September wedding. The bridal gown was pale champagne chiffon and the flower girl dress was to be the same color, accented with candy apple red, the color of the bridesmaids’ dresses.
But I needed samples. Amanda, the bride, did not have any and the bridal store did not have a matching sample of the wedding dress. Never underestimate a bride!
About a week later, I received a letter with tiny little samples. She had been back to the bridal store to try on her wedding gown and while there, cut a piece of the lace from an inside seam so I could have a sample for color!
All of the scalloped and beaded lace I found for the veil was priced beyond the budget. In February, I was to accompany my husband on a business trip to Florida. What an opportunity! Janice’s sewing room and “stash” was only about an hour away. We spent a couple of days looking through boxes and boxes of lace.
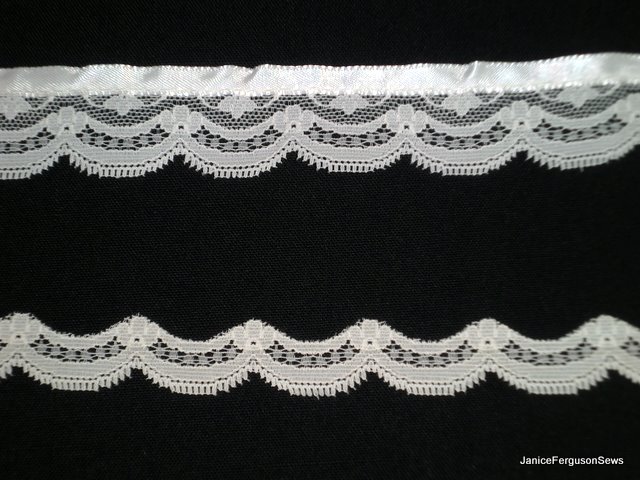
There, I found a “diamond in the rough,” an inexpensive domestic lace attached to ribbon.
In March, I met Amanda at a fabric store in Nashville to purchase tulle for the veil and fabric for the flower girl dress. Using the tiny piece of lace, we found the exact match for the tulle, as well as silk dupioni for the flower girl dress. We even found small candy apple red flowers to accent the flower girl’s dress and hair.
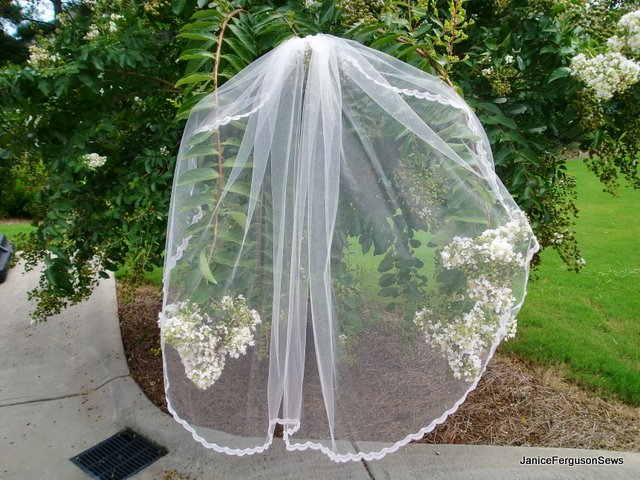
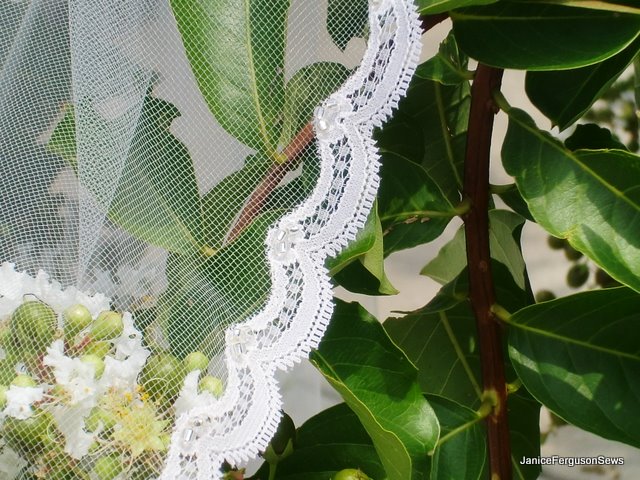
The veil was a modified version of Vogue pattern #8569. With the excess lace and ribbon trimmed away, the remaining scalloped lace was dyed in a weak solution of tea. After sewing on beads to match the beading on the dress, the lace was stitched to the veil.
The bride was thrilled with the small scallop on the lace mirroring the slight scallop on the hem of her bridal gown.
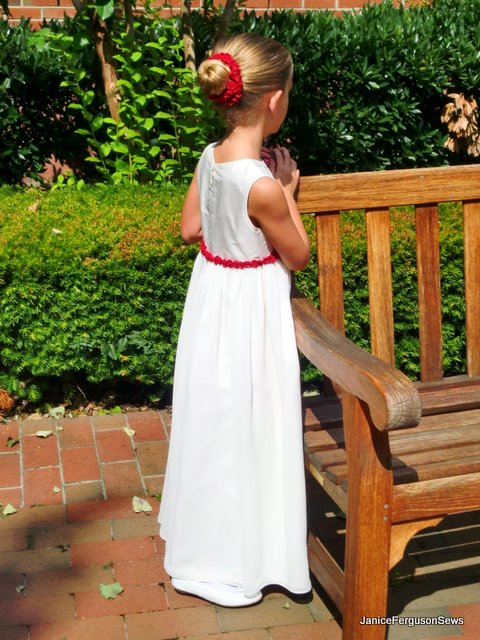
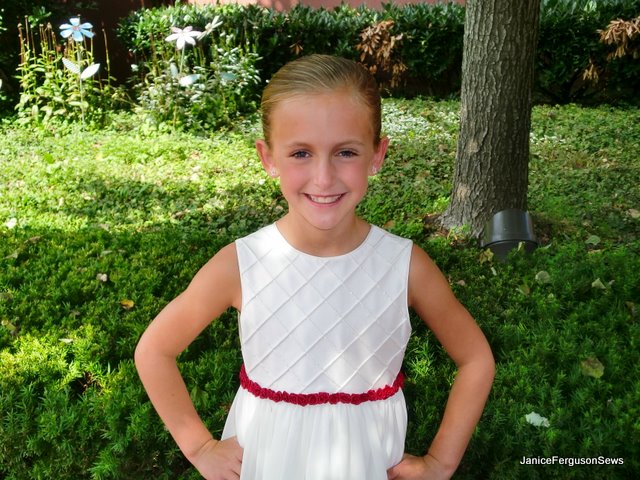
Courtney’s dress was made using Children’s Corner pattern Louise. The bodice was textured with a “window pane” pattern, using a twin needle. The needle tension was tightened just enough to give a slight rise to the fabric.
The bodice was then cut on the bias so the “window panes” were on point. Tiny piping was used around the neck and armholes to give a more finished look.
So I was almost finished…or so I thought.
The skirt had a fold (from being on the bolt) that I could not remove, even after washing. My daughter-in-law, Courtney’s mother, who does not sew, came up with a solution to put a layer of chiffon over the skirt.
It worked great, covering the crease and matching the bride’s chiffon covered dress!  I put a hidden zipper in the back of the dress. The red flowers were stitched around the waistline and fashioned in a circle for Courtney’s hair.
Two valuable lessons were learned in making Courtney’s dress:
- 1. If making something special, NEVER purchase silk supioni that has been folded and rolled on a bolt. It will either be dirty on the fold or faded from the flourescent lighting, neither of which can be “fixed.” Only purchase dupioni that is rolled on a tube with no crease.
- 2. If you are using chiffon, cut it at least an inch longer than needed. Chiffon tends to “bounce back” after it is cut. I don’t know why, but I found a web site that talked about it……after I cut it.
It was a beautiful wedding and the bride was glowing. Courtney was the sweetest little flower girl. But, of course, I may be a little biased!



7 responses to “Wedding Veil and Flower Girl Dress”