Life certainly has gotten in the way of the Liberty sundress I am making for Laurel. (UPDATE: But it is finally finished! Click here.) Fortunately, with all of our Florida sunshine, the dress is likely to be worn 9 months of the year. But my 89 year-old aunt seems to be failing at an alarming rate and has needed more attention than usual. Then I discovered that all but two of my SAGA magazines are missing, either lost in the hurricanes or lost in the garage. Fortunately, I remembered that I had copied the pattern and was able to retrieve it. So finally, progress is being made.
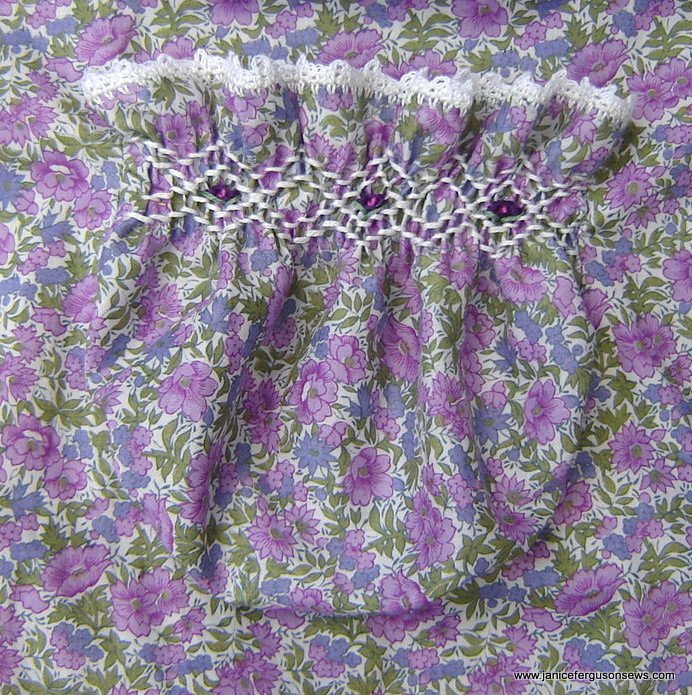
The smocked pockets were just the touch this little dress needed. The Florence Roberson pattern, published in The Smocking Arts, date unknown, is unlike anything else I’ve seen and makes up so sweetly. Though the no-show attachment to the dress is a little tedious, the puffy pocket is worth the effort.
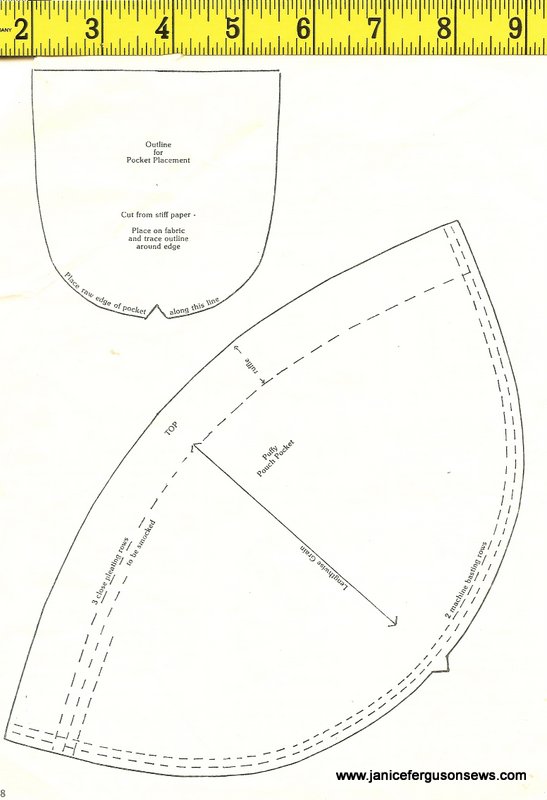
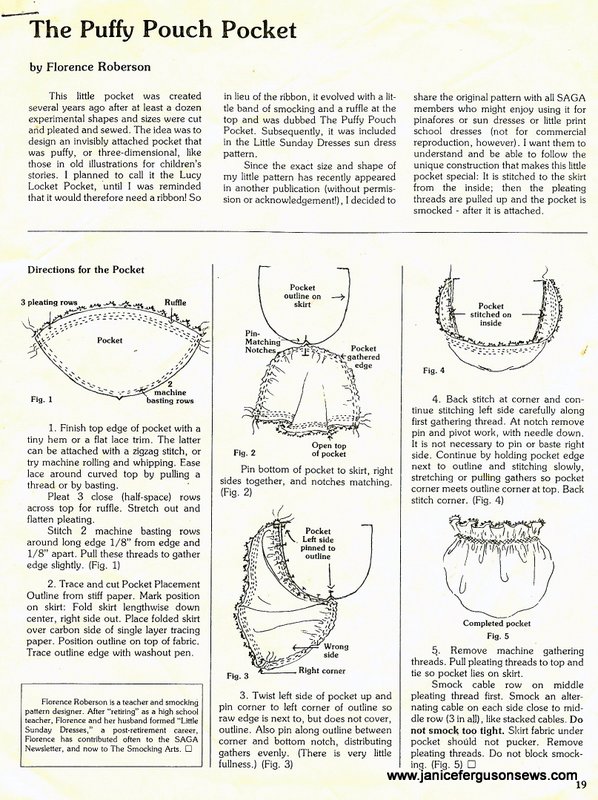
The pattern is included below.
Because of the filet crochet yoke I am using, I decided to crochet a little edge on the top of the pockets. But I have no proficiency at this needleart, so it took me a while and the results are hardly worthy to be included on a garment with the beautiful yoke. Still, as Martha Pullen once said, “If something is worth doing, it’s worth doing poorly until you get good at it.” I like that—and hope to be good at it some day.
The directions are very clear, but I did things a little differently because of the crochet edging.
- photo copy pattern pieces
- cut out and tape to card stock–I use my double sided tape for this and dozens of other things in the sewing room.
- cut out pattern on card stock
- starch and press fabric
- trace pocket pattern onto right side of fabric
- transfer mark for center bottom
- draw top pleating thread line 3/4″ from original top edge of pocket
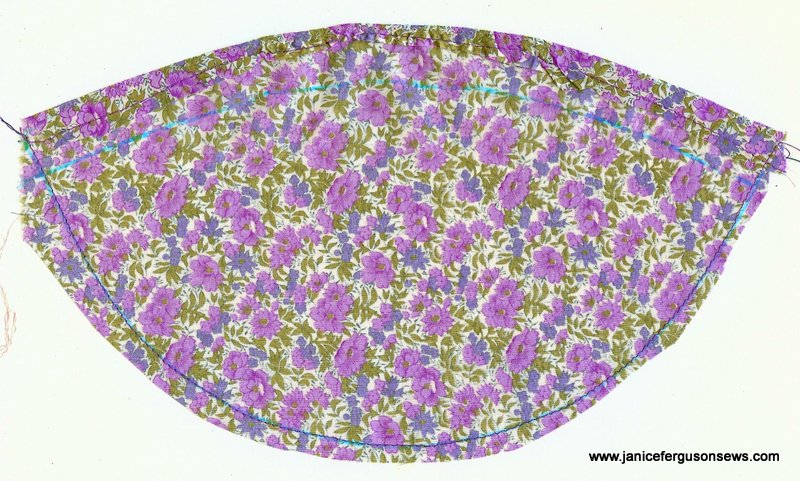
- straight stitch along cutting line
- draw line 1/4″ above cutting line at top of pocket (to be folded down later)
- trim near cutting line/basting stitches and along+ 1/4″ line
- press 1/4″ extra at top to wrong side
- baste 1/4″ in place, leaving original cutting line at top of pocket
- pleat with extra long threads
- flatten pleats and press pocket–spray starch again if fabric is not crisp…I did this before pleating but think it would work best after
- straight stitch very close to fold with unthreaded wing needle –use Stitch & Ditch under
- roll and whip raw edge
- crochet edge
- attach pocket to skirt–I found it easier to hand baste in
- smock
In most instances, I prefer that lace (or crochet or whatever trim) not be cranked through the pleater. It seems like unnecessary stress on a delicate textile, so I add trim after pleating.
Rolling and whipping the raw edges of the pocket was neither suggested nor necessary. There is nothing objectionable about a raw edge inside the pocket, but a finished ege is nicer. The fabric was trimmed 1/8″ from the straight stitched cutting line then rolled and whipped just to that line.This kept the original shape of the pocket, though it doubt it would have made a significant difference if I had gone beyond that cutting line a little.
The first two rows of crochet were done with DMC #12 perle cotton. But when I began the picots, it just seemed too heavy so I moved on to a finer needle (1.40) and DMC #70 tatting thread.
After the crochet is completed, the folded under fabric just below the crochet was trimmed away then the basting stitches were removed. After the first pocket, I learned that it is easier to trim away while the basting threads are in place and removed after trimming.
I love this little pocket and am grateful to Florence Roberson for designing and sharing it with us. If you have trouble extracting it from this post, just post a request in the comments and I will e-mail it to you.
Have you ever used a crochet or tatted yoke on a new garment? This is my second (see Miss Alice’s Tatted Yoke) but the shape and addition of smocking makes it different from my experience. I’d love to hear from you if you have any tips.
Now I’m off to finish up the dress.


23 responses to “Smocked Pocket Pattern”