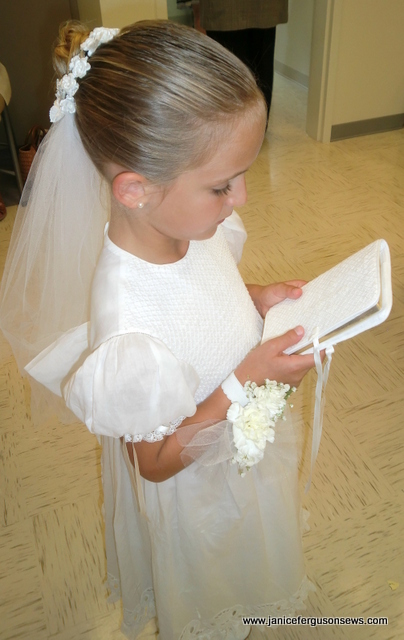
This is a continuation of the previous post about the exquisite First Communion dress Judy Day made for her granddaughter Courtney. Details of the dress, slip and veil were included there while this post focuses on the extensive accessories–Bible cover, garment bag, hanger and purse–that make the ensemble all the more special. In Judy’s words:
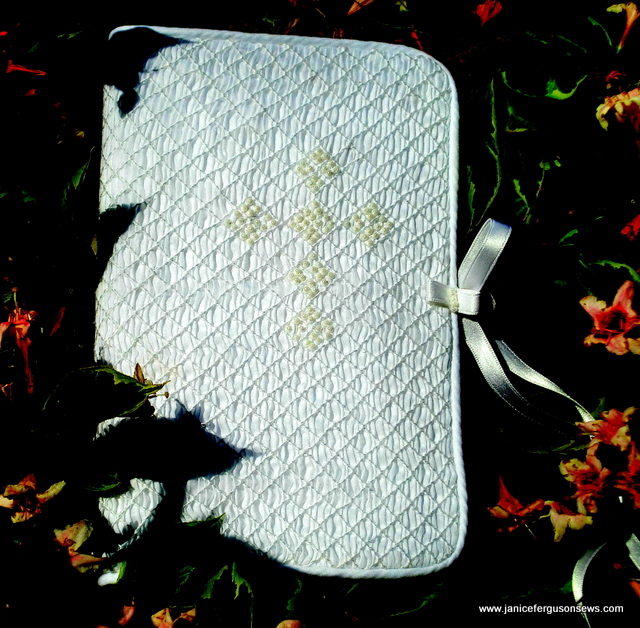
My parents, Courtney’s paternal  great grandparents, gave her the First Communion Bible. It was smocked and beaded by my mother, Wanda Stewart, in the same diamond pattern as the dress. The beaded cross on the Bible was formed by sewing the pearl glass beads  in place  after the smocking was completed. The instructions for the Bible cover can be found in the April, 2007 issue of Creative Needle  magazine.Â
My mother smocked my dresses when I was a child and continued to do so for my two daughters. Now, she applies her years of needlework experience to garments and other items for her great-grandchildren, this Bible cover being the most recent.   That makes three generations my mother has lovingly sewn and smocked for.    We have a wonderful time planning and sewing together.
Some projects just seem to grow as you sew and this communion ensemble grew like Topsy! At some point, Courtney decided that she needed a purse. So after a frantic call to Janice, we decided on a hanky purse.
I did not have a hanky the correct size, so I cut a 16″ square of Swiss batiste. Matching English lace was softly gathered and  stitched to the edges. On one corner, her monogram and the date was embroidered while on the opposite corner was a small version of the Trinity Crosses.
To finish the purse, I laid the embroidered, lace edged square flat on the table with the embroidery facing down. Then four corners were folded and pressed  toward the center, exposing the right side of the embroidery. I straight stitched 1/2″ from the fold, creating a casing.  Two silk ribbons, one from each side, were threaded through the casing. When both ribbons were pulled at the same time, the purse closes. Courtney loved it!
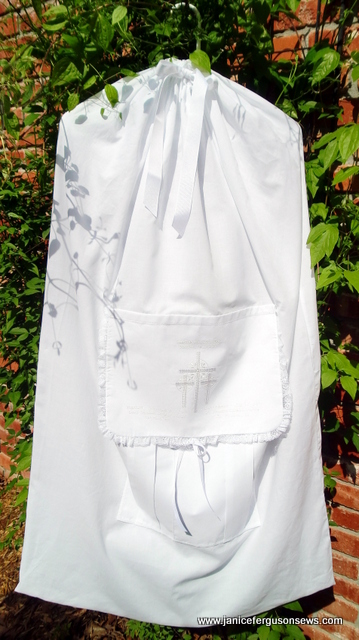
Next, I decided that a cotton garment bag would be needed to store the dress after the big day. It was made long enough to also hold her Christening gown from 7 years ago.   I cut a rectangle the width of the fabric by the desired length, folded in half and then stitched the side seam. At the top, 1 1/2″ was turned down and pressed to form a heading. The heading was then opened back up and stitched with 2 buttonholes at the center front for the ribbons to enter and exit.
The heading was folded back down, stitched along the top edge and the lower edge, forming the casing. I created a pocked for the front of the bag to hold small keepsake pieces. The pocket is divided so that the left side will hold keepsakes from her Christening and the right side will hold items from her 1st Communion.
The flap on the pocket has the Trinity Crosses as well as her name and the dates of each event. I used grosgrain ribbon in the heading, pulling it tight and tying a bow. The bottom of the bag has a zipper, allowing it to be easily slipped on and off.
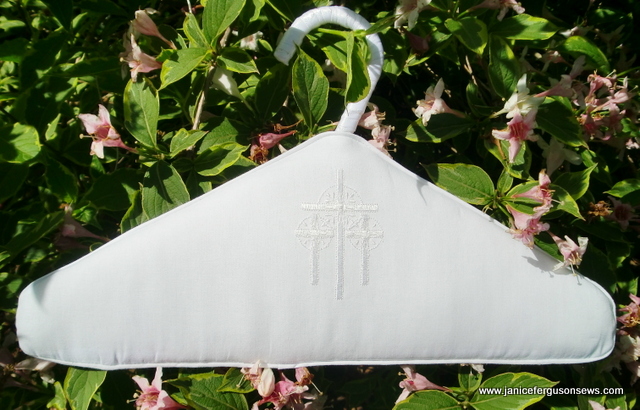
And that led to the hanger for the dress and slip. I used a plastic child’s hanger, wrapped the hanger body with polyester quilt batting then traced a pattern of the hanger shape. After cutting the batiste, I embroidered her monogram and date on one side and a small version of the Trinity Crosses on the other. Tiny piping is stitched into the sream of the hanger cover.. After stitcing the side seams, (leaving the bottom open) and inserting the hnger, I hand stitched it closed aqlong the bottom.
This project gave me a lot of pleasure, not only from designing and sewing, but from seeing Courtney wear the dress. It was priceless to witness the tearful delight on the faces of both my DIL and her mother when they saw “Nanny’s” antique beading on the dress.  Four generations are bound together by love and a beautiful piece of beading. How could it get any better!


4 responses to “1st Communion Accessories”