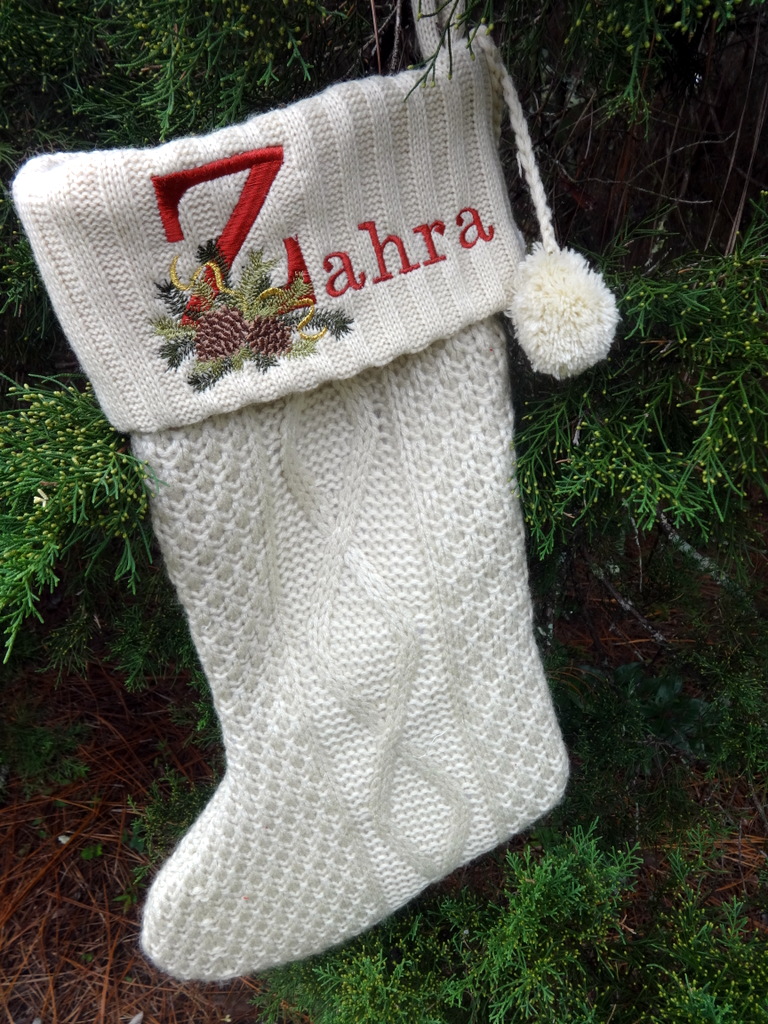
While working on this stocking or a friend, I had two AHA! moments. Now that’s a good sewing day!
Many of you, I am sure, have long since experienced these aha moments. But for some readers…
I was ticked pink to discover two new problem solutions.
My first problem was the design. I love the Winter Pines alphabet which is currently being offered for free, one letter at a time every few days, from Sonia Showalter Designs. Every single design on her site is spectacular, with artistic flair and flawless stitching. It is one of my favorite embroidery sites.
Winter Pines seemed perfect for this bulky knit stocking. But the alphabet was only up to the letter “O” when it was time to get started. I needed “Z” for Zahra. No time to wait for the entire alphabet so…..
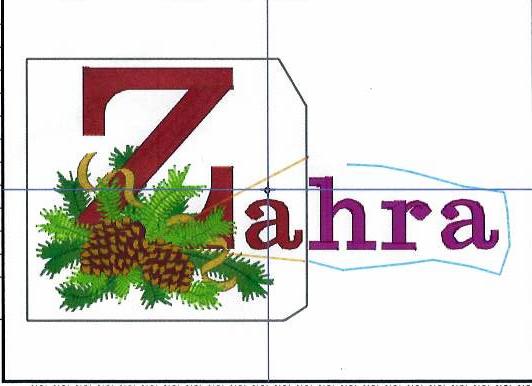
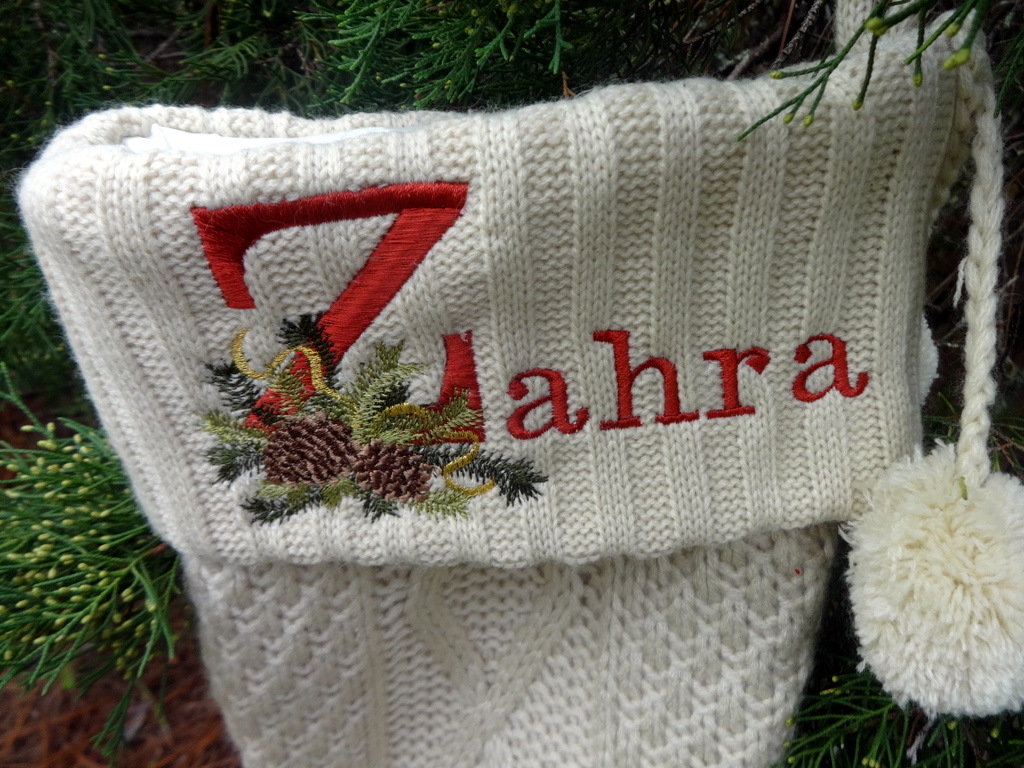
AHA #1. I took one of the previously downloaded letters, deleted the letter itself and then inserted a similarly styled “Z” from my Brother PE-Design. Because that program has so many fonts and allows unlimited sizes, I found the perfect “Z” to fit the cuff. A bit of adjustment was required to make certain the letter stitched first and to remove the heavy satin stitching under the pine designs. But it worked. I was so pleased to get just the design I wanted.
Now, can you see the sort of challenges this stocking presented with regard to hooping the cuff? Initially, only two options came to mind.
A. I could open a side seam to lay the cuff flat and stitch it to tearaway stabilizer. But a whole new world of difficulties would arise by opening a satin lined, knit seam and then sewing it back together again. Uh, nix that option.
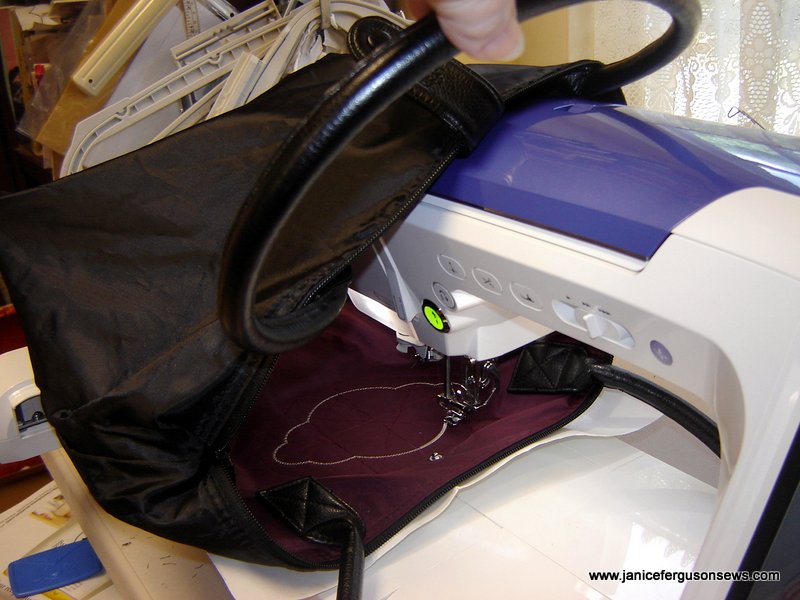
B. Sewing “in a cave,” as I did with this tote bag, was another option.
This tote bag, though, was wide enough for the head of the machine to be inserted into the bag. Â The stocking cuff, however, is only 7″ wide and would certainly not fit around the head of any embroidery machine.
Manually holding the back of the cuff while embroidering seemed to be the only remaining option. This posed many possibilities for disaster.
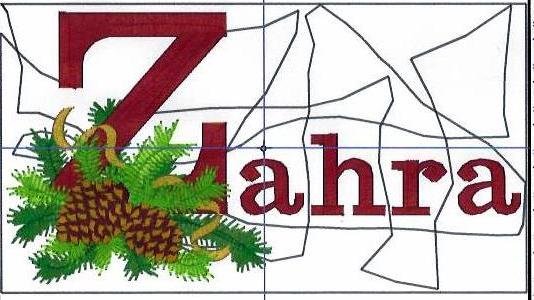
Nonetheless, I tried. The black basting stitches on this template show my effort at stabilization.
Even with my best efforts, the cuff could only stretch so far and ripped away from the stabilizer before basting was finished.
AHA! #2. The design could be embroidered in two parts!
The design was redone so that it first basted in black around the Winter Pines and “Za.”  After scrolling through the color changes for that portion of the design, I inserted more basting threads, shown in blue around the remainder of the name. Those letters, “hra” were assigned a different color, though ultimately the entire name was stitched in the same rusty red requested by Zahra. Now the design was ready for the stocking cuff.
So I got started. The first half of the design was basted to the stabilizer and then embroidered. After that was finished, the first inch of basting threads were snipped and the first half of the pines design and Z were freed up from the stabilizer. Enough stitches were left to hold the cuff securely to the stabilizer.
Then with that portion of the cuff free, there was more room to stitch. The remainder of the design was easily embroidered. Whew!
That was a lot of fiddlling, but I realized that embroidered circular items like this can be done more easily than I thought. Then again, I keep dreaming about Brother’s new Persona, a single needle free arm machine which would make hooping this cuff a piece of cake. This and tote bags and onesies and tee shirts and jeans legs and pockets……Maybe I’ll write a letter to Santa.
Some days are more significant than others when it comes to learning, but my 2 aha’s! on one Christmas stocking were big scores for me.


22 responses to “2 Aha! Moments and 1 Stocking”