NOTE: I’ve since shortened the dress by 5″ and it fits so much better.
In my humble opinion, bishops are a near perfect garment for little girls. They are comfortable, long wearing and easy to construct. Would anyone rather construct than smock? Not me.
Ready-to-smock garments from Martha Pullen Company were my go-to “bring-along” project for trips. When they were readily available, I laid in a supply. But I have run out. The white bishop shown above is the last one that will fit any of my grandchildren. The few remaining Smockables are for sale here.
Starting with a ready-to-smock bishop is the quickest way to get one finished. I soon grew tired of the basic style offered and have had fun modifying it.
A few weeks ago, I was packing for our trip to North Carolina. We were headed to the mountains with our two younger grandchildren and their parents. I knew I had to have some handwork for those few (VERY few) quiet moments after 2 yo tornado Vivian Rose was asleep next to her easy-going brother, Alastair. I grabbed this last white bishop and couldn’t help but think “ho-hum.”
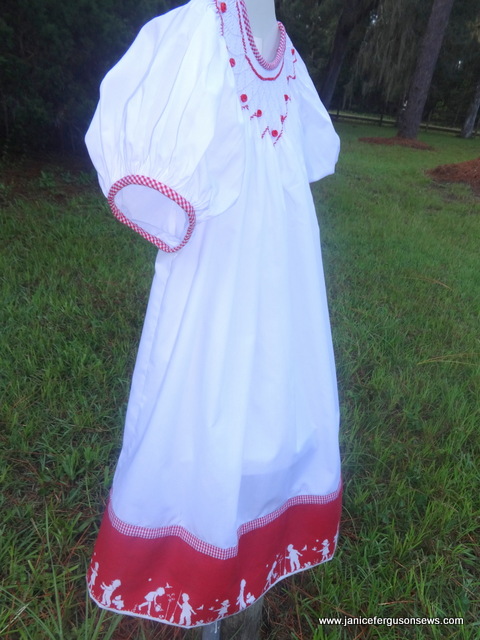
Don’t get me wrong, I love a geometrically smocked white bishop. But I was in the mood for something a little different. Then, due to the less-than-tidy condition of my sewing room, I spotted this scrap red border given to me by my friend, Suzanne Sawko. Hmmmm…
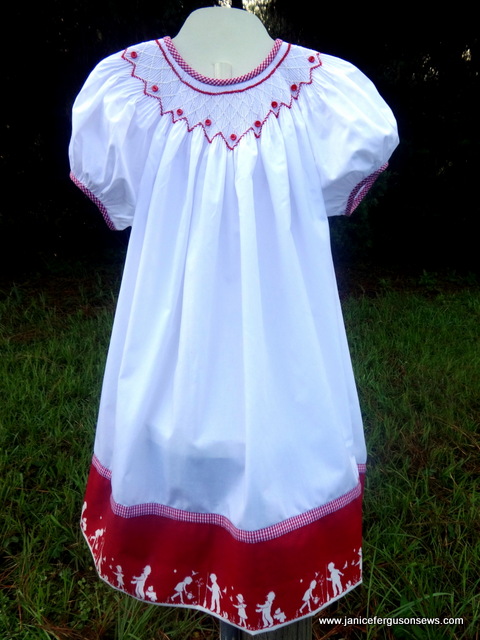
I’ve always like this playful little piece. I thought if I added it to the hem and smocked with white a little red, the bishop might be more interesting. So just hours before our late night departure, I was adding the bias and the border, pulling out floss, needles and buttons for accent. In my haste, I forgot to pack my heavy sweater and nearly froze in that blissfully cool mountain air.
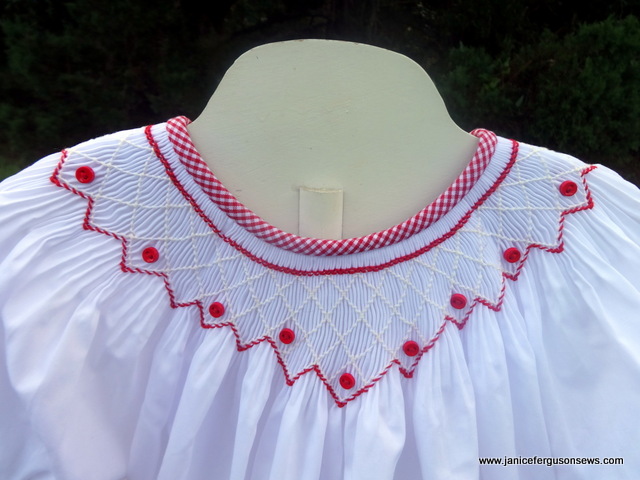
This is the re-bound neckline and smocking. After I thought it was finished, it needed more red. So the tiny buttons were stitched in every other bottom diamond.
The most challenging and time consuming step in the construction of a bishop is binding the neckline. Of course, with a ready-to-smock, the binding is finished. To add color, I simply cut red gingham bias and covered the existing neckline. Easy peasy.
The pleated sleeves were cut just below the top gathering thread and bound with the same red gingham.
The gingham band above the border did double duty–as added interest and as a cover up for the border.
TECHNIQUE:Â AÂ 3″ gingham strip was folded in half and stacked at the top of the border and the raw edge of the wrong side of the skir’s hemline. Black thread was used to show the stitching more clearly.
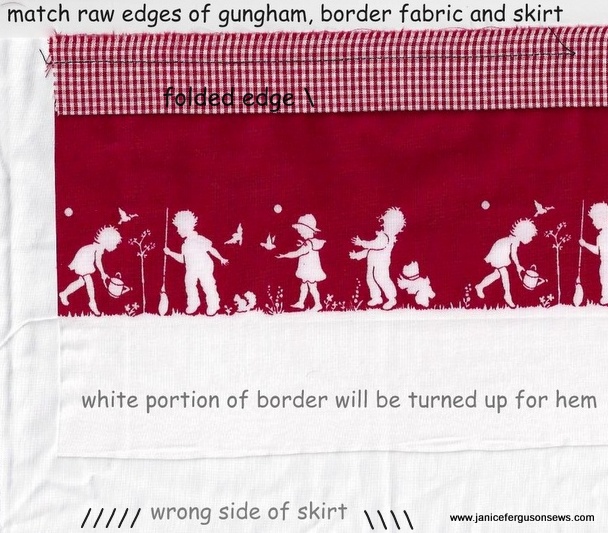
Please excuse the misspelling of “gingham.” I’m pretty compulsive about correct spelling. I’ve just learned how to add text to an image but I can’t figure out how to correct it. Oh well.
Press the skirt up, away from the 3/8″ seam.
Press the gingham up over the raw edges. Press from the back as well.
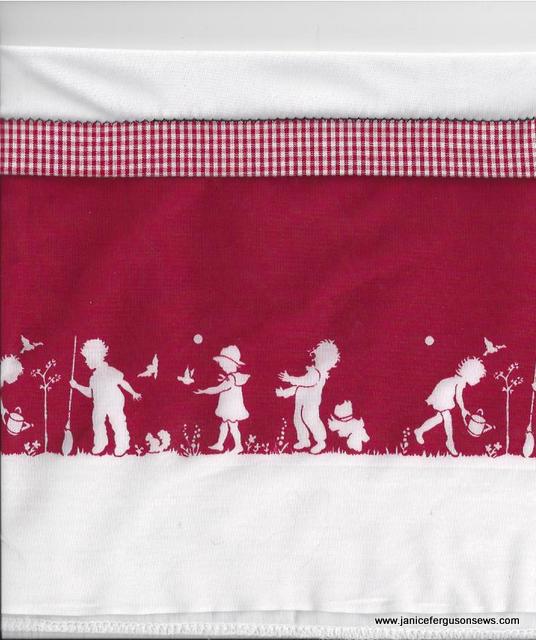
After pressing gingham over the raw edges, secure it to the skirt with a tiny zig zag (w 1.5, l 2.0. Using monofilament makes the stitches disappear.
This leaves a neat skirt back, with no raw edges exposed.
Now it is ready for a hand hem. In no time, the dress is finished.
I know there are other ready-to-smock sources out there. I’d better check them out. Any recommendations?





4 responses to “Technique & Summer Fun Bishop”