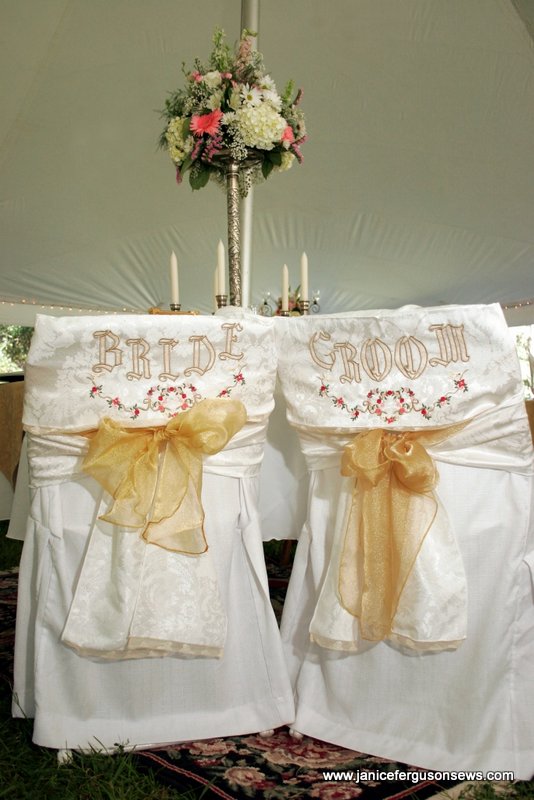
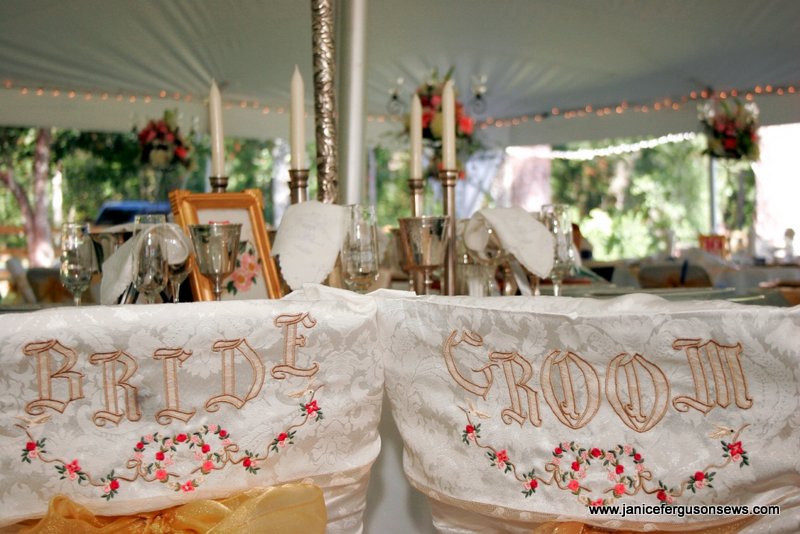
Another wedding repost. Quick and easy to make, these chair covers could be embroidered for birthdays, Christmas or other holidays. Any event that calls for a guest’s special recognition is a good reason to whip up a few.
The BRIDE and GROOM chair backs lived with the trunk show samples I displayed when I taught classes. At every event, they got a lot of positive attention, with students measuring and making notes on the construction. Â
Have you ever made chair covers? Please share pictures.
~~~~~~~~~~~~~~~~~~~~~~~~
Sewing for a wedding is just about as much fun as sewing for babies.  It’s like the prelude to grandchildren.
When our daughter was married at our several years ago, the sewing/embroidery machine ran almost non-stop for the 10 months we had to get ready.
Arrangements had already been made for the standard white chair covers with gold organza bows. But I wanted something special for the bride and groom.
A few weeks before the wedding, I came across these plain white damask cap style chair tie backs at a linen outlet. They were marked down several times and then an additional 30% clearance discount was applied. I don’t recall the original price, but I paid $10 each. So they must have been quite pricey.
After seeing how easy they would be to make, I justified the purchase as the cost of a pattern. And then I got busy with the machine embroidery and lace attachment.
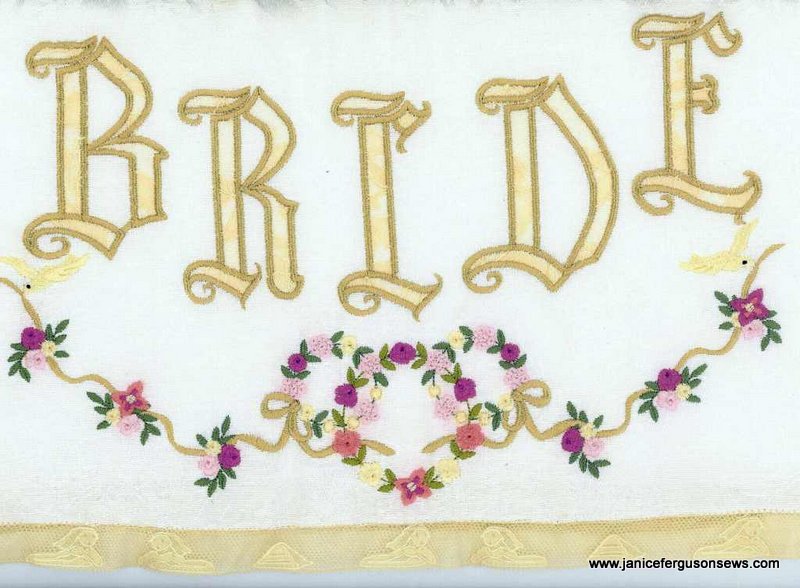
Aside from the pure joy of machine embroidery, one of the things I like best is the ability to personalize almost anything. The floral embroidery design was stitched in colors to match the flowers and wedding colors, bright rose, pink and gold.
The parchment colored lace edging at the bottom of the chair back and on the ends of the ties features King Tut and pyramids. It is an antique piece from the late 1920’s, when so called “Tutmania” hit the country. The tomb had just been discovered and there was a surge of interest in all things Tut and Egyptian. This lace reflects that interest.
So what does that have to do with the bride and groom? Before they were married, Rebecca and Harvey took a trip to Africa where they visited the pyramids, went on safari and then climbed Mt. Kilimanjaro. At the peak of Mt. Kilamanjaro, on Christmas Day, Harvey knelt before Rebecca, pulled an engagement ring from deep in his parka and proposed.
How romantic is that! Rebecca said yes she would marry him, but did she have to take off her gloves? She was never one to suffer the cold gracefully, but he married her anyway.  At the wedding, no one but Rebecca and Harvey noticed the lace on the chair backs, but who else mattered?
Back to the sewing…..
How to:
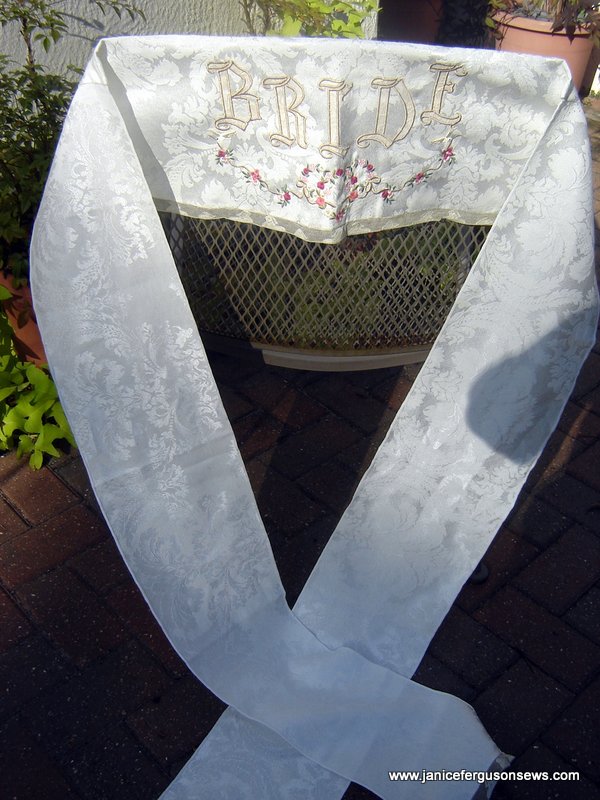
- 1. Chair cover pocket—Cut one piece 16″ x 22″. Serge a rolled edge or join lace to each 22″ side. Fold in half to get the 8″ x 22″ finished size. Press in a crease at the fold.  See crease in photo below. This crease is the top edge of the chair cover.
- 2. Embroider between the lace and the fold, centered on one of the 8 x 22″ sides.
- 3. Ties:   Cut two ties 8″ x 45.”  Serge a rolled hem along each 45″ side. Serge or join lace to one 8″ side of each tie.
- 4. Assembly: Pin raw edge of each tie along raw edge of chair pocket, between lace and fold.    Seam  from lace edge to fold.  Repeat on other side. See seam in photo at left.
For the Bride and Groom text, I used Connie Palmer’s Lacy Applique Alphabet from Martha Pullen.  This is an elegant, formal alphabet.  But even with my Brother Duetta 4500D’s largest hoop, 7″ x 12″, the text had to be curved to fit. Bride was easier than Groom, because the letters are narrower. It took some fidgeting to get Groom to fit.
Much as I am inclined to hoard my heirloom laces, I used one wide piece of dark ivory antique lace to cover the entire BRIDE and another for the GROOM text, rather than using bits and pieces to cover each letter.   With only a month left before the wedding,  I had to go the fastest route.
The text was laid out in my software, in the  largest hoop with the color sequence rearranged to stitch the outline of each letter without a color stop. Then, the wide piece of lace was placed over the text outline, straight stitched in place, trimmed and then satin stitched.
It would be very easy to make chair backs like these, especially by serging all the edges, as was done on the purchased covers.  It takes just 1 1/2 yds of 45″ fabric to make two. This same pattern could be used for holiday or special occasion chair backs like birthdays.


11 responses to “Wedding or Holiday Chair Backs”