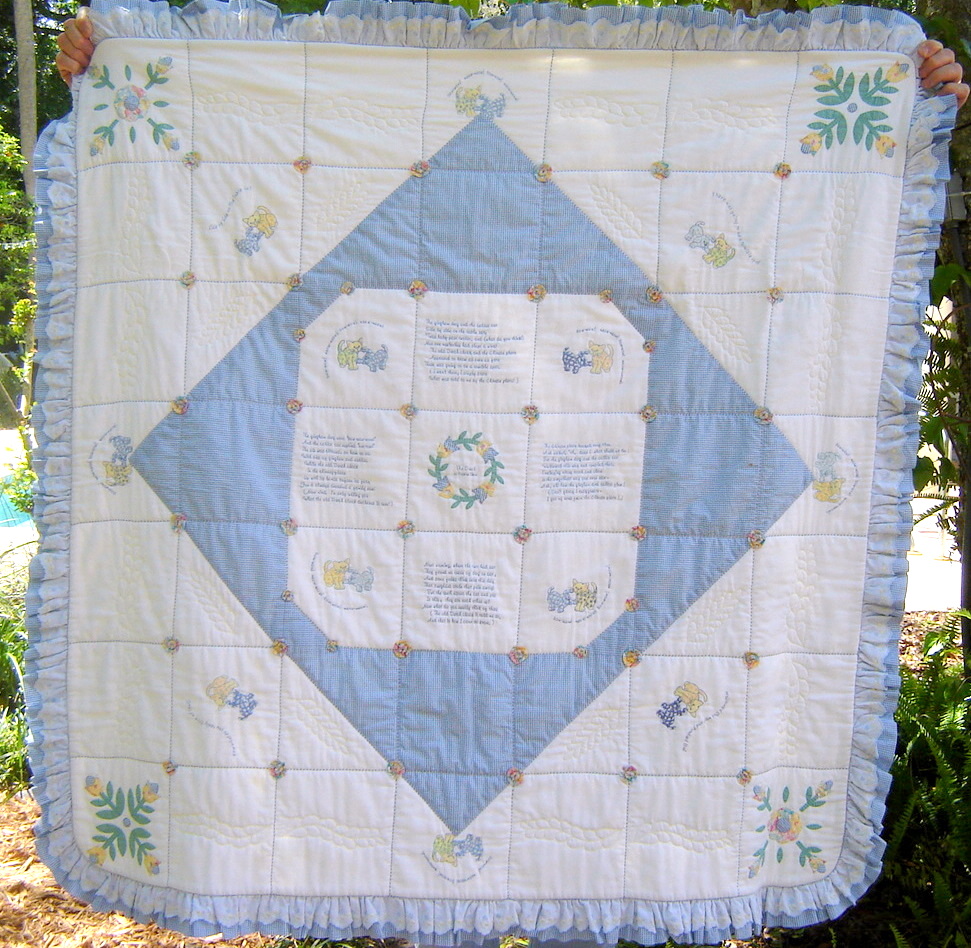
This is one of my all-time favorite projects. My dear friend, Suzanne Sawko, and I collaborated on the design, she digitized the straight line text and I sewed it.
It was a major project and telling you about it will take more than one post. I doubt many of you would have the patience or endurance to plow through all the details at one sitting. However, those of you who seek new techniques might find some tidbit of interest in the non-conventional creation of this quilt. So this is part one.
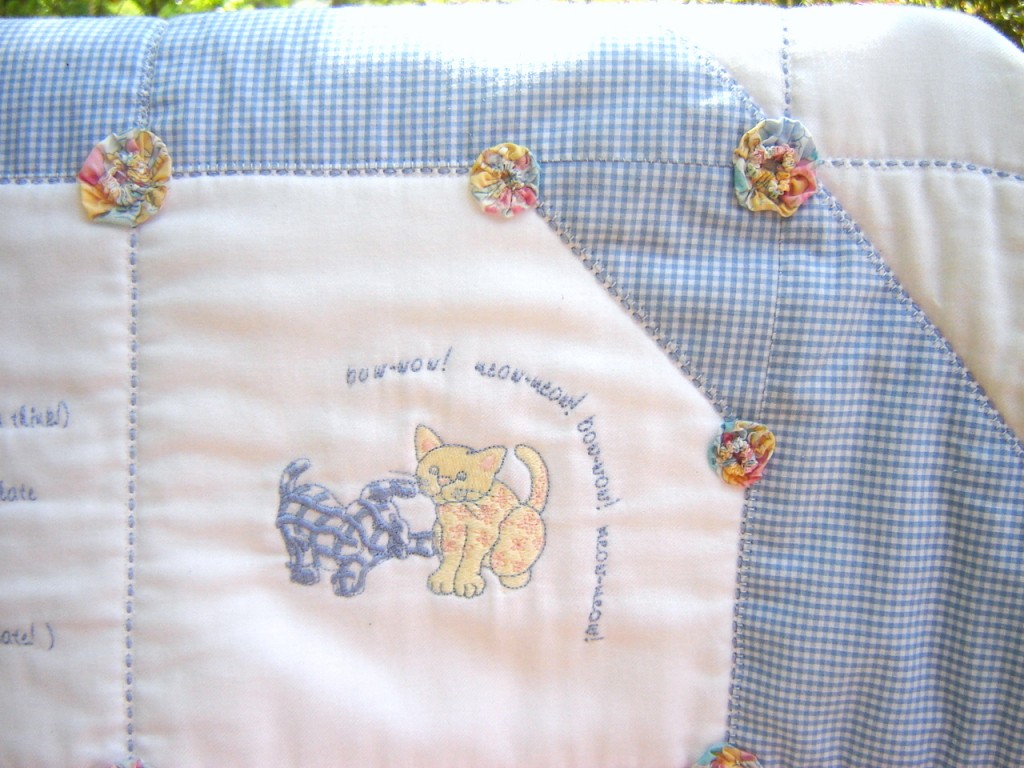
The quilt celebrates the amazing capabilities of today’s computerized home embroidery machines. Uncommon sewing and quilting techniques make the project interesting and relatively easy. With the whimsy of a classic children’s poem, the beauty of fine heirloom fabrics and the charm of embroidered gingham dogs and calico cats, this quilt has delighted each of my grandchildren. It hangs now in our upstairs nursery, next to the crib.
What makes this quilt interesting? Well, the basic construction, for one. I will never forget my original disdain for quilting, especially after hearing a non-quilter comment that to her it made little sense to cut perfectly good fabric up into little pieces and then sew it back together again. At that time, I naively concurred.
But there is none of that cutting up and resewing here. This quilt is very non-traditional in every respect but the design.
QUILT TOP CONSTRUCTION: The foundation is a 50″ square of Swiss flannel, a luscious but shifty fabric which creates its own challenges. Pulled threads created a centered grid of 7″ squares. After the threads were pulled, the entire piece was starched and pressed.
To create the triangles which form the frame around the poem’s text, four triangles were created. This was done by cutting four rectangles 22 1/2″ x 12″ of blue gingham pima cotton, starching and pressing. 1/4″ was pressed under on each of the long sides. A triangle was created by folding the two top corners on the long side to the center. This created a fold on the bias side of the triangle which was then pressed.  The excess, folded under portion of the gingham was cut away.  Then they were set aside.
Four small triangles were made for each corner of the center medallion in which the poem’s text is to be embroidered. The intent was to create a version of the popular snowball quilt square. Four 3 1/2″ gingham squares were folded in half and placed in the corner with the folded edge toward the center of the medallion. The raw edges of the triangles extended 1/4″ beyond the pulled thread which marked the 7″ blocks. These raw edges were covered later by the folded edges of the larger triangles.  The triangles were secured with pins or a glue stick, then basted in place.
The large gingham triangles were placed as shown, taking care to place the point of the right angle at the absolute center of its 7″ block.  The sides of the triangle were made to cross the intersection of pulled threads. NOTE: Enlarge first photo for an upclose look at this placement. These triangles were then basted in place, 1/4″ from the folded edge. The base of each large triangle covered the raw edges of the smaller ones.
Now the all the pieces of the quilt top were in place.  The top looks pieced but is in fact a whole cloth quilt with all the stability that imparts.  It was spray basted to Quilters’ Dream Cotton Request, their lightest weight cotton batting.  As I am a huge fan of hand basting, it was then basted both ways to Christmas with a handsewing needle and quilting thread. That time was well spent, especially in consideration of the fluid nature of the Swiss flannel.
NOTE: This batting was put in place to serve as a stabilizer. The nature of the machine embroidery text files/designs would make removal of tear-away stabilizers risky and extremely tedious. Cut-away stabilizers shadowed through the fine Swiss flannel (ask me how I know!). So after all the embroidery is done, a second layer of batting will be placed under this stabilizer layer.   There is no removal of tearaway stabilizer nor is the back side of the machine embroidery shadowing through to the Swiss flannel back of the quilt. But back to the construction….
HEMSTITCHING: Through gingham, flannel and batting, pinstitch (width 2.5, length 2.5) was worked along the outer edge edge of the gingham square frame which was created by the four large triangles. The holes were stitched into the flannel and the reach stitch into gingham check. This was repeated on the inner edge of the gingham triangles. Finally, the  the two sides of the small triangles were hand whipped to the larger, overlapped larger triangles. At this point, all the gingham pieces were in place.
With a chalk marker, the pulled thread lines were re-marked, those which were now covered with the gingham. This reconnected the original grid.
Machine made entredeux (width 3.5, length 2.5) was stitched through both flannel and gingham along all interior pulled thread and marked lines which had not already been pin stitched. Entredeux was NOT stitched (1) on the hand whipped sides of the small triangles or (2) on the perimeter of the 7 x 7 block grid, i.e. the outer edges of the top, sides and bottom where the ruffle was later attached.
To be continued…………


4 responses to “Gingham Dog Quilt Part I”