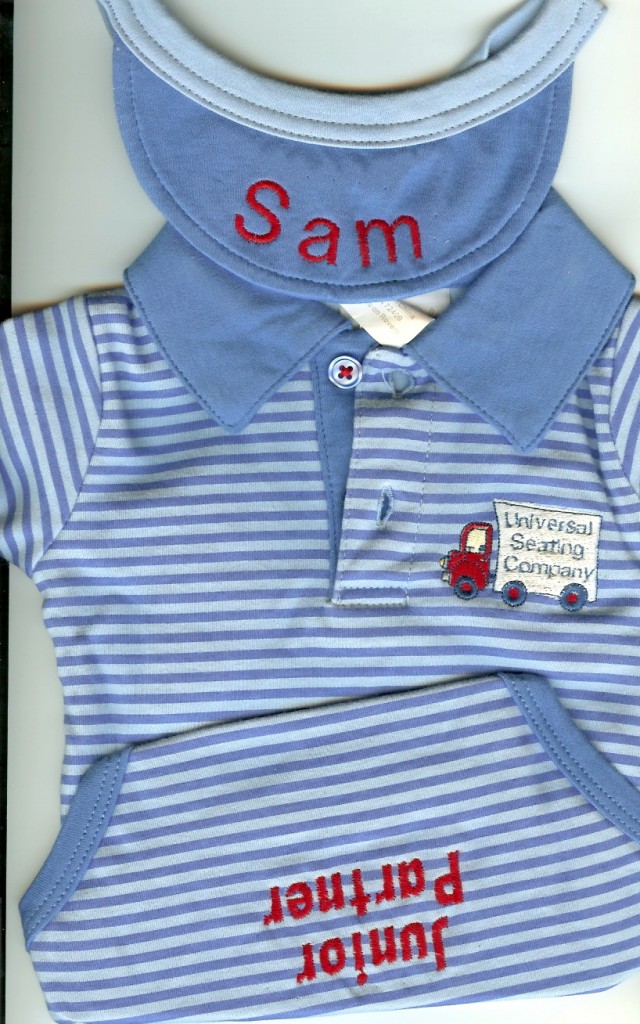
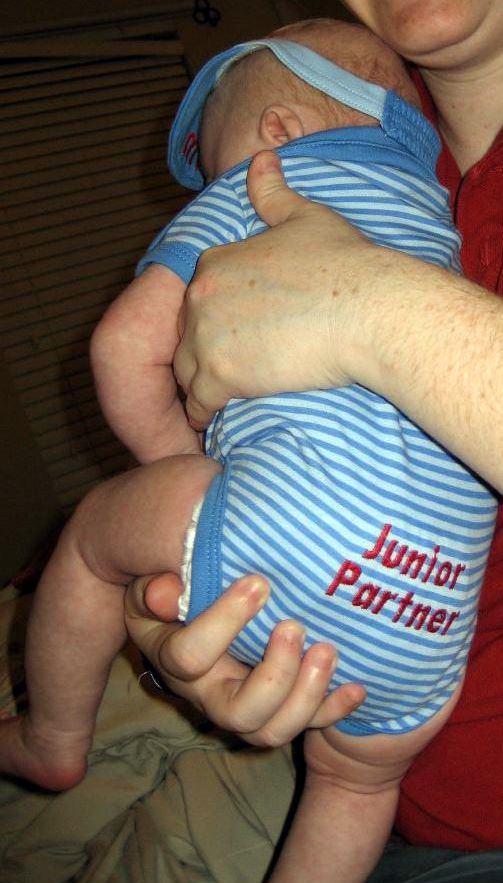
One of the things I love most about machine embroidery is the limitless opportunity to personalize items relatively quickly.  When my daughter’s sorority sister, roommate and then matron-of-honor, Minna,  gave birth to her first child, I wanted to do something very special. Because Sam’s grandparents had been shopping for him since the announcement of Minna’s pregnancy, he had more than a closet full of beautiful clothing. So I decided cutsey personalization would fill the bill.
Minna and her husband are huge Disney fans, so with my beloved Brother 4500D, I embroidered several burp cloths, bibs and outfits with Disney characters. This off the rack onesie and soft visor set was included with the package of Disney items.   Sam’s father works in the family business and joked that he would be taking newborn Sam in as a junior partner.  So I thought a “uniform” would be appropriate.
From my design collection, I selected a big delivery truck, sized proportionally to the onesie. Then, in my PE-Design program, I worked the company name until it fit on the side of the truck.  Of course, I wanted “Sam” to be in large letters on the visor and the “Junior Partner” embroidery to be large enough to read easily.
The last touch was to re-sew the buttons with red thread. This is not the place for mother of pearl buttons. “Utility” quality was just perfect. But the accent of the red thread seemed to pull it all together nicely.
This little outfit is certainly not an heirloom. But it was special to Sam’s family and they enjoyed seeing him in his little work clothes.
I do have some tips for anyone wanting to personalize a similar outfit.
- 1. Iron a fusible tricot interfacing under the area where the design is to be placed. Make sure that the square, probably 4″ x 4″, has the stretch going the opposite direction of the stretch on the knit. Most garments stretch from side to side. So apply the fusible knit stabilizer so that it stretches up and down. Then turn the garment inside out.
- 2. Put a basting frame around the design in your software or using on-screen editing. I like to add an X from corner to corner for extra stability.
- 3. Print out a template, then mark the placement center with a cross hairs that goes from side to side and top to bottom.
- 4. Hoop up a water soluble sticky stabilizer.
- 5. With the onesie inside out, work through the neck or crotch to place it under the embroidery foot. Try to match the lines to the center side marks one each side of the hoop. Then sink the needle in the center mark and, if necessary,  resituate the garment for perfect placement.
- 6. With the needle and presser foot up, advance the design one stitch. With such a small garment and working through the neck opening or crotch, the movement of the hoop may dislodge the garment from the correct placement. If so, try again, holding the garment firmly in place with your fingers.
- 7.  Begin stitching the basting frame, but do so just 2-3 stitches at a time, then stop and reconfirm that the item is still placed correctly. Continue until it is basted in place.
- 8. Do not leave the machine unattended. It is very difficult to keep the body of the garment from flopping into the embroidery field. So place close attention and be ready to stop on a dime.
- 9. It is not easy to find infant ready-to-wear that is not already embroidered.   On Sam’s onesie, it was a small, insignificant design. So I simply stitched right over it. But covering two-tone blue striped fabric with white embroidery is risky enough without the complication of pre-existing embroidery.  So I used white Dry Cover Up under the back of the truck.


